Baby Corn Cooking and Serving Tips
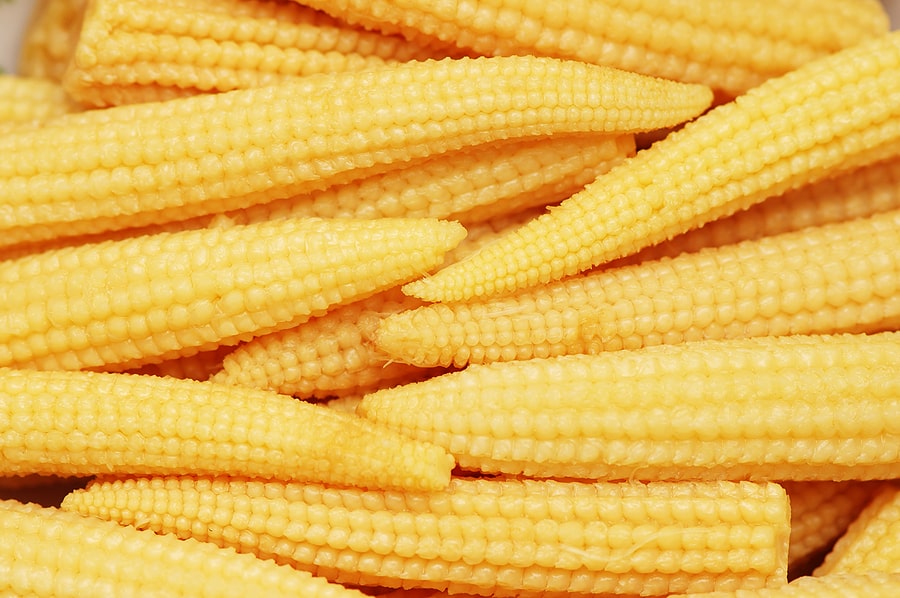
Baby corn is sweet and crunchy and can be eaten whole out of hand–kernels and cob together. Add baby corn raw to salads, or cook it quickly in stir-fries. Include fresh baby corn among crudités.
Baby corn is often included in Thai and Chinese dishes. It looks like miniature corn on the cob. But baby corn does not come from dollhouse-sized corn plants; baby corn is harvested from standard varieties of sweet and field corn just after silking.

Baby corn must be picked in mid-summer just one or two days after the silks of the corn cob emerge from the husk. After that, baby corn is on its way to becoming an adult.
Kitchen Helpers from Amazon:
- Oster Vegetable Steamer
- Chef’s Knives Set of 6
- EZ Off Jar Opener for Weak Hands
- Pepper Core Remover Stainless Steel
- Kitchen Utensils – Set of 35
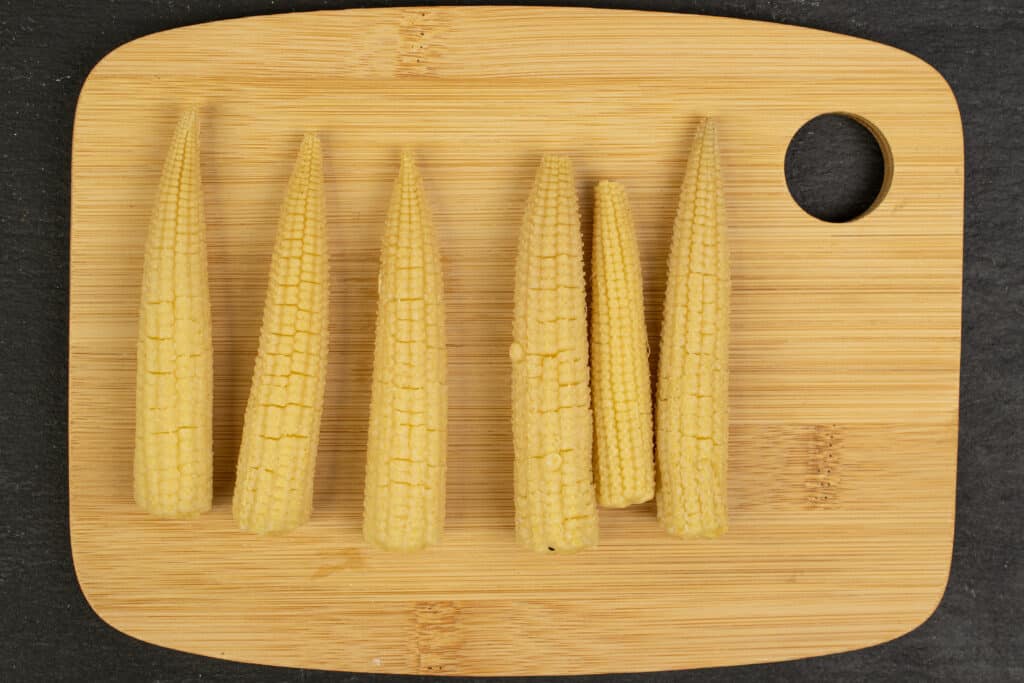
Baby corn cooking and serving suggestions
- Bring baby corn to the table raw just picked and serve alone or add to the crudités plate and serve with dip.
- Add baby corn raw to a green salad or mixed fresh-picked vegetables and top with vinaigrette.
- Roast baby corn lightly with sesame seed oil and toss in a rotini or penne pasta salad.
- Steam or stir fry baby corn for a minute or two and it will retain its shape and flavor; never cook past tender-crunchy.
- Add baby corn cobs whole or cut on the diagonal to soups.
- Braise baby corn in a broth with whole baby bok choy and mushrooms and glaze before serving.
- Pickle baby corn in vinegar, water, salt, and dill and serve as a snack.
How to choose baby corn
- Select baby corn still in the husk to ensure it is still moist.
- Peel back the husk and look for small, full kernels in straight rows; the end should be tapered.
- Avoid baby corn whose kernels are sunken or wrinkled.
- Bright yellow baby corn will be sweet; white baby corn will be a bit starchier.
How to store baby corn
- Baby corn will keep in a loose plastic bag in the refrigerator for 2 to 3 days but is best served fresh.
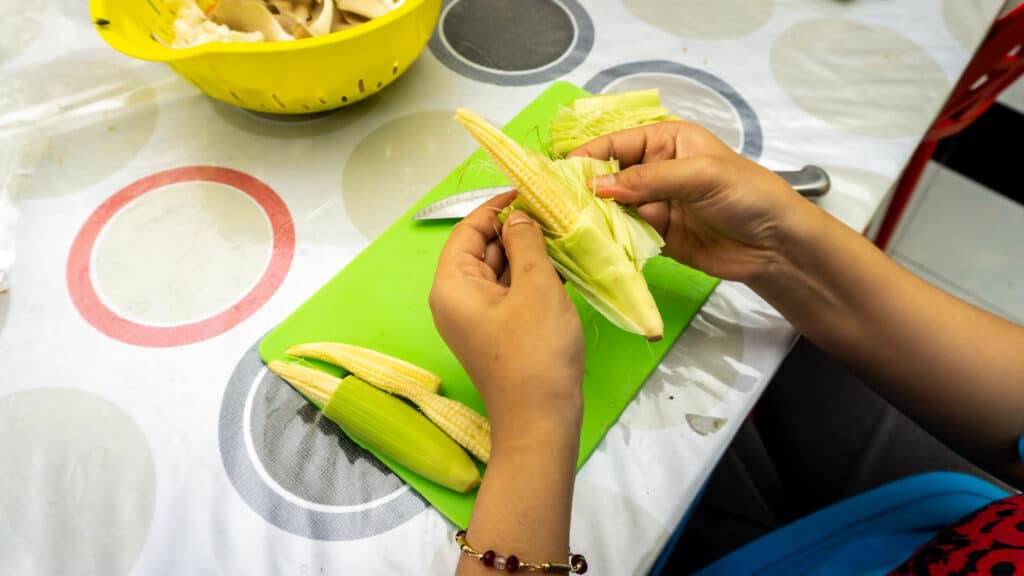
How to prep baby corn
- Before serving or cooking, carefully remove the husk and silks so as not to break or damage the ear.
- Trim away the stem end.
- Leave whole or cut on the diagonal.
Baby corn growing tips
- Corn can take a significant amount of room to crop; corn is often grown in blocks to enhance pollination; four rows wide and deep is a minimum planting.
- Because baby corn is not grown to maturity, growing baby corn in the kitchen garden is quite doable; the plant does not grow to maturity.
- Plant corn for baby corn harvest as close as 18 to 24 inches apart.
Baby corn harvest tips
- Pick baby corn 1 or 2 days after the silks emerge. Silking of corn ears occurs over a 2 to 4-week period on each plant.
- The ideal baby corn ear will be 2 to 4 inches long and about ½ inches in diameter.
- Harvest baby corn every 2 to 3 days during that time.
- If you want some ears on your corn plant to mature to full size, leave the ears at the top of the plant to gain maturity and harvest the ears below as baby corn.
Baby corn varieties to grow
- Grow any variety of sweet or field corn for baby corn harvest. Some corn varieties are suited for baby corn harvest; these varieties never gain more than six feet in stature. Try ‘Little Indian’, ‘Baby’, ‘Golden Midget’ (butter yellow kernels), ‘Glacier’ (white kernels), ‘Miniature Hybrid’, ‘Baby Asian’, ‘Baby Blue’ (blue kernels), Bo Peep (‘pink kernels’), and ‘Strawberry Popcorn’.
The botanical name of baby corn is Zea mays.
Corn articles at Harvest to Table:
How to Plant and Grow Sweet Corn
How to Harvest and Store Sweet Corn
Seven Ways to Cook and Serve Sweet Corn
Corn Chowder and Summer Flavors
Grilled Corn with Seasoned Butter
Baby Corn Cooking and Serving Tips
Corn, Beans, Squash: The Three Sisters
Corn Growing Problems Troubleshooting
Corn Earworm Organic Pest Control
Articles of interest:
Best Herbs for Container Growing
Garden Planning Books at Amazon:
- Vegetable Garden Almanac & Planner
- Kitchen Garden Grower’s Guide Vegetable Encyclopedia
- Vegetable Garden Grower’s Guide
- Tomato Grower’s Answer Book
More kitchen tips:
Bring your harvest to the table. Kitchen prep tips and easy recipes for the vegetables you grow. Click below for vegetable prep and recipes you can use now.
- Almonds
- Apples
- Apricot
- Aprium
- Artichoke
- Arugula
- Asparagus
- Avocado
- Bamboo Shoots
- Banana
- Basil
- Beans, Dried
- Beans. Long
- Beans, Shell
- Beans, Snap
- Beets
- Bitter Melon
- Blackberry
- Bok Choy
- Broccoli
- Broccoli Raab
- Brussels Sprouts
- Cabbage
- Cardoon
- Carrots
- Cauliflower
- Celeriac
- Celery
- Chard
- Chayote Squash
- Cherimoya
- Cherries
- Chestnut
- Chickpea
- Chinese Cabbage
- Chives
- Cilantro
- Citron
- Clementine
- Collards
- Coriander
- Corn, Sweet
- Corn, Baby
- Corn Salad, Mache
- Cranberry
- Cress
- Cucumber
- Daikon
- Dandelion
- Dill
- Eggplant
- Endive, Belgian
- Endive and Escarole
- Fava Beans
- Fig
- Florence Fennel
- Garlic
- Ginger
- Grapefruit
- Grapes
- Guava
- Horseradish
- Jerusalem Artichoke
- Jicama
- Jujube
- Kale
- Kiwifruit
- Kohlrabi
- Kumquat
- Leeks
- Lemongrass
- Lemons
- Lettuce
- Lime
- Mache (Corn Salad)
- Mandarin Orange
- Mango
- Maple Syrup
- Marjoram
- Melons
- Michihili
- Mint
- Mizuna
- Mushrooms
- Mushrooms, Cremini
- Mustard Greens
- Napa Cabbage
- Nectarine
- Okra
- Olives
- Olive oil
- Onions
- Oranges
- Oregano
- Parsley
- Parsley Root
- Parsnips
- Passion Fruit
- Pawpaw
- Peaches
- Pears
- Peas, Garden Snap
- Peas, Snow
- Pei Tsai
- Peppers, Chili
- Peppers, Sweet
- Persimmon
- Pineapple
- Pineapple Guava
- Plantain
- Plums
- Pluots
- Pomegranate
- Potatoes
- Prickly Pear
- Pumpkin
- Quince
- Radicchio
- Radishes
- Raspberries
- Rosemary
- Rhubarb
- Rutabaga
- Sage
- Salsify
- Sauerkraut
- Savory
- Shallots
- Sorrel
- Spinach
- Squash, Summer
- Squash, Winter
- Strawberries
- Sunchokes
- Sunflower
- Sweet Potato
- Swiss Chard
- Tangerine
- Taro
- Tarragon
- Thyme
- Tomatillo
- Tomato
- Turnip
- Turnip Greens
- Yams

