The Ultimate Potato Growing Guide: From Seed to Harvest
Potatoes require a cool but frost-free growing season. Grow potatoes through the summer in cool northern regions. Grow potatoes in fall, winter, and spring in hot summer southern regions.
Here is your complete guide to growing potatoes.
Quick potato growing tips
- Plant potatoes as early as 4 to 6 weeks before the average last frost in spring or any time after the soil temperature warms to 40°F (4.4°C).
- Potatoes need 75 to 135 or more cool, frost-free days to reach harvest depending on the variety.
- Harvest late winter or spring-planted potatoes before daily temperatures average 80°F (27°C)
- Potatoes do not grow well in extreme heat or dry soil. High temperatures can cause mature potatoes to discolor inside.
Related articles:
- Seven Ways to Cook and Serve Potatoes
- How to Cook New Potatoes
- Seed Potato Starting Tips
- How to Plant and Grow Potatoes
- How Potatoes Grow
- Grow Potatoes in Pots and Grow Bags
- Potato Growing Problems Troubleshooting
- Colorado Potato Beetle Organic Pest Control
Where to plant potatoes
- Grow potatoes in full sun.
- Plant potatoes in fertile, well-drained soil rich in organic matter. Add several inches of aged-compost or commercial organic planting mix to planting beds before planting.
- Loosen the soil to 18 inches (45cm) deep or grow potatoes in raised or mounded beds.
- Do not grow potatoes where the soil is compacted, heavy with clay, or constantly wet.
- A soil pH of 5.0 to 5.5 is best for potatoes. Alkaline soil increases the size of the crop but also increases the incidence of scab–a condition that affects the skin of the potato.
When to plant potatoes: early, midseason, and late
Potato varieties are classified according to the number of days they require to come to harvest. The ideal temperature for growing potatoes is 60° to 70°F (16-21°C); temperatures greater than 80°F (26°C) are usually too warm for potatoes. Grow a variety that can come to harvest in cool to mild, not hot, weather.
Know What to Plant This Week
Every week I answer the gardener's most important question: what should I plant now? Get seasonal planting advice free — or go Pro for my full Soil Temperature Garden Report, with soil temperature, moisture, weather trends, and crop-by-crop recommendations.
In cold winter regions, plant seed potatoes in spring as soon as the soil can be worked. For a summer crop where the soil temperature does not climb above 85°F (20°C), plant 2-3 weeks before the last frost. For a fall crop, plant in late spring. In mild-winter regions, plant in late winter—4 to 6 weeks before the last frost—for a summer crop. Plant in late summer for a winter-into-spring crop. Potatoes are tolerant of cool soil and late frost.
- “Early” season (early maturing) varieties require 75 to 90 cool days to reach harvest. Early potatoes are the best choice for southern regions where summers become very warm or hot.
- “Midseason” varieties require 90 to 135 cool days to reach harvest.
- “Late-season” (also called long-season) varieties require 135 to 160 cool days to reach harvest. Late-season potatoes are a good choice for northern regions where the weather stays mild all summer.
Spring planting potatoes
- Plant potatoes 3 to 4 weeks before the last spring frost; in Zone 7 and warmer, plant a second crop in late summer or fall. Time the planting in spring so that new foliage is not killed by the last frost.
- In mild summer regions, you can plant early, mid-season, and late-maturing cultivars in spring for an extended harvest season.
Summer planting potatoes for autumn harvest
- Plant potatoes no later than 12 weeks before the first expected autumn frost.
Planting potatoes in mild winter regions
- If you live where winters are mild and summers are hot, plant late-season potatoes in winter for harvest in mid to late spring before the weather turns hot, or plant early-season potatoes in late summer for a fall crop.
Growing potatoes in sub-tropical and tropical regions
- In tropical and subtropical regions potatoes can be grown all year round, although they are best planted in summer and autumn for harvest before the rainy season.
Yield. Potatoes are highly productive and can yield 6 to 8 pounds (3-4kg) of tubers per square yard (meter).
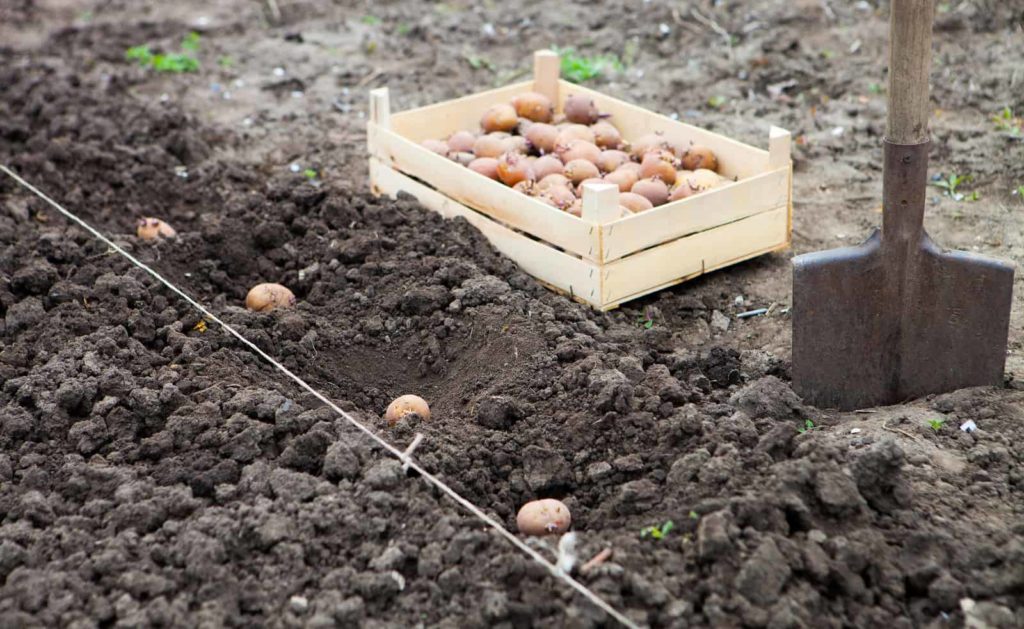
Preparing seed potatoes for planting
- Grow potatoes from “seed potatoes.” Seed potatoes can be whole potatoes or pieces of whole potatoes.
- Potatoes are swollen stems, not roots.
- A seed potato must have at least one “eye” to sprout. An “eye” is a bud, a puckered spot where sprouts develop; sprouts develop stems and leaves.
- Plant certified disease-free seed potatoes. Supermarket potatoes have been chemically treated to inhibit sprouting. Seed potatoes can be purchased at a garden center or from mail-order suppliers.
- Store seed potatoes in the refrigerator for up to one month before planting.
- You can plant seed potatoes whole, or cut them to about the size of a medium egg, with two or three buds apiece.
- Two or three weeks before planting, set seed potatoes in a bright, 65° to 70°F (18-21°C) place to encourage sprouting.
- Cut whole seed potatoes into pieces with a sharp knife two days before planting; each piece should have at least two eyes After cutting, you should let the pieces cure for one to two days at 75°F (24°C).
- Even if you are planting whole seed potatoes, it’s best to cure them in a warm place for two days before planting; this will encourage the best growth.
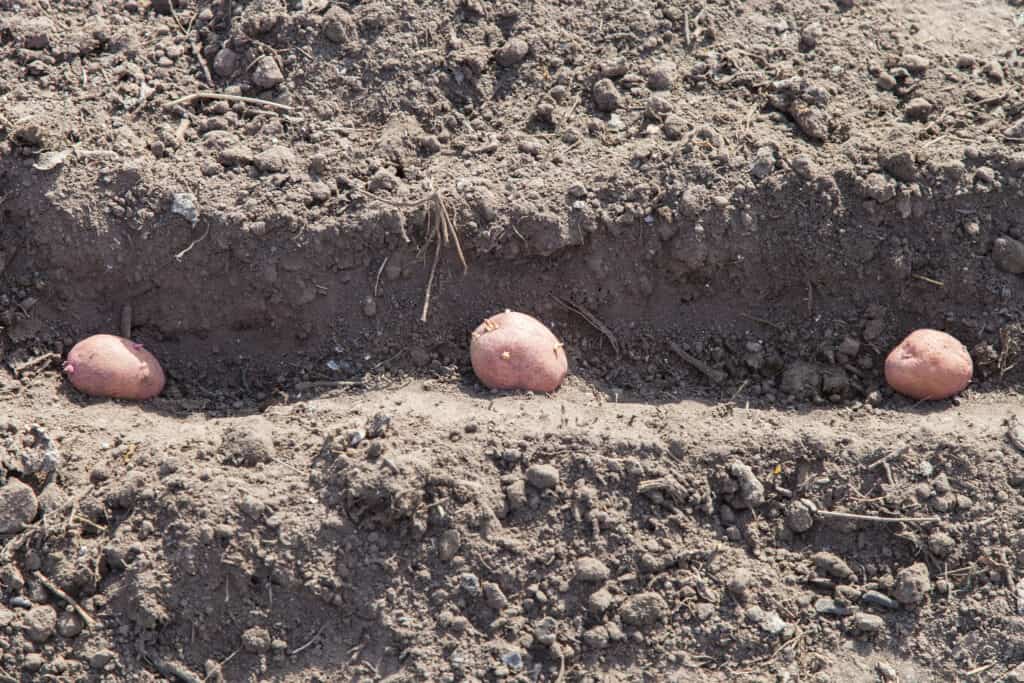
- Plant seed potatoes in a hole or trench 3 to 4 inches (7.5-10cm) deep and cover with 2 inches (5cm) of soil.
- Plant cut pieces with the cut side down.
- If you prefer not to dig, or if the soil is heavy clay or wet, you can lay the tubers on the soil surface and cover them with 4 to 6 inches (10-15cm) of straw or composted leaves.
Planting and spacing potatoes
Set seed potatoes 2 to 4 inches (5-10 cm) deep and 12 to 18 inches (30-45 cm) apart in all directions. Plant seed potatoes in soil rich in compost and rotted manure.
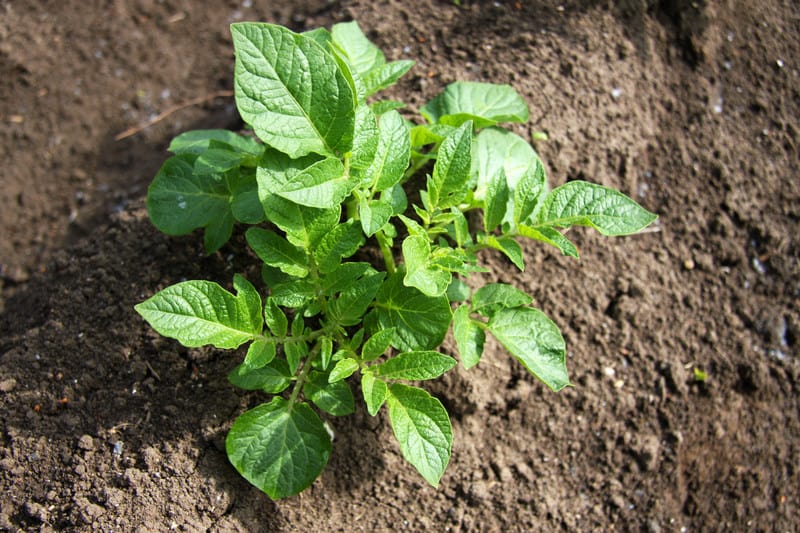
When plants are 12 inches (30 cm) tall, draw the soil up around them—called “hilling”—so just a few inches (5 cm) of the plant is seen. Hilling will protect potatoes from sunburn and from turning green. Grow potatoes in full sun. Keep the soil just moist. Add a side-dressing of high phosphorus fertilizer to the soil after 1 month of growth.
- Early Varieties Spacing: Sow early variety seed potatoes 8 to 14 inches (20-35cm) apart; space rows 12 to 18 inches (30-45cm) apart.
- Late Varieties Spacing: Sow late variety seed potatoes 12 to 14 inches (30-35cm) apart; space rows 30 to 36 inches (75-90cm) apart.
- When seedlings (developing sprouts) emerge, add the remaining 2 inches (5cm) of soil to the hole or trench.
- Keep adding light soil as plants grow tall. Leave the top two sets of leaves exposed.
- Potatoes also can be planted on top of the ground if they are covered with a 12-inch (30cm) thick mulch of straw or hay.
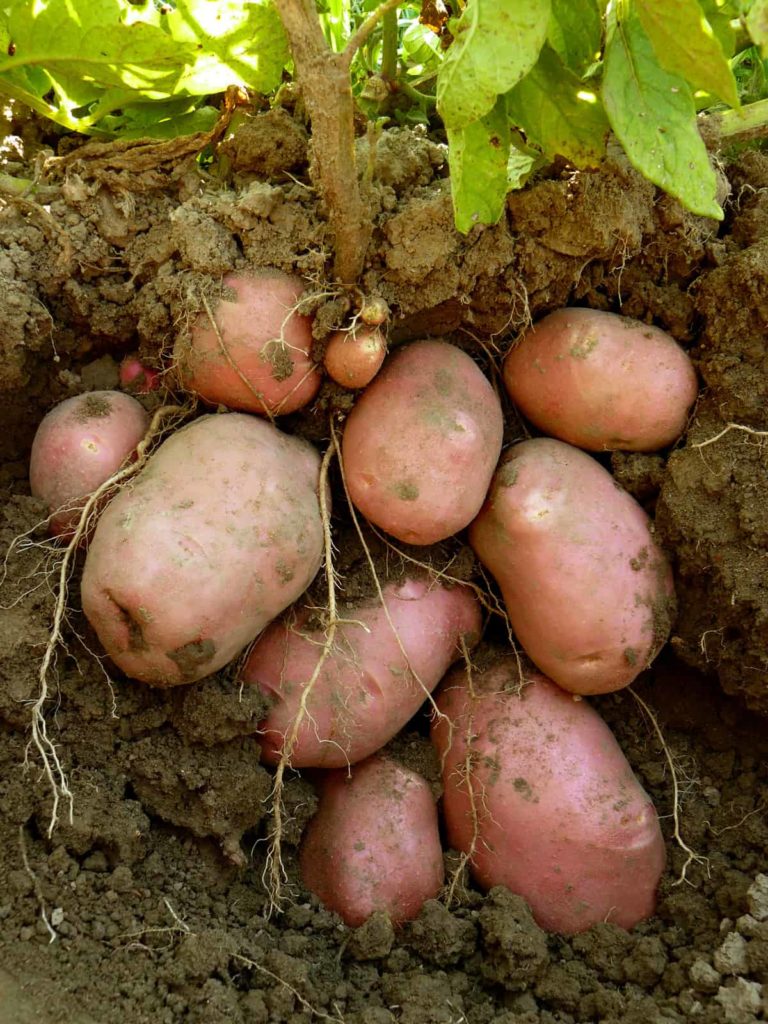
- Each plant will produce about 5 to 10 potatoes or 3 to 4 pounds (1.3-1.8 kilos).
Crop rotation and potatoes
- Potatoes are related to bell peppers, chili peppers, and eggplants; all are prone to the same diseases.
- Don’t grow potatoes where any of these vegetables have grown in the past four years.
More tips: Potato Seed Starting Tips.

Growing potatoes in trenches
Trench planting is the traditional method for growing potatoes.
- Dig a trench or hole 4 to 6 inches deep, put the seed potatoes in place one foot apart, and backfill with 2 inches of soil.
- When the plant grows to 6 inches tall, add soil to cover all but the top leaves; fill the hole or trench as the foliage grows on and continue to hill up loose soil around the plants.
Surface growing potatoes under mulch
- Potatoes can be grown across the surface of a planting bed by simply covering seed potatoes with soil or mulch. This method requires no digging. As with trenching, continue to hill up or mound soil above the tubers.
- Loosen a few inches of soil across the planting bed then lay seed potatoes on the soil surface and cut side down about one foot apart. Each seed potato should have two or three eyes. Cover the seed potatoes with one foot of mulch—shredded leaves, leaf mold, or clean hay or straw.
- When shoots and leaves emerge from the soil or mulch and grow about 6 inches, add more mulch—enough to cover all but the topmost leaves. Repeat this process.
- After several weeks, begin to check under the mulch periodically for developing tubers. The mulch should always be several inches thick over the tubers keeping tubers from turning green.
- Mulch, unlike soil, is not rich in nutrients so the yield may be less.
- Feed mulch-grown potatoes with fish emulsion— after sprouts emerge and again just before plants flower.
- To harvest new or mature potatoes, lift the mulch and take what you need; be sure to recover still-growing tubers so that they do not green.
Growing potatoes under landscape fabric
- Potatoes can be grown under black landscape fabric with almost no effort.
- Place seed potatoes on the planting bed one foot apart then place black landscape fabric over the planting bed. The black fabric will exclude light as though the tubers were underground.
- As plants emerge they will begin to push up the fabric; cut slits in the fabric to allow the plants to grow up.
- Make sure that as plants grow, tubers are kept under the fabric and not exposed to sunlight.
- To harvest potatoes enlarge the slit or roll back the fabric to expose the tubers.
Container growing potatoes
- Potatoes can be grown in containers. Use a shallow wooden box or a half barrel with the bottom removed; use stacked old tires or use special potato-growing bags or barrels.
- Plant seed potatoes at the bottom of the container.
- When plants grow from 8 to 10 inches (20-5cm)all, add enough soil to cover all but the top 2 or 3 sets of leaves. Continue this process until the maturity date for the variety you are growing then harvest.
How potatoes grow
Potatoes grow from other potatoes. A potato grows from a whole, small potato, or a piece of a larger one. The whole potato or cut piece has several recessed, dormant buds on its surface–these dormant buds are called “eyes”. When conditions are right, the buds will sprout and develop into independent plants.
Potatoes used to grow new potatoes are called seed potatoes. Seed potatoes are small tubers. A potato plant will also grow from a cut piece of a larger potato tuber as long as that piece has two or three dormant buds. A cut potato piece is called a “seed piece”. The small tuber or cut piece provides the new sprout or seedling with nourishment from its supply of stored starch.
There are five potato growth stages: sprout development, vegetative growth, tuber growth, tuber bulking, and maturation.
There are five potato growth stages: sprout development, vegetative growth, tuber growth, tuber bulking, and maturation.

Potato growth stages
When a seed potato or piece is planted, the potato growth stages begin. Here are the five potato growth stages
Stage 1: Sprout development
After the seed potato or piece is planted, the piece provides nourishment for a sprout or seedling to grow. The eyes of the potato develop sprouts. The sprouts grow and emerge from the soil. Sprouts and stems rise from the ground two to six weeks after planting depending on the climate. A main stem and the first leaves begin to grow. The root system develops quickly and begins to absorb nutrients as the starch in the seed piece is used up.
Stage 2: Vegetative growth and photosynthesis
The leafy part of the plant puts on a lot of growth over a four or five-week period. With proper sunlight, photosynthesis begins in the leaves and stems above ground. Excess energy is channeled downward as stolons (underground stems or “tubers”) develop. These tubers develop above the original seed piece, not below it. The tubers grow out from the entire length of the underground stem, starting at the bottom all the way to the uppermost section of the stem that is buried. The short underground stems (what we call potatoes) store nutrients. Soon, the main stem of the plant will stop growing and produce a flower bud.
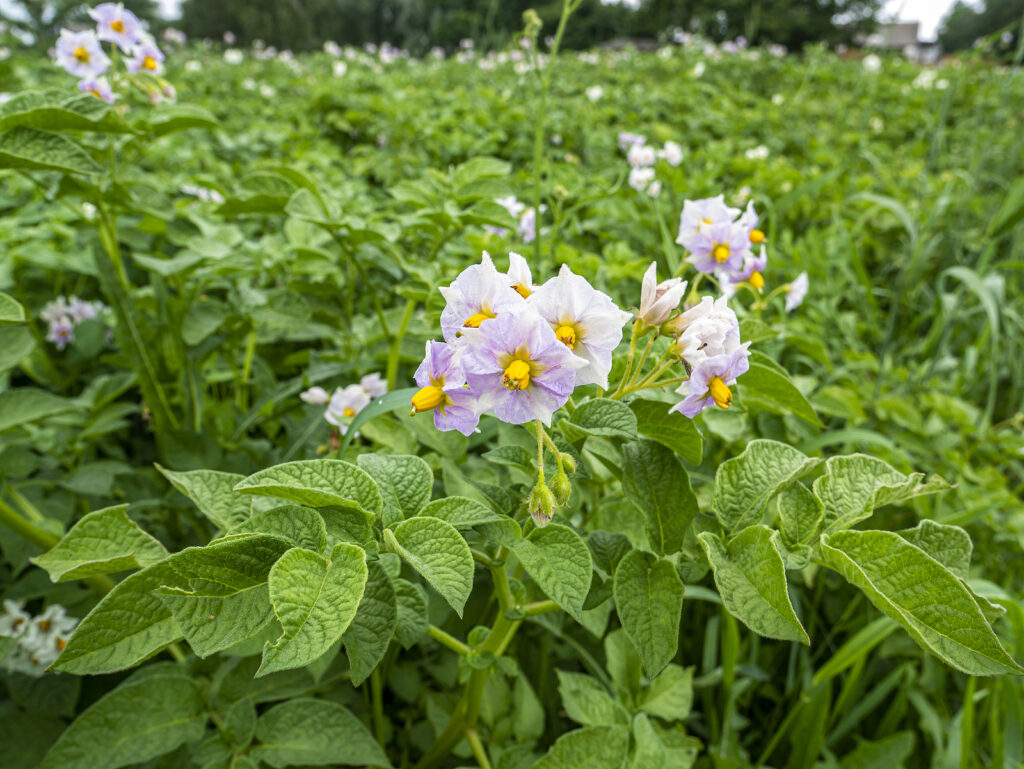
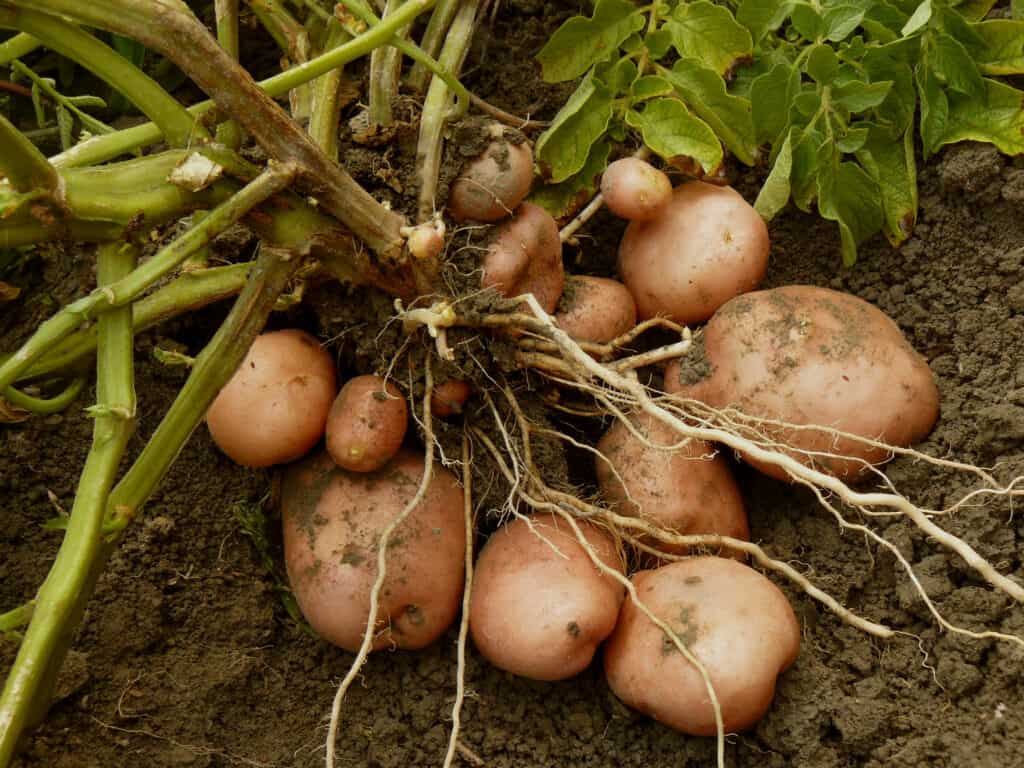
Stage 3: Tuber growth
Tubers begin forming on the end of stolons; the stolon tips swell and tubers begin to form. Above ground, shoots develop ahead of flowers. Stolons usually swell before the plant flowers. (Because the “root” of the potato plant is a stem, not really a root, potatoes are considered tubers.) Tuber development begins 5 to 6 weeks after sprouts emerge from the soil. When a potato plant flowers, that is a sign that the nutrient process and tuber development have begun underground. (But, it’s important to note that some potato varieties produce potatoes with no flowering at all.)
Stage 4: Tuber bulking
Tubers enlarge. Sugars and starches accumulate in the newly formed tubers. Optimal soil moisture and temperature as well as the availability of soil nutrients are very important during this time for the best yield. Tubers form best in cooler temperatures. The best crops are produced when the daytime temperature is in the 60° to 65°F range and when night temperatures are below 57°F. Fewer tubers form when temperatures are between 68° and 84°F, and no tubers form when temperatures are greater than 84°F. (When the weather is warm, the top part of the plant respires heavily, reducing the nutrients that can be put into storage in the tubers below ground.)
Stage 5: Maturation
As starch is stored in the tubers underground, the tubers enlarge and reach full size. The outside layer of the tuber gets tougher and tougher, keeping moisture within the potato. As the tuber skins harden, the leaves and stems above ground begin to dry out and die. Potatoes can remain underground for a while after the tops begin to die so that the last entry in the tops is transferred to the tubers. When the top of the plant dries out and yellows, tubers are ready for harvesting. The harvest of mature tubers can begin 10 to 26 or more weeks after planting (70 to 120 days) depending on the variety. However, potato tubers can be harvested at any size they are edible. If the skin of the harvested potato can not be rubbed off, it will store well.
Potato seed starting is further explained in Potato Seed Starting.

Potato growth challenges
Keeping tubers buried is critical for their development. Sometimes new tubers may start growing at the surface of the soil. Exposed tubers should be buried ahead of harvest. Exposure to light leads to an undesirable greening of the skin and the development of solanine as protection from the sun’s rays, growers cover surface tubers. Solanine is an alkaloid found in potatoes and other Solanaceae family plants. If ingested, solanine can cause poisoning in humans and animals. “Hilling up” or “earthing up”—the piling of additional soil around the base of the plant as it grows—inhibits the development of solanine. An alternative to “earthing up” is covering plants with straw or other mulches.
Home gardeners often grow potatoes from a piece of potato with two or three eyes, commonly in a hill of mounded soil or in a grow bag or containers. Commercial growers plant potatoes as a row crop.
Potatoes are sensitive to heavy frosts, which damage them in the ground. Even cold weather makes potatoes more susceptible to bruising and possibly later rotting.
Potato plant planting and growth are further explained in How to Plant, Grow, and Harvest Potatoes.
Commercial seed potatoes are specifically grown to be free from disease and to provide consistent and healthy plants. Commercial seed potato growing regions usually have cold winters that kill pests and summers with long hours of sunlight each day for optimum growth.
Companion plants for potatoes
- Grow potatoes with beans, cabbage, corn, and eggplant.
- Avoid planting potatoes near cucumbers, pumpkins, squash, sunflowers, tomatoes, or raspberries. These plants are attacked by the same pests and diseases as potatoes.

Watering potatoes
- Keep potatoes evenly moist but not wet; water before the soil dries out.
- Potato tubers will rot if the soil is too wet.
- Even soil moisture is important; fluctuations in soil moisture—wet, dry, wet—can lead to cracked or knobby tubers.
- Mulch to protect tubers from the sun, conserve soil moisture, prevent the soil from becoming too warm, keep weeds down, and discourage pest insects.
Feeding potatoes
- Feed potatoes by sprinkling 5-10-10 fertilizer across the planting bed before planting; add this again as a side dressing at midseason. Choose a fertilizer that includes calcium and magnesium.
- Avoid giving potatoes too much nitrogen; too much nitrogen will encourage foliage growth over tuber growth.
- Where the soil is poor, drench the soil with a cup or more of compost tea shortly after planting. Spray-mist foliage with compost tea every two weeks through the season.
Caring for potatoes
- Be careful not to compact the soil around potatoes. Use boards between rows to avoid walking on the soil.
- Protect maturing tubers from sunlight by hilling up soil over plants or applying additional mulch to all but cover the plants. Exposed tubers will sunburn or their shoulders will become green (called greening). Green potatoes produce a chemical called solanine. Solanine is both bitter-tasting and toxic.
- Carefully cultivate around plants or mulch to keep weeds down.
Hilling potatoes
- Exposure to light can cause potato tubers to turn green; the green skin is slightly toxic.
- Protect the tubers from light by “hilling up” soil when the green shoots or stems are about 4 to 5 inches (10.12.5cm) tall. Use a hoe to mound up soil leaving just a few leaves exposed to sunlight. Hilling will also keep the tubers cool and moist. Hill the plants again two or three weeks later.
- Surface-planted potatoes can be filled by piling mulch deeply around the plant; you can use straw or composted leaves rather than soil.
Potato pest
- Potatoes can be attacked by Colorado potato beetles, leafhoppers, flea beetles, and aphids. Potato beetles and flea beetles chew holes in leaves. Cover plants with floating row cover until midseason to exclude these pests.
- Handpick both adults and larvae Colorado potato beetles and destroy them.
- Use Bacillus thuringiensis to control potato beetles, leafhoppers, and flea beetles.
- Knock aphids off plants with a strong blast of water.
- Stunted plants with puckered or yellow leaves, small bumps on the tubers, or hard galls on the roots have been attacked by root-knot nematodes; destroy infected plants. To prevent nematode problems, plant a cover crop of marigolds, and apply beneficial nematodes to the soil.
Potato diseases
- Potatoes are susceptible to blight and scab.
- Spray plants with compost tea every two weeks to control blights.
- Scab can cause potatoes to have rough skin but does not affect the eating quality of the potato. Cut away the corky areas
- If scab is a problem, adjust the soil pH to 5.5.
- Plant disease-resistant varieties and practice crop rotation.
More on potato problems: Potato Growing Problems: Troubleshooting.
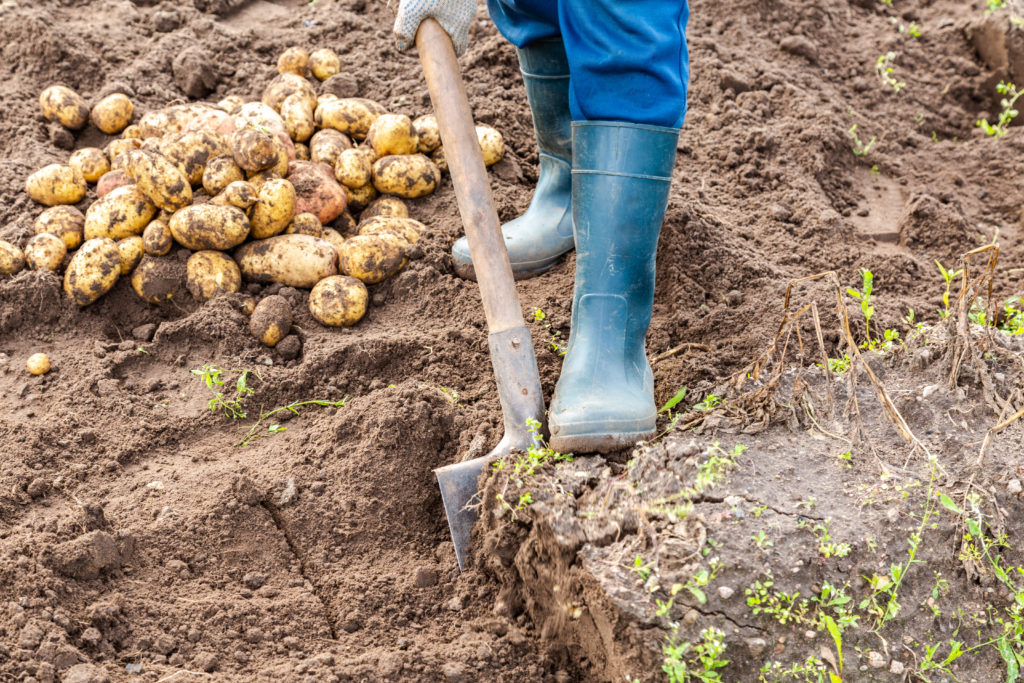
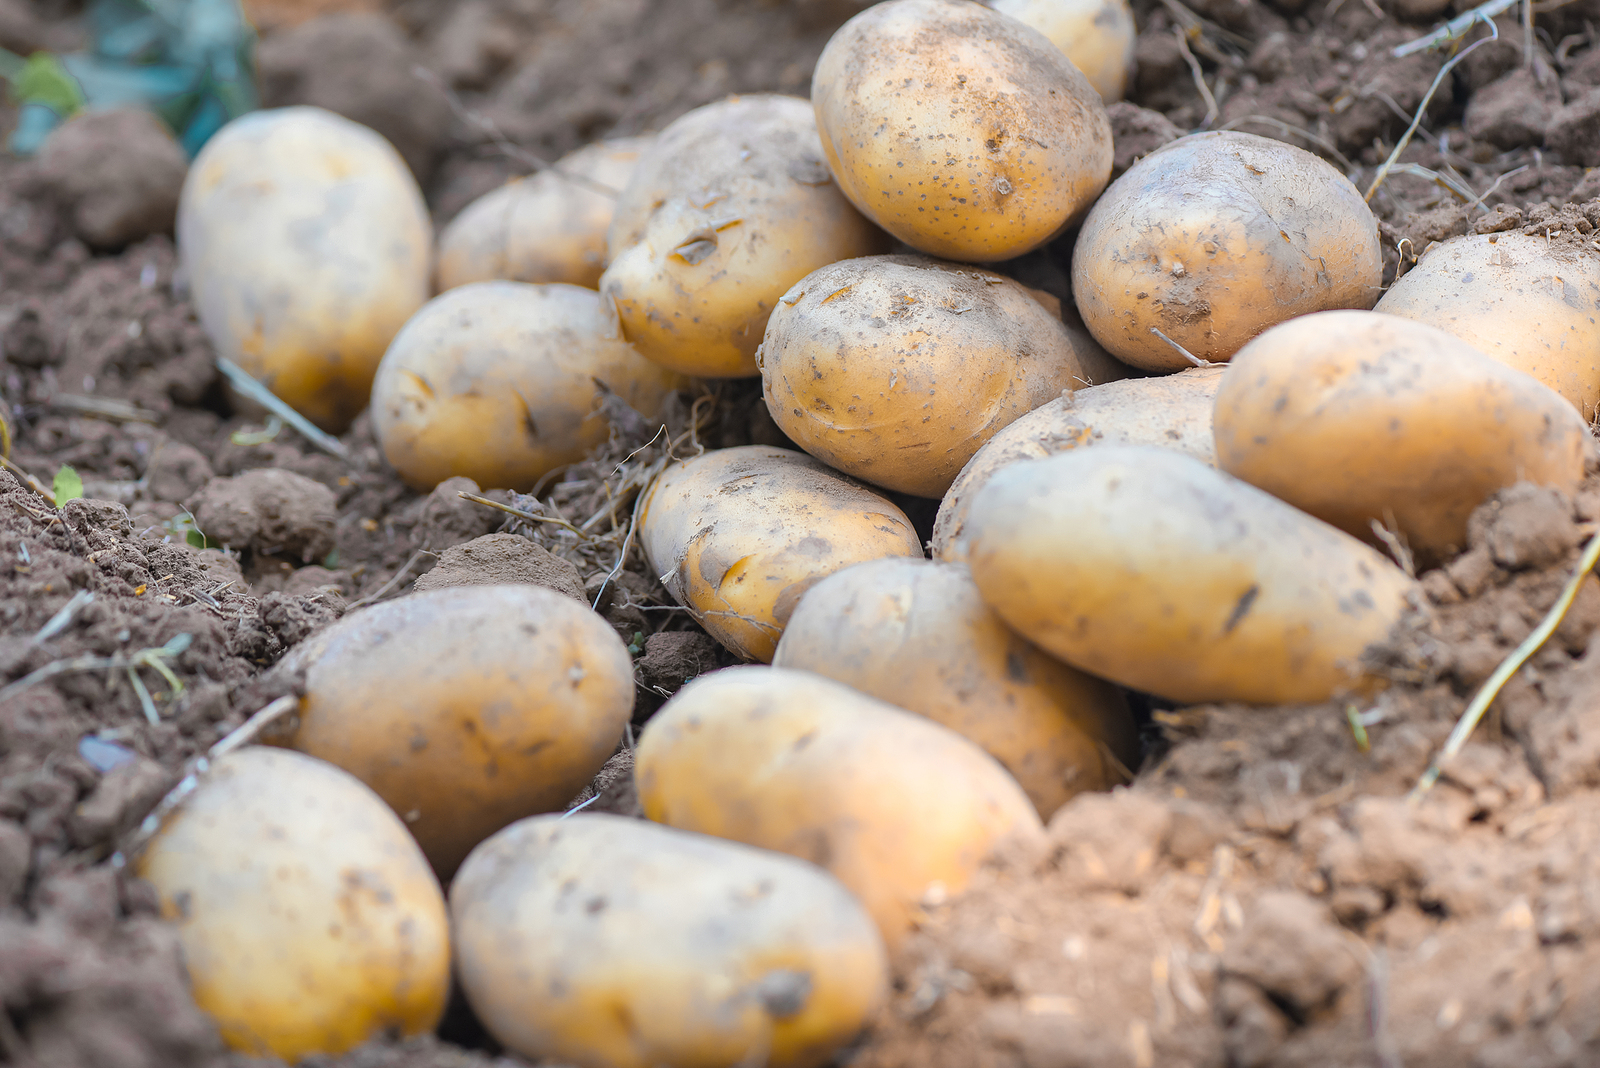
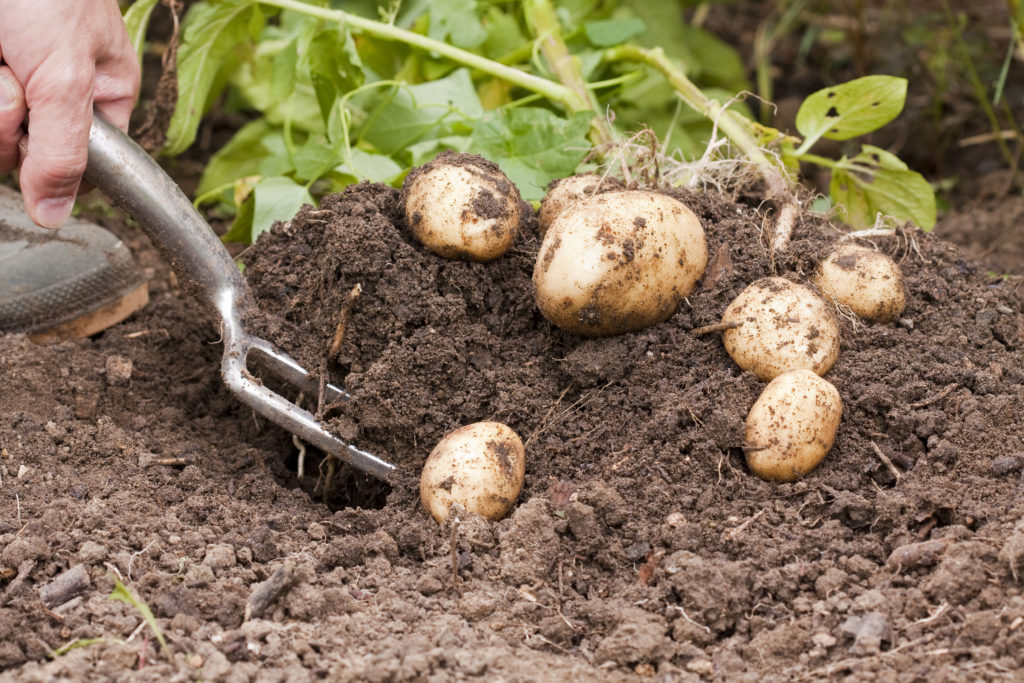
Harvesting potatoes
Potatoes planted in early spring will be ready for harvest in 90-110 days; planted in late spring, 100-120 days; planted in late summer or fall, 110-140 days. Dig early for “new potatoes” when plants begin to bloom and fade; dig for mature, full-size potatoes when the vines are yellow and die. To harden the potato skin before harvest, stop watering 2 weeks before harvest; cut away the top foliage 10 days before harvest. Carefully lift potatoes with a garden fork, starting 8 to 10 inches (20-25 cm) away from the plant, then work closer to the vine. Brush but do not wash clinging soil from tubers. Store potatoes in a dry, dark, well-ventilated place for up to 6 months.
- Potato stems and leaves turn brown and flowers fade as tubers below ground mature.
- Potato tubers can be harvested at any size. Potatoes harvested before they mature are called new potatoes.
- New potatoes can be harvested when plants are in full bloom.
- As potatoes mature their skins harden. The skin of a new potato will easily peel off when rubbed. New potatoes cannot be stored but must be used right away.
- A potato plant will produce 3 to 6 regular-size potatoes and a number of small ones.
- Use a spading fork to dig up potatoes. Lift potatoes gently to avoid bruising or damaging the skins. Use your fingers to harvest potatoes if need be.
- You can harvest the whole plant or gently break off tubers, removing a maximum of two tubers per plant if you intend to let the plant grow on and harvest again.
- To harvest mature tubers, wait until the tops of the plants die back. Leave the tubers in the ground for a few weeks after the tops die back; this will allow the skins to toughen and the potatoes will store better.
- Test one or two potatoes before lifting the entire crop. Use damaged potatoes immediately and store the rest in a dark, dry place, with good air circulation.
- Potatoes can be left in the ground past maturity until the first frost, but they are most nutritious if harvested when they mature.
- If first is not imminent and vines are not dying back, knock the vines flat or cut them with a knife to kill them. You can then proceed to harvest.
- Early potatoes take about 60 days to reach maturity; mid-season potatoes take about 80 days; late-season potatoes need 90 days or longer to mature.
- Protect harvested potatoes from sunlight; potatoes exposed to light will green and produce a bitter chemical compound called solanine.
- Allow potatoes to cure before storing them. Curing will harden the skins for storage. Set tubers in a single layer in a dark place at 50° to 60°F (10-15°C) for two weeks to cure.
- Brush excess dirt off the tubers, but don’t wash them; they are best stored with dirt on, as this helps exclude light and stop them from turning green.
- Store potatoes at about 40° (4.4°C).
- Potatoes will also store well in the ground as long as the weather is not too wet or warm.
- Save the best tubers for planting next season. Don’t save potatoes that are soft or discolored. Don’t save potatoes if any of the plants have been hit by a disease.
When to harvest: Potato Harvest Calendar.
Storing and preserving potatoes
- Store potatoes in a dark, well-ventilated place at about 40°F (4.4°C). Do not wash them before storing; allow them to air dry at 50-65°F (10-18°C) for five days before storing.
- Potatoes will keep for about 6 months.
- Do not refrigerate potatoes.
- Prepared or new potatoes freeze well. Potatoes also can be dried.
More tips: How to Harvest and Store Potatoes.
Plant the right potato for the way you cook
When it comes to growing potatoes, choose the potato you grow to match the way you want to cook potatoes. Use low-starch potatoes for boiling, roasting, grilling, sautés, stews, salads, and au gratin dishes. Use medium starch potatoes for steaming, baking, roasting, grilling, and au gratin dishes. Use high-starch potatoes for baking, frying, and mashing.
Low- and medium-starch potatoes keep their shape and remain creamy and toothy when boiled. High-starch potatoes will swell and puff up when baked; they will be light, dry, and delicate. (A high-starch potato submitted to the rigors of boiling will explode and turn inside out in boiling water.)
Here’s what you need to know about low, medium, and high-starch potatoes:
Low- and medium-starch potatoes for boiling
Low- and medium-starch potatoes are sometimes called salad or boiling potatoes. They have high moisture content so they don’t absorb as much water when submerged and boiled. The most common low-starch potatoes are red-skinned varieties often called round-reds; look for the variety Red Bliss. Other boiling potatoes are California long whites, Maine, and Kennebec potatoes. Medium-starch potato varieties include Yukon Gold, Yellow Finn, and German Butterball.
Other low- and medium-starch potatoes include many dubbed fingerlings (named for their shape and size) and heirlooms (look for rose, pink, gold, and purple potatoes).
High-starch potatoes for baking
High-starch potatoes, best for baking, are russet, russet Burbank, and russet Idaho. They have low moisture content and are sometimes called “mealy” potatoes. If you can’t get a russet, Burbank, or Idaho potato for baking, use a medium-starch potato, again Yukon Gold and Yellow Finn are the best known. Medium-starch potatoes will not produce a baked potato as light and puffy as a russet or Idaho potato.
Potatoes for mashing
If you plan to mash the potatoes you grow, you can choose either low-, medium, or high-starch potatoes, but preparation differs when making mashed potatoes. Low- and medium-starch potatoes will be more flavorful as mashed potatoes than high-starch potatoes, but you will find they are stickier, almost glue-like, in preparation so you may find it difficult to achieve a smooth-texture mashed potato serving. Use high-starch potatoes for a smooth, fluffy mashed potato, but rather than boil the potatoes steam them.
Guide to potato types and varieties
Here are nine different types of potatoes with variety names. Look for the amount of starch–low, medium, or high–for each type. Match the type you grow to how you plan to cook the potatoes.
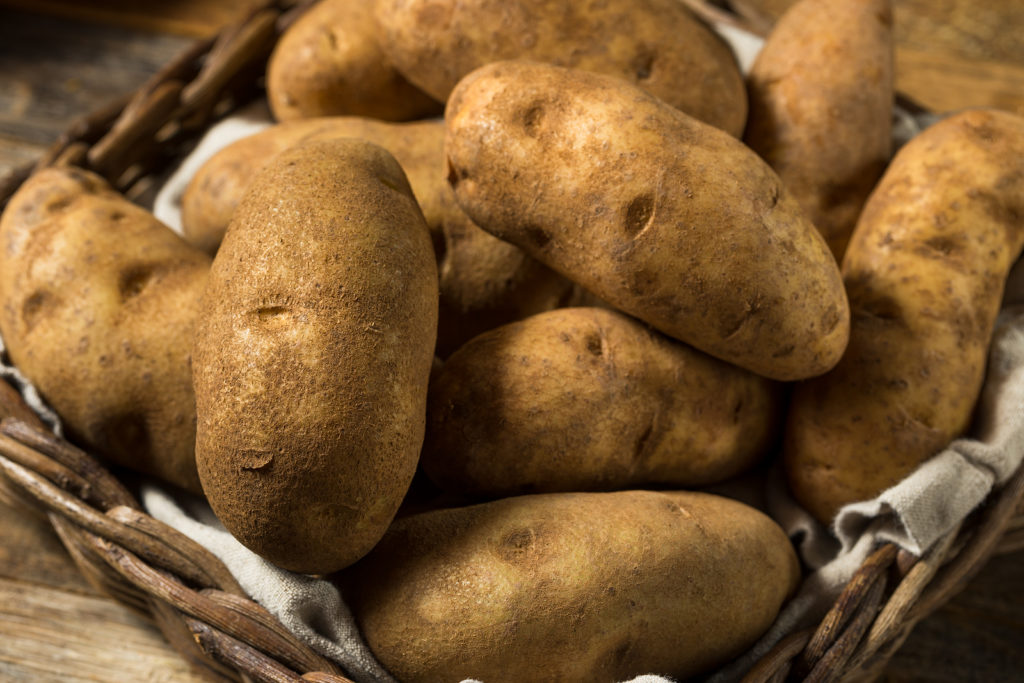
Russet potatoes
• Russet potatoes—also called old potatoes, baking potatoes, or Idaho potatoes (if they were grown in Idaho)—have an oblong, elliptical shape, and rough, netted, brown skin with numerous eyes and white flesh. Russets grow from 4 to 6 inches (10-15 cm) long and about 2 inches (5 cm) in diameter.
Russets are low in moisture and high in starch so they cook up dry and fluffy. Russets are suited for baking, mashing, and deep frying (French fries). The top varieties are russet Burbank, russet Norkotahs, russet Arcadia, and russet Butte.
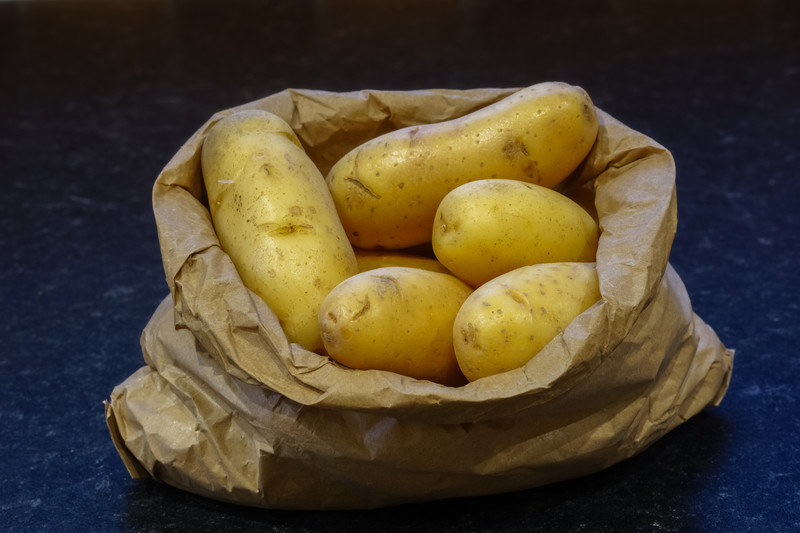
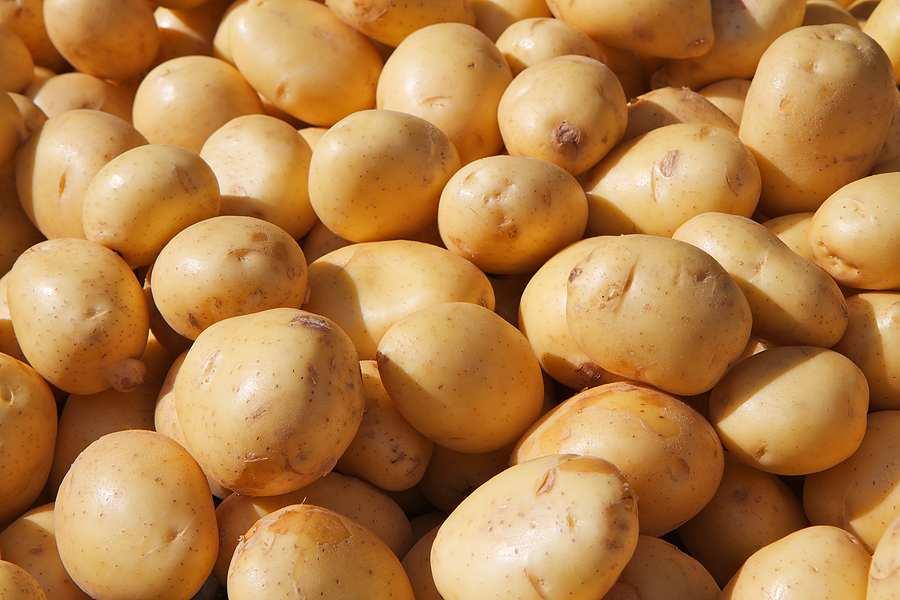
Long white potatoes
• Long white potatoes–also called white rose or California long whites (because they were developed in California)—have an elliptical shape and thin ivory white to pale gray-brown skin with imperceptible eyes. Long whites grow from 4 to 6 inches (10-15 cm) long and about 2 inches (5 cm) in diameter.
Long whites have a medium to low starch content and are moister than russets. You can use long whites for boiling, baking, or deep frying. Long whites keep their shape when cooked.
Fingerling potatoes
• Fingerlings—are thumb-sized potatoes that grow to about 3 inches (7.5 cm) long and 1 inch (2.5 cm) wide. Fingerlings are thin-skinned and can be cooked unpeeled—baked, boiled, steamed, fried, and roasted. They are low in starch with a waxy texture and hold together well after cooking. They are yellow-fleshed with a rich, buttery texture.
Many fingerlings—small finger sized-potatoes—are also low-starch potatoes. Fingerling varieties include long white fingerling, purple Peruvian fingerlings, French fingerling, German fingerling, Russian banana fingerling, Ozette, and Ruby Crescent fingerlings.
Yellow potatoes
• Yellow potatoes—are usually round to slightly oblong-shaped potatoes with thin, yellowish light brown skins, and buttery yellow to golden waxy flesh. Yellow potatoes are low to medium in starch and have a moist, creamy, succulent texture with a buttery flavor. They are well suited for boiling, steaming, mashing, roasting, grilling, and au gratin dishes.
Yellow flesh potato varieties include Yukon Gold, Yellow Finn, German Butterball, Carola, Nicola, and Alby’s Gold.
Round white potatoes
• Round white potatoes—are medium-sized, round with a light tan to freckled brown skin and waxy to creamy textured flesh. Round whites are moist with low to medium starch. They are well suited for boiling, roasting, frying, and mashing. Round whites hold their shape after cooking.
Round whites are grown mostly in the Northeastern United States. Round white varieties include Kennebec, Superior, and Atlantic.
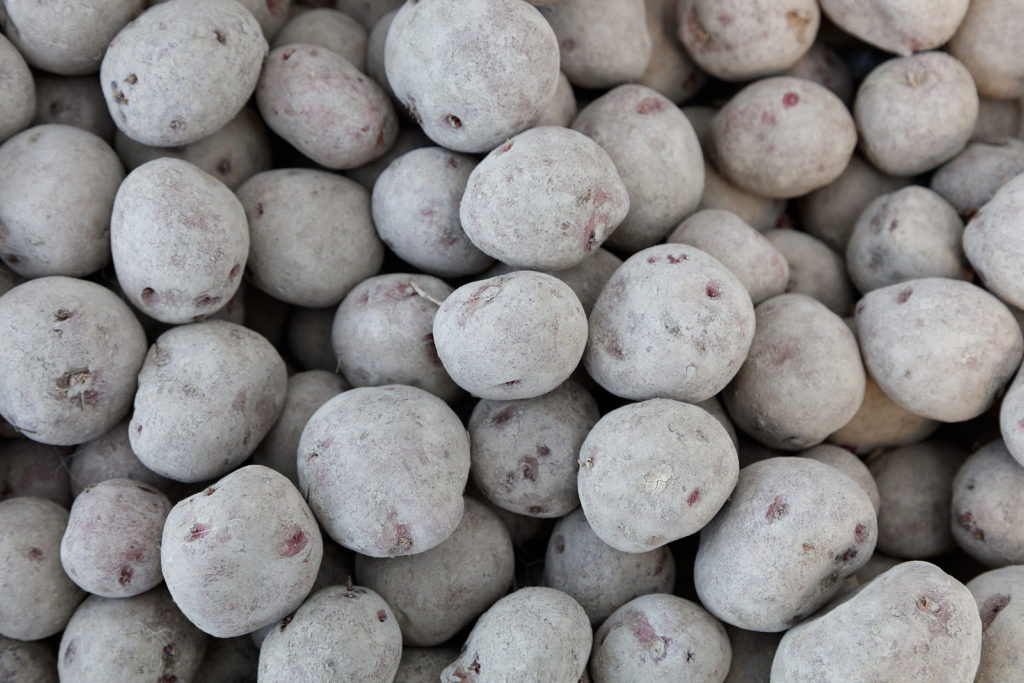
Round red potatoes
• Round red potatoes— also called new potatoes (because they are small), red bliss potatoes, and boiling potatoes–are medium-sized, round, rose to reddish-brown skinned potatoes with dense, crisp white flesh. Round reds are low in starch and are sweeter tasting than round whites. Choose round reds for boiling, roasting, grilling, sautés, stews, salads, and au gratin dishes. You can serve round reds cooked whole.
Round reds are mostly grown in the Northwestern United States. Round red varieties include Red Norland and Red Pontiac.
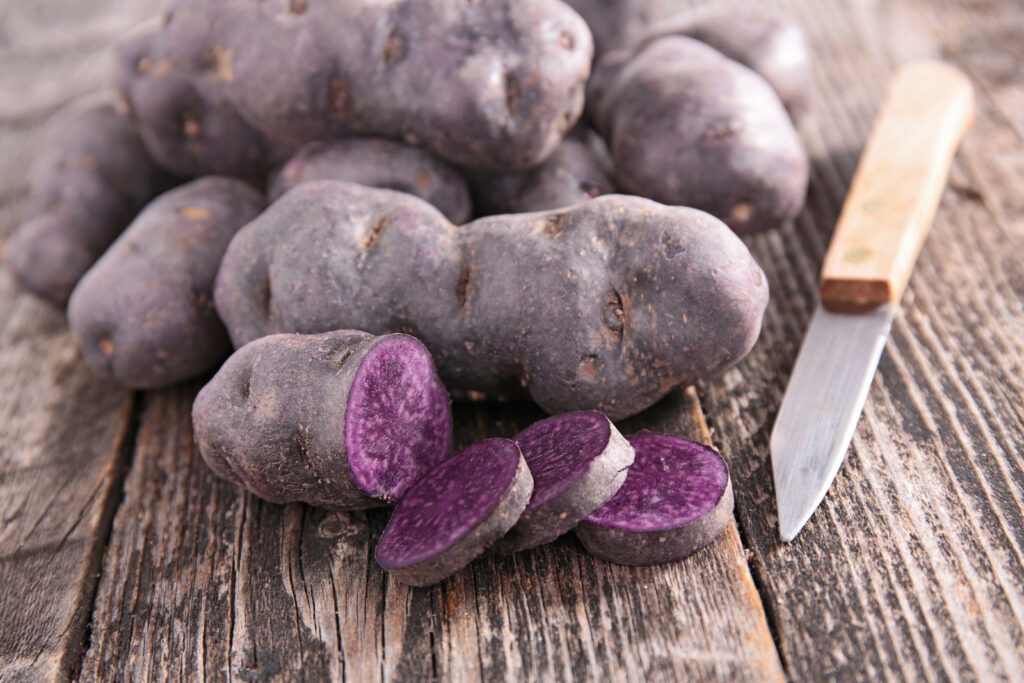
Purple and blue potatoes
• Purple potatoes or blue potatoes—are heirloom potatoes with grayish-blue to purple skins and usually inky blue flesh. They are delicately flavored. Purple and blue-skinned potatoes are low in starch and can be boiled, steamed, roasted, fried, mashed, or served in stews, salads, and au gratin dishes.
Blue and purple potatoes are probably descended from the original potatoes from Peru which were the same color. Purple flesh potato varieties include All Blue, which is dry and good for roasting; Purple Peruvian which is well fried; and Purple Viking which has good flavor and is good mashed.
• Other heirloom potatoes–include two red-skinned and red-fleshed potatoes: Huckleberry and Blossom. Both of these potatoes are low in starch and can be boiled, steamed, roasted, fried, mashed, or served in stews, salads, and au gratin dishes.
New potatoes
• New potatoes–is a term for any variety of potato that has been harvested before it has reached maturity. (However, mature round red potatoes are also called new potatoes simply because they are small.) New potatoes are also called baby potatoes and sometimes creamers. They can be as small as marble-sized.
New potatoes are harvested when their leaves are still green—most potatoes are harvested after their leaves have turned yellow or brown—and before their sugar has begun to convert to starch. New potatoes are thin-skinned and very moist with a crisp, waxy textured flesh.
New potatoes often come to market in the spring and early summer. They are never kept in storage because of their high sugar content. New potatoes are great for cooking whole, boiling, or pan-roasting. They keep their shape after cooking and are well-used in potato salads.
Storage potatoes
Storing potatoes or storage potatoes–come from mature plants whose leafy tops have yellowed and died back. Storing potatoes should be dried or cured before they are stored. Potatoes are usually cured for a period of 4 to 5 days at about 60-70ºF (16-21°C). Curing allows cuts and surface injuries of the tuber to “heal.” Potatoes low in starch will store well.
Well-matured potatoes without defects are the best keepers. Potatoes should be stored in a cool, dark, well-ventilated area. Potatoes can be stored for up to 6 months.
Good storing potatoes include Norkotah, Goldrush, Butte, Katahdin, Caribe, and Red Norland.
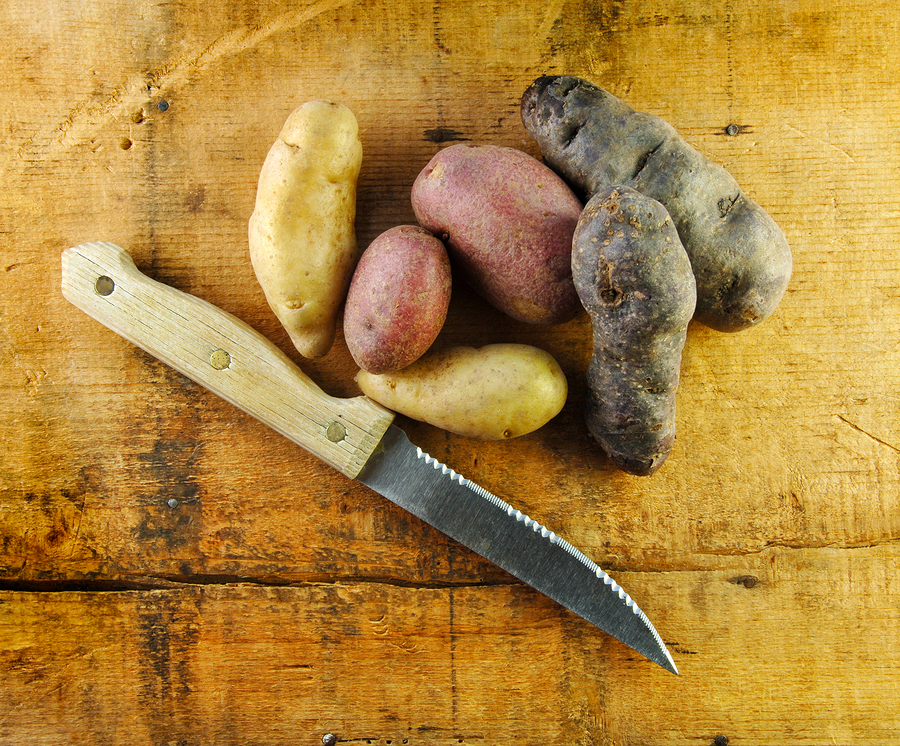
How to test an unknown potato variety for starch
If you don’t know the variety of the potato you have in hand, you can determine how starchy it is by cutting it with a knife. If the potato clings to the knife or if the knife is coated with a creamy white substance, the potato is starchy.
Potato varieties to grow
- There are more than 100 varieties of potatoes.
- There are four basic potato categories: long whites, round whites, russets, and round reds. You can also grow potatoes with yellow or bluish-purple skins.
- Potato flesh may be white or match the skin color: red, yellow, or blue.
- Potatoes can be round, cylindrical, or finger-like, called fingerlings
- Potatoes can be categorized as moist or dry. Dry potatoes are good for baking and mashing (varieties include ‘Russet Burbank’ and ‘Butte’). Moist potatoes fall apart when cooked; they are a good choice for soups.
- Check your cooperative extension service for specific recommendations for your area.
Recommended varieties
Here are potato varieties to grow in a home garden:
- ‘All Blue’: midseason medium-sized potato with blue skin and blue-purple flesh; use mashed, steamed, baked, roasted, and in salads.
- ‘Butte’: early season; baking.
- ‘Caribe’: early season; drought tolerant; all-purpose use.
- ‘Carola’: late-season; yellow flesh; all-purpose use.
- ‘Cranberry Red’: early- to midseason; red skin and pink, smooth flesh; use mashed, steamed, roasted, and in salads.
- ‘French Fingerling’: late-season; use roasted, baked, and in salads.
- ‘Katahdin’: midseason; use French-fried, baked, mashed, or roasted.
- ‘Purple Peruvian’: late-season; use roasted, baked, and in salads.
- ‘Red Gold’: midseason: all-purpose use.
- ‘Red Norland’: early season; use boiled, steamed, mashed, or in salads.
- ‘Red Thumb’: early season fingerling; roasting.
- ‘Rose Finn Apple’: late-season; all-purpose use.
- ‘Russian Banana’: late-season; use roasted, baked, or in salads.
- ‘Yellow Finn’: midseason yellow-fleshed variety; all-purpose use; good for mashing and baking.
- ‘Yukon Gold’: early season; use boiled, mashed, or in a salad.
About Potatoes
- The potato is a perennial vegetable grown as an annual.
- Botanical name: Solanum tuberosum
- Origin: Chile, Peru, Mexico
Potato Growing Hub
Start here: The Ultimate Potato Growing Guide: From Seed to Harvest
🥔 Varieties & Planting Prep
- Best Potato Varieties for Different Cooking Uses – Detailed profiles on varieties for boiling, baking, mashing, and roasting.
- Guide to Fingerling Potatoes: Growing, Cooking, and Varieties – Spotlight on fingerlings with care tips and culinary uses.
- How to Prepare and Cut Seed Potatoes for Planting – Step-by-step guide to maximize yield and reduce disease risk.
- Seed Potato Starting Tips – Ready your seed potatoes and plant
🌱 Planting & Early Growth
- How to Grow Potatoes in Containers: A Complete Guide – Soil, container size, watering, and harvesting tips for small-space growers.
- Grow Potatoes in Pots and Grow Bags: Seven Easy Steps
- 6 Easy Steps to Grow Organic Potatoes
- Companion Planting with Potatoes: What to Grow Together and Avoid – Maximize garden health and productivity through smart companion planting.
- Growing Potatoes in Mild Winter and Tropical Climates – Specific tips for successful potato cultivation in warmer regions.
- How to Identify Potato Growth Stages and Troubleshoot Problems – Recognize each growth phase and manage issues at every stage.
🌿 Care & Maintenance
- How and When to Hill Potatoes for Bigger Yields – Detailed instructions and timing for hilling to support tuber development.
- Watering Potatoes: Best Practices for Healthy Growth – Provide consistent moisture without risking rot or stress.
- Common Potato Pests, Disease, and Problems: Organic Solutions – Identification and natural control strategies for common pests.
- Crop Rotation Strategies for Potatoes to Prevent Soil-Borne Diseases – Plan your garden for long-term soil health and disease prevention.
🧺 Harvest & Storage
- Harvesting Potatoes: Signs of Maturity and Techniques to Avoid Damage – Know when potatoes are ready and how to harvest carefully.
- How to Harvest and Stoe Potatoes – Ideal temperature, humidity, and storage environments to keep potatoes fresh.
🍽️ Cooking & Kitchen Insights
- Testing Potato Starch Levels: Why It Matters and How to Do It – Understand starch content to choose the right potato for each dish.
- Seven Ways to Cook and Serve Potatoes – Easy ways to serve your potato harvest.
- How to Cook New Potatoes with No Recipe – Here’s how to get those little spuds on the table fast.
Potato articles at Harvest to Table:
How to Plant and Grow Potatoes
6 Easy Steps to Grow Organic Potatoes
Grow Potatoes in Pots and Grow Bags: Seven Easy Steps
Seven Ways to Cook and Serve Potatoes
How to Cook New Potatoes with No Recipe
How to Make Seasonal and Flavorful Potato Salad
Yellow Potato Side Dish and Soup
Ham, Potato, and Cheese Gratin
Potato Growing Problems Troubleshooting
Colorado Potato Beetle Organic Pest Control
Garden Planning Books at Amazon:
- Vegetable Garden Almanac & Planner
- Kitchen Garden Grower’s Guide Vegetable Encyclopedia
- Tomato Grower’s Answer Book
- Vegetable Garden Grower’s Guide
More how to grow articles:
Learn how to plant, grow, and harvest your favorite vegetables. Click below for all you need to know.
- Artichoke
- Arugula
- Asparagus
- Beans, Snap
- Beets
- Broad Beans
- Broccoli
- Brussels Sprouts
- Cabbage
- Cantaloupe — Melons
- Cardoon
- Carrots
- Cauliflower
- Celeriac
- Celery
- Chard
- Chayote Squash
- Chickpeas
- Chicory
- Chinese Cabbage
- Collards
- Corn Salad
- Corn, Sweet
- Cresses
- Cucumbers
- Eggplant
- Endive and Escarole
- Fava Beans
- Florence Fennel
- Garbanzo Beans
- Garlic
- Horseradish
- Jerusalem Artichoke
- Kale
- Kohlrabi
- Leeks
- Lettuce
- Lima Beans
- Melons
- Mizuna
- Mustard Greens
- New Zealand Spinach
- Okra
- Onions
- Parsnips
- Peanuts
- Peas
- Peppers
- Potatoes
- Pumpkins
- Radicchio
- Radishes
- Rhubarb
- Rutabaga
- Salsify
- Shallots
- Sorrel
- Southern Peas
- Soybeans
- Spinach
- Squash, Summer
- Squash, Winter
- Sunchokes
- Sweet Potato
- Swiss Chard
- Taro
- Tomatillo
- Tomatoes
- Turnips
- Watermelon
- Zucchini