6 Easy Steps to Grow Organic Potatoes
Organic potatoes are a great addition to any home garden. Not only are they packed with vitamins, minerals, and fiber, but they also provide a unique and flavorful cooking experience. Growing organic potatoes in your home garden is both rewarding and easy as long as you are well-versed in how to grow potatoes.
Here are six easy steps you can follow to grow delicious organic potatoes in your home garden.
Step #1: Choose the Right Potato
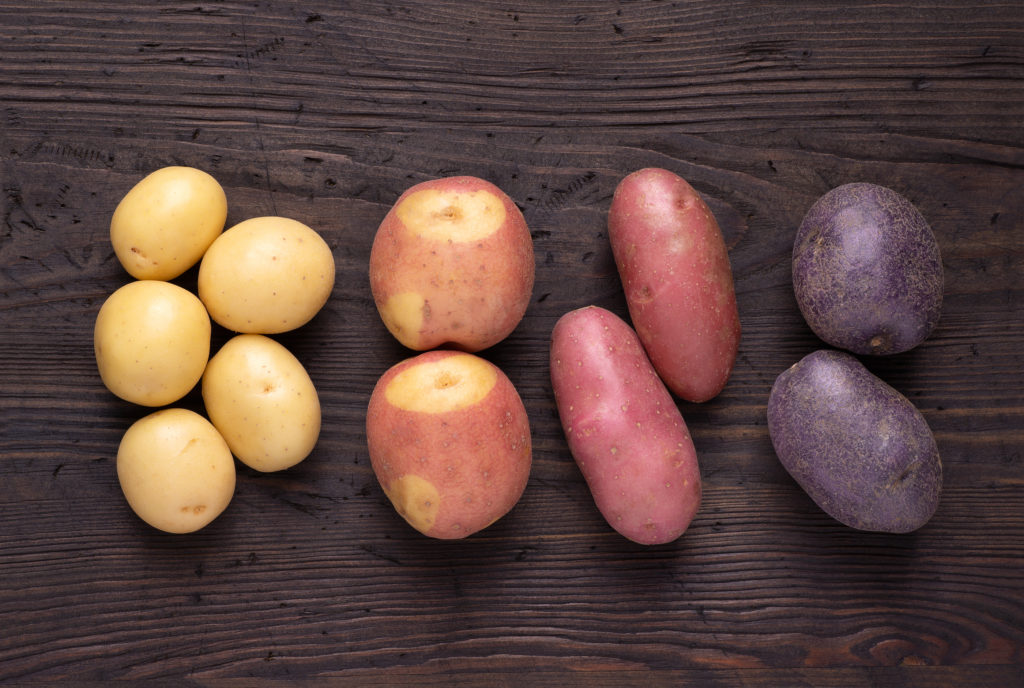
Selecting the right variety of potato is a crucial step in growing organic potatoes. The right variety will depend on the type of potato you wish to grow, the climate and soil conditions of your area, and the size of your garden. It is important to research the varieties of potatoes that do well in your region before planting.
When selecting the right variety of potato, it is important to consider the size of the harvest. Some varieties, such as small fingerling potatoes, are ideal for small gardens and will yield a relatively small harvest. On the other hand, larger russet potatoes can yield a much bigger harvest and can be grown in larger gardens.
Know What to Plant This Week
Every week I answer the gardener's most important question: what should I plant now? Get seasonal planting advice free — or go Pro for my full Soil Temperature Garden Report, with soil temperature, moisture, weather trends, and crop-by-crop recommendations.
Different varieties of potatoes also vary in their suitability for different uses. Some are ideal for boiling, others for baking, and some for roasting. For example, white-skinned potatoes are great for boiling and mashing, while russet potatoes are ideal for baking and roasting.
The climate and soil conditions of your area will also affect the type of potato you should select. Some varieties are better suited to cooler climates, while others thrive in warmer conditions. The soil pH and fertility of your area will also help determine the best variety for you.
Potatoes can be cooked and eaten in several ways. There are potato varieties suited for baking and others suited for steaming, roasting, frying, slicing, and mashing. Choose a potato variety suited for how you plan to use the potato in the kitchen.
Potatoes are often described as early, mid-season, and late. Early-season potatoes are ready about 60 days after planting; mid-season about 80 days after planting; and late 90 or more days after planting.
If you live in a cool, short-summer region, grow early potatoes. If your season is long, grow mid-season or late-season varieties.
Here are potato varieties to grow in a home garden:
- All Blue: midseason; use mashed, steamed, roasted, and in salads.
- Butte: early season; baking.
- Caribe: early season; drought tolerant; all-purpose use.
- Carola: late season; yellow flesh; all-purpose use.
- Cranberry Red: early- to midseason; use mashed, steamed, roasted, and in salads.
- French Fingerling: late season; use roasted, baked, and in salads.
- Katahdin: midseason; use French-fried, baked, mashed, or roasted.
- Purple Peruvian: late season; use roasted, baked, and in salads.
- Red Gold: midseason: all-purpose use.
- Red Norland: early season; use boiled, steamed, mashed, or in salads.
- Red Thumb: early season fingerling; roasting.
- Rose Finn Apple: late season; all-purpose use.
- Russian Banana: late season; use roasted, baked, or in salads.
- Yellow Finn: midseason; all-purpose use.
- Yukon Gold: early season; use boiled, mashed, or in a salad.
Step #2: Prepare the Soil
Potatoes grow best in loamy, airy, well-drained soil. Heavy clay soils and soggy soils are the least hospitable to potatoes. To prepare your potato bed, add plenty of aged compost and organic matter–leaves and grass clippings. Potatoes like highly acid soil–a pH of below 5.5 is optimal. (Acid soil discourages scab, a disease that causes the potato’s skin to pit.) If your potato patch has never grown potatoes before, a cover crop of quick-growing annual ryegrass can be planted the season before. Turn the ryegrass under at frost time–this is a “green manure” perfect for preparing your planting bed.
Soil temperature is important. Potatoes can go into the ground as soon as the soil temperature is at least 40°F, usually two to four weeks before the last expected frost. Potatoes very nearly stop growing when the daytime temperatures rise to greater than 80°F. In very warm summer regions, the potato harvest should be in before the hot weather arrives. In hot summer regions, plant potatoes in early autumn for harvest in mid-winter. Choose potato varieties with harvest times suited to your climate: early-, mid-, or late-season potatoes.
Step #3: Prepare Seed Potatoes
Use certified disease-free seed potatoes
Plant certified-disease-free seed potatoes. Small seed potatoes can be planted whole. Larger potatoes should be cut into pieces that have three or four “eyes”–recessed dormant buds–apiece. Cut the pieces into blocks about the size of a large ice cube. Larger seed pieces produce plants that will yield a large number of medium to small-size potatoes. Smaller seed pieces will produce fewer, but larger potatoes. (Each piece contains starch which will nourish the developing new plant.) Cure cut pieces by spreading them out in a warm, bright, airy place for a day or two, or until they are slightly dry and the cut areas have hardened or healed over. (If the soil is warm, you do not need to cure the seed pieces, you can plant them right away.)
Sprinkle sulfur on the seed potatoes
Some gardeners sprinkle sulfur powder on the seed pieces to prevent the pieces from rotting in the ground. This is particularly helpful in wet climates or where the garden stays damp. Sulfur powder can be purchased at the garden center or a drugstore.
Sprout the potatoes before planting
To harvest potatoes early you can force the eyes to sprout before planting the seed potatoes in the garden. To sprout seed potatoes before planting, spread them out in a single layer in a bright, airy place where the temperature will remain about 60°F or warmer. The potatoes will develop short, green sprouts–thus this process is called “greening.” When planting time comes carefully cut the potatoes into seed pieces without breaking the new sprouts.
Step #4: Plant the Potatoes
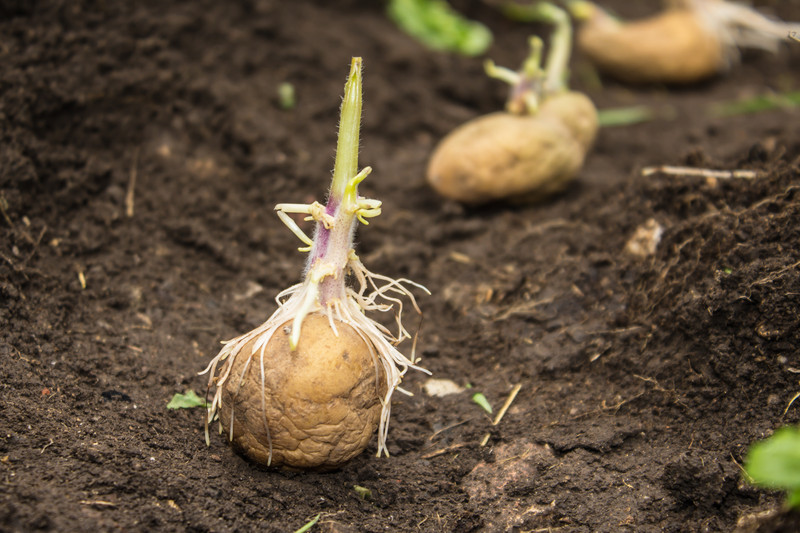
Grow potatoes from whole potatoes, small potatoes, or a cut piece of a larger potato. Potatoes grow from the dormant buds–called “eyes”–on the surface of other potatoes.
When the buds sprout, they develop into new plants. About two weeks after sprouting, the main stem and first leaves of the new potato plant will appear above ground.
Here are three ways to plant potatoes. Decide which one you want to use.
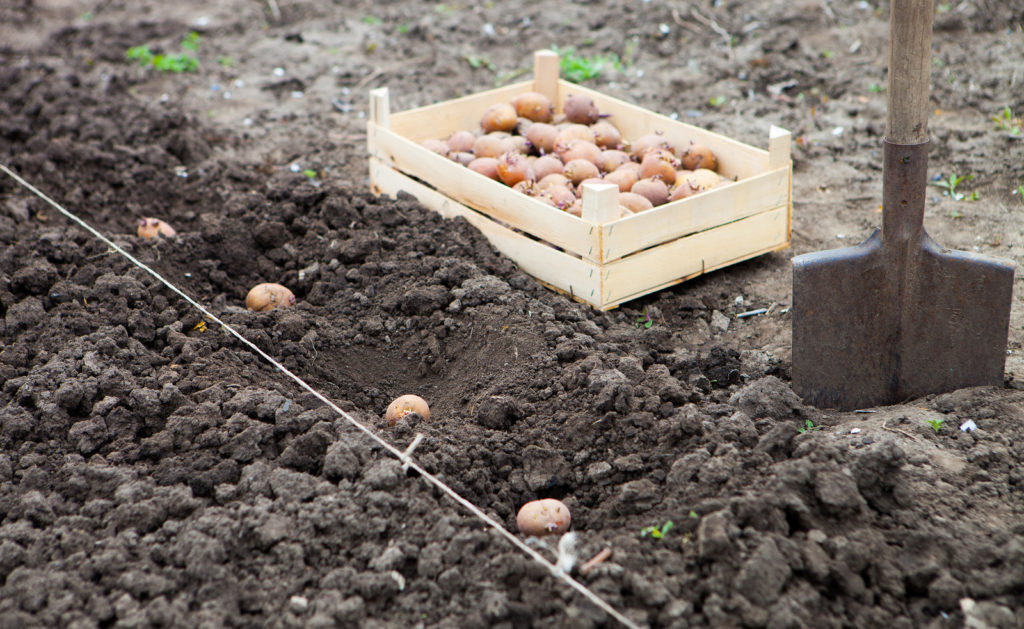
Trench planting
Plant seed potatoes in 4 to 6-inch-deep trenches or furrows. Space trenches 24 to 36 inches apart. Sow the seed potatoes cut side down every 10 to 12 inches; don’t plant seed potatoes too close or the yield will drop. Between each seed, potato put a half-handful of aged compost or 5-10-10 fertilizer–such as bulb food–into the trench. Cover the seed potatoes with 3 to 4 inches of soil and continue to keep the tubers covered as they grow.
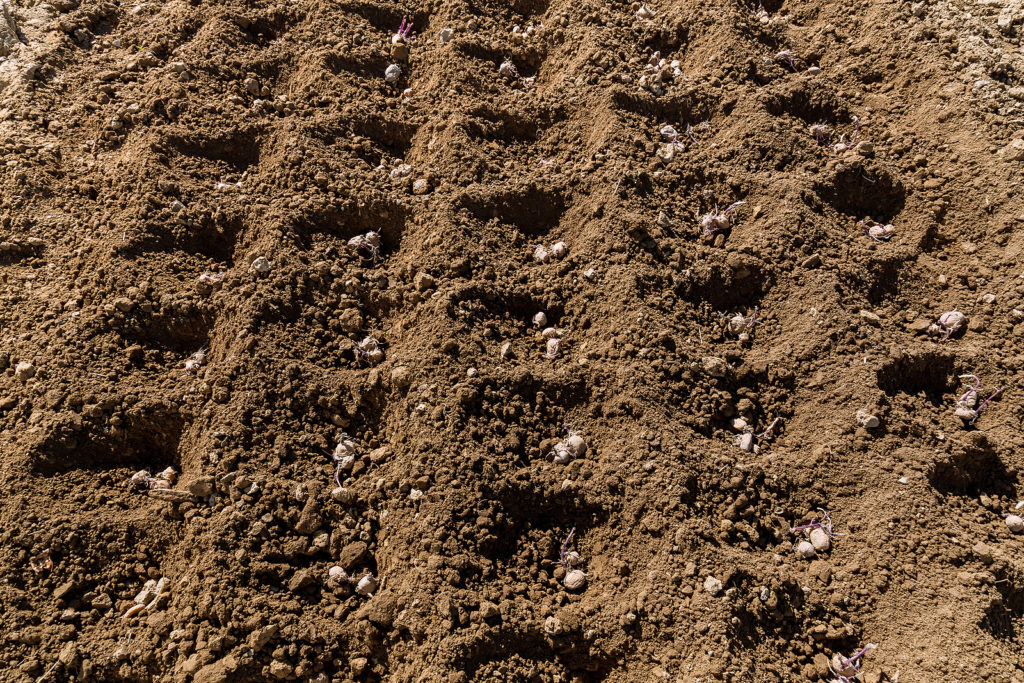
Surface planting:
Plant potatoes just below the soil surface. Turn or till the soil and sprinkle on compost or 5-10-10 fertilizer; rake the bed level. Plant seed potatoes about 10 inches apart in all directions; set the cut side of the seed potato on the planting bed and push it down until the top is even with the ground level. Cover the planting bed with 18 inches of mulch–straw, hay, and leaves. The potatoes will grow under the mulch.
Container planting
Plant potatoes in containers. Plant in containers or grow bags or line a bushel basket, large bucket, half wine or whiskey barrel, or garbage can (a container at least 18 inches deep) with plastic, punch holes in the bottom, and place a layer of stones or gravel at the bottom for drainage. Add 4 to 6 inches of potting mix to the bottom of the container and set the seed potatoes six to eight inches apart. Add another 2 to 4 inches of soil over the seed potatoes. As the plants grow add potting mix, straw, or compost–keep the plants covered except for the top leaves.
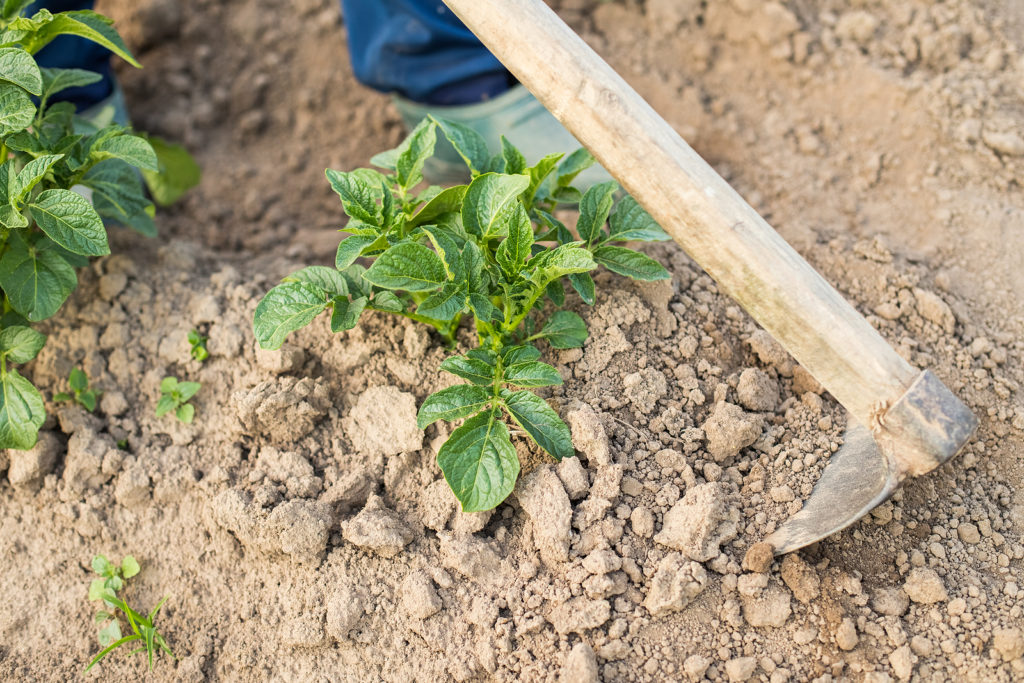
Step #5: Hill and Care for the Potatoes
Hilling potatoes
Keep the developing tubers covered. New potato tubers form above the buried seed piece or seed potato. To give the new potato tubers room to expand and grow, the soil should be mounded up around the stems of growing potato plants. This process is called “hilling.” Hilling should happen once or twice during the growing season. Use a hoe to draw the soil up around the stem of the growing potato plant–leave just the top leaves exposed. Hilling keeps the shoulders of new potatoes from poking up through the soil. The skins of exposed potato tubers turn green (called “greening”); green potatoes contain a bitter-tasting, slightly toxic substance called solanine. Hilling also keeps weeds from growing up around potatoes and it ensures that water does not sit on top of growing potatoes, but runs off the hills. Once the potato plants flower, stop hilling up the soil. Apply thick mulch to save water and fight weeds.
Watering potatoes
Keep the potato patch evenly moist but not soggy. Take special care to keep plants well-watered from six to ten weeks after planting as tubers are starting to develop. While potatoes demand well-drained soil, the development of the tuber is dependent on even watering throughout the season. Deep watering is the best practice; the soil should be moist eight to ten inches below the surface. Uneven watering will cause potato tubers to form knobby growths or crack. If the soil is dry, there will be little if any tuber growth.
Feeding potatoes
Fertilizing is also a key factor in growing healthy potatoes. Organic fertilizers, such as compost or well-rotted manure, are excellent choices for potato gardens. Use can also use a commercial time-release organic fertilizer such as 5-10-10. Apply the fertilizer in the spring, when the plants are emerging from the soil, and again when the plants are about 6 inches tall. As the potatoes grow, side-dress the soil with additional fertilizer to maintain steady growth. Avoid over-fertilizing potatoes or you may end up with fewer potatoes.
Watch for pests and diseases
Keep an eye out for Colorado potato beetles. The black and yellow striped beetles and their larvae can defoliate potato plants. Pick off beetles, and larvae, and crush the small, yellow eggs that may be found on the undersides of leaves. Potatoes can suffer from a disease called late blight resulting in soggy, brown leaves. Using certified seed potatoes and disease-resistant varieties should keep diseases away from your potato plants.
Step #6: Harvest the Potatoes
Harvesting Potatoes
The potato harvest can begin seven to eight weeks after planting when the plant begins to blossom. Potatoes harvested at this time are called “new potatoes”—these tubers are small. Full-size tubers can be harvested when the plant begins to wither and turn brown. The number of days to harvest mature potatoes depends on the variety you grow.
Potatoes are often described as early, mid-season, and late. Early-season potatoes are ready about 60 days after planting; mid-season about 80 days after planting; and late 90 or more days after planting.
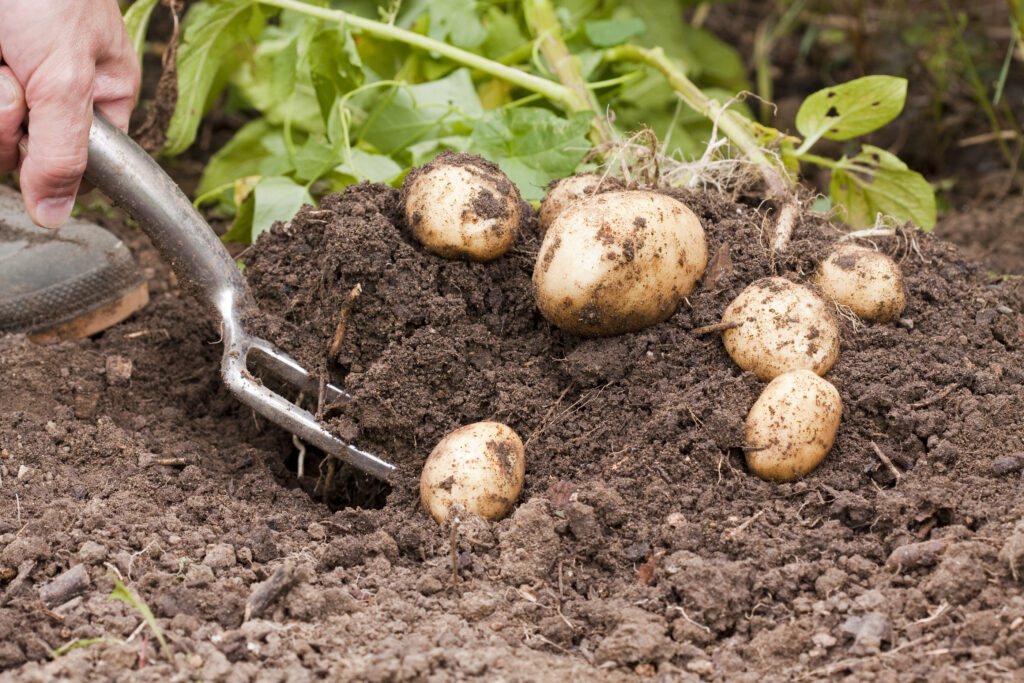
When flowers open, harvest “new” potatoes. Use your hands to pull aside the hilled-up earth around the base of the plants and gently pluck out the new small, round, smooth tubers. Once the top foliage starts to wither and die back potato tubers are full-grown. Mature tubers can be lifted with a multi-pronged garden fork. If the weather is not too warm or wet, full-grown tubers will keep in the ground for several weeks. But, be sure to get your crop up before the first frost. Don’t let freshly dug potatoes sit in the sun for too long–not more than an hour or two. A cloudy day after a period of little or no rain is ideal for potato harvesting. Nicked or bruised potatoes won’t store well, so eat them first.
Harvest potatoes when the soil is dry—to avoid compacting the soil as you work in the garden. Use a spading fork to lift the tubers; lift from a foot to a foot and a half or more away from the plant to avoid injuring the tubers—loosen the soil and lift. Let tubers air dry for a couple of weeks to toughen the skin and then brush away any excess soil before you store them. Any potatoes with damaged skins should be used right away; they will rot if you try to store them.
Storing Potatoes
After freshly dug potatoes have set and dried for an hour, dust away any soil left on them and put them into a dark place for storage. Keep them at temperatures around 55° to 60°F. Let them cure for two weeks; this will allow cuts and bruises to heal. Once cured store potatoes at 35° to 40°F in a well-ventilated basement or root cellar. If the storage temperatures are higher, the tubers may sprout and shrivel. Store potatoes where they get plenty of air circulation. Don’t pile them higher than six to eight inches. Remember not to expose stored potatoes to light; the skin will start to green.
Potato Growing Hub
Start here: The Ultimate Potato Growing Guide: From Seed to Harvest
🥔 Varieties & Planting Prep
- Best Potato Varieties for Different Cooking Uses – Detailed profiles on varieties for boiling, baking, mashing, and roasting.
- Guide to Fingerling Potatoes: Growing, Cooking, and Varieties – Spotlight on fingerlings with care tips and culinary uses.
- How to Prepare and Cut Seed Potatoes for Planting – Step-by-step guide to maximize yield and reduce disease risk.
- Seed Potato Starting Tips – Ready your seed potatoes and plant
🌱 Planting & Early Growth
- How to Grow Potatoes in Containers: A Complete Guide – Soil, container size, watering, and harvesting tips for small-space growers.
- Grow Potatoes in Pots and Grow Bags: Seven Easy Steps
- 6 Easy Steps to Grow Organic Potatoes
- Companion Planting with Potatoes: What to Grow Together and Avoid – Maximize garden health and productivity through smart companion planting.
- Growing Potatoes in Mild Winter and Tropical Climates – Specific tips for successful potato cultivation in warmer regions.
- How to Identify Potato Growth Stages and Troubleshoot Problems – Recognize each growth phase and manage issues at every stage.
🌿 Care & Maintenance
- How and When to Hill Potatoes for Bigger Yields – Detailed instructions and timing for hilling to support tuber development.
- Watering Potatoes: Best Practices for Healthy Growth – Provide consistent moisture without risking rot or stress.
- Common Potato Pests, Disease, and Problems: Organic Solutions – Identification and natural control strategies for common pests.
- Crop Rotation Strategies for Potatoes to Prevent Soil-Borne Diseases – Plan your garden for long-term soil health and disease prevention.
🧺 Harvest & Storage
- Harvesting Potatoes: Signs of Maturity and Techniques to Avoid Damage – Know when potatoes are ready and how to harvest carefully.
- How to Harvest and Stoe Potatoes – Ideal temperature, humidity, and storage environments to keep potatoes fresh.
🍽️ Cooking & Kitchen Insights
- Testing Potato Starch Levels: Why It Matters and How to Do It – Understand starch content to choose the right potato for each dish.
- Seven Ways to Cook and Serve Potatoes – Easy ways to serve your potato harvest.
- How to Cook New Potatoes with No Recipe – Here’s how to get those little spuds on the table fast.
Potato articles at Harvest to Table:
How to Plant and Grow Potatoes
6 Easy Steps to Grow Organic Potatoes
Grow Potatoes in Pots and Grow Bags: Seven Easy Steps
Seven Ways to Cook and Serve Potatoes
How to Cook New Potatoes with No Recipe
How to Make Seasonal and Flavorful Potato Salad
Yellow Potato Side Dish and Soup
Ham, Potato, and Cheese Gratin
Potato Growing Problems Troubleshooting
Colorado Potato Beetle Organic Pest Control
Garden Planning Books at Amazon: