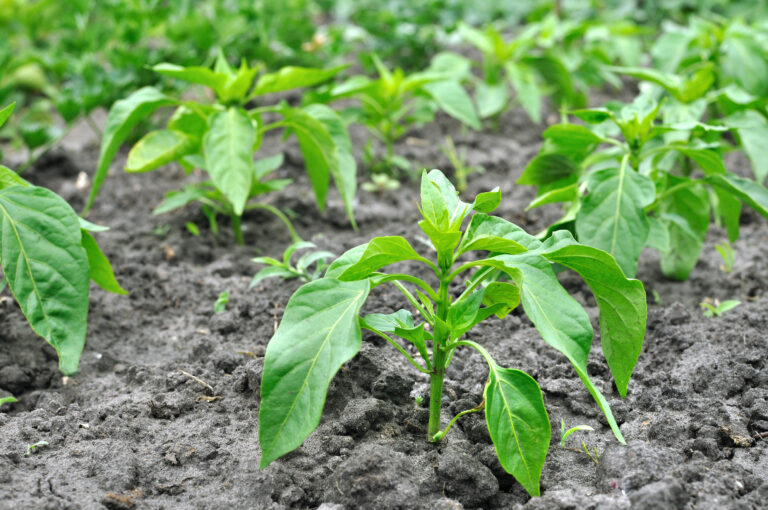
Learn how to grow tomatoes in the ground, in raised beds, and in containers. From seedling to harvest, tomato plants require care. Now let’s start the port by understanding the tomatoes in more depth.
The tomato is native to semi-tropical western South America. Tomatoes are warm-season annuals. To grow strong and healthy and to bear fruit, tomatoes require sun, warm air and soil temperatures, and rich, loamy, evenly moist soil.
Tomatoes grow best when the soil temperature is at least 55°F (12°C) and the air temperature ranges between 65° and 90°F (18-32°C).
Here is your complete guide to growing tomatoes.
Tomato growing quick tips
- Tomatoes are commonly grown from seedlings started indoors that are later transplanted into the garden.
- Tomato seeds are commonly planted indoors as early as 8 to 6 weeks before the average date of the last spring frost.
- Tomato seedlings are usually transplanted into the garden 1 to 3 weeks after the last frost. If an unexpected frost threatens, transplants must be covered and protected.
- Early-season tomatoes require 50 to 60 days to reach harvest from transplanting; mid-season tomatoes require 60 to 80 days; late-season tomatoes require 80 or more days.
- In hot summer-mild winter regions such as USDA zone 10 or warmer, tomatoes can be grown as a fall and winter crop.
Related articles:
- Nine Ways to Cook and Serve Tomatoes
- How to Harvest and Store Tomatoes
- Tomato Varieties Harvest Time
- Tomato Seed Starting Tips
- Growing Tomatoes in Containers
- How to Prune Tomatoes
- Grow Tomatoes on Stakes
- How to Choose a Tomato for Your Garden
- Tomato Growing Problems Troubleshooting
- How to Prevent Tomato Blossom Drop
- How to Ripen Tomatoes
- How to Identify Early Blight, Late Blight, and Leaf Spot
- Tomato Hornworm Organic Pest Control
- How to Plant and Grow Tomatoes
Types of tomatoes
Bush and dwarf tomatoes
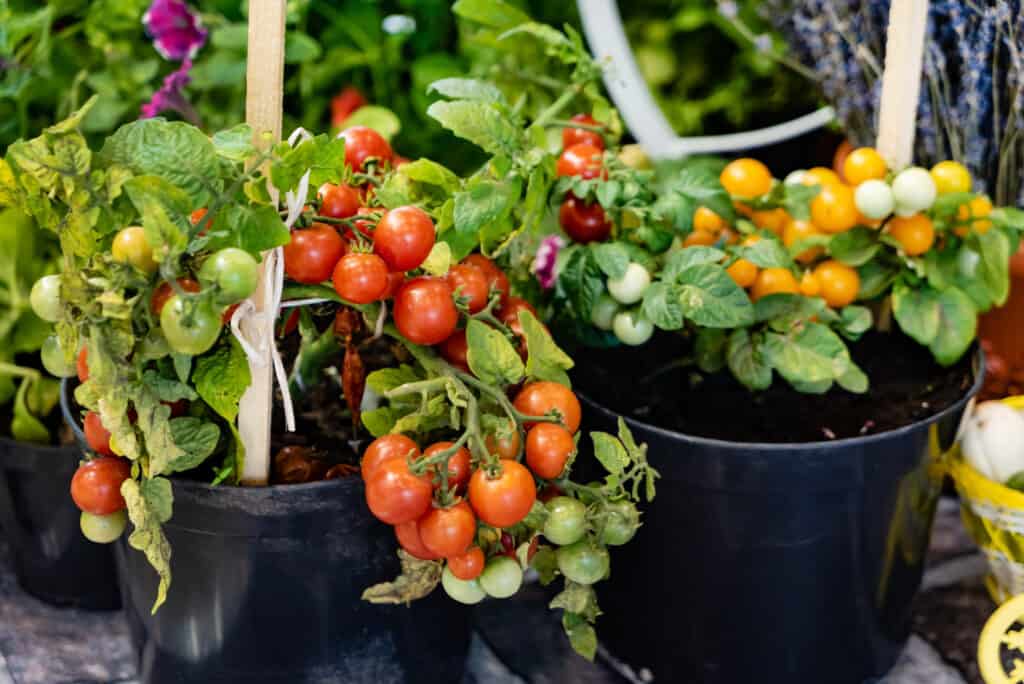
- Bush or determinate tomatoes grow from 2 to 4 feet (.6-1.2m) tall. Dwarf tomatoes grow to about 2 feet (.6m) tall.
- Bush or determinate tomato varieties and dwarf varieties require the least amount of space.
- They can be grown in a small-sized garden requiring just a square foot or two of space or in a container with just 2 to three 3 square feet (.9m) of soil.
- When the determinate tomato flowers the plant stops growing. Flowers and fruits appear at the end of stems.
- The fruit grows and ripens usually all at once over a four- to six-week period.
Vining tomatoes
- Vining or indeterminate tomatoes can grow 6 feet tall (1.8m) or more.
- Indeterminate tomatoes require 3 to 4 square feet of space.
- Vining tomatoes produce a succession of flowers along the branching spurs; fruit forms from those blossoms.
- Indeterminate tomatoes will grow almost indefinitely if not pruned or stopped by frost.
- Most indeterminate tomato varieties require staking or caging.
- Vining tomatoes can be left to sprawl on the ground but fruit may become susceptible to diseases and be more difficult to find and pick at harvest time.
Other tomato classifications
- Fruit size and shape: Besides being bush or vine-like, tomatoes are further classified by the size and shape of their fruit: currant (the smallest), cherry, plum, pear, heart-shaped, oblong, oblate, round, and large or beefsteak.
- Color: Tomatoes are also classified by their color: red, pink, orange, yellow, cream, white, green, purple, brown, black, zebra-striped, and swirled multi-colors.
Tomato varieties
There are more than 1,000 tomato varieties, but there are just three major tomato categories based on use: cherry or miniature, cooking, and slicing and eating:
• Cherry or miniature: smallest ranging in size from ¾–1½ inches (1.9–3.8 cm) in diameter and in hues of red, yellow, and zebra-stripe green. Use in salads or for snacking. Popular varieties include: ‘Sweet 100 Plus’, ‘Sun Gold’, ‘Matt’s Wild Cherry’.
• Cooking: usually oblong or pear-shaped, with meatier, less juicy flesh than the eating varieties; sweeter flavor; generally ripen at the same time providing quantities for canning and sauces. Well-known varieties include: ‘Juliet’, ‘Tuscany’, ‘Milano’, ‘Amish Paste’, and ‘San Remo’.
• Slicing and eating: generally the largest, juiciest, most flavorful tomatoes. They come in both early-season and longer-developing varieties; those with longer growth periods have enhanced taste and texture. Popular varieties include: ‘Celebrity’, ‘Big Beef’, ‘Big Boy’, and ‘Better Boy’.
When to plant tomatoes
Tomato seedlings are tender and easily fall prey to disease, pests, and unpredictable changes in weather. Starting tomato seeds indoors is a good strategy. Sow tomato seeds in a seed-starting mix 6 to 8 weeks before you plan to transplant them into the garden. Transplant tomato plants into the garden after the last frost in your area. Check with a nearby garden center for the average last frost date in your area and then count back 6 weeks—that’s a safe time to sow tomato seeds indoors.
- Tomatoes need 3 to 4 months of warm, clear, fairly dry weather to produce the best.
- Set 8 to 10-week-old tomato seedlings in the garden two weeks after the last frost in spring. If transplanted sooner, tomatoes must be protected from cold temperatures with hot caps or plastic tunnels.
- Tomatoes need consistent night temperatures between 55°F and 75°F to set fruit. (A few varieties will set fruit at lower or higher temperatures.)
- Later in the season, the fruit will not color properly when night temperatures stay above 85°F, and plants will quit growing when temperatures go above 95°F.
Starting tomato seeds indoors
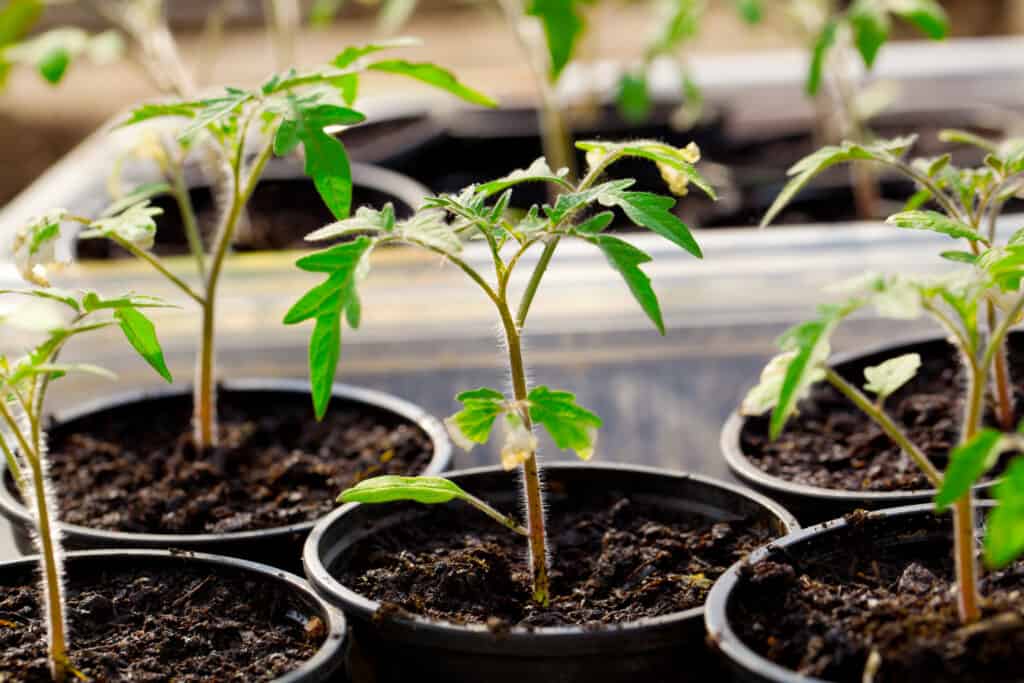
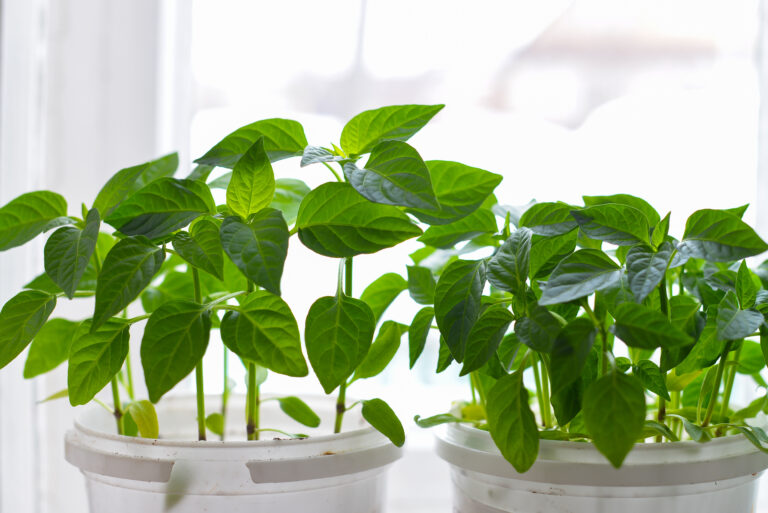
Sow two tomato seeds per pot; that way you will hedge your bet. Tomato seeds germinate at 75°F; you can use an electric seed starting mat to regulate the temperature or set your seed trays atop the refrigerator. Once the seeds are up, don’t let the temperature fall below 60°F. If both seeds emerge, use little scissors to clip away the weaker of the two once both plants have a couple of leaves. Now let your seedlings grow on for a week or two.
- Start tomato seeds indoors about 6 to 8 weeks before the last frost in spring. (Transplant tomato seedlings to the garden just after the last frost in spring.)
- Sow tomatoes in individual pots with a light potting mix. Pots should have drain holes in the bottom.
- Sow two to three seeds ½ inch deep and 1 inch (2.5 cm) apart in a small pot or flat.
- Germination soil temperature can range between 65-86°F (18-30°C); the optimum soil temperature for germinating seed is 86°F (30°C).
- Seeds can be started in a bright window or under fluorescent lights set about 2 inches (5 cm) above the plants.
- Keep seed starting mix just moist until seeds germinate.
- Germination takes 5 to 7 days at 75°F (24°C) or warmer.
- Clip away the weaker seedlings once the strongest seedling is about 2 inches (5 cm) tall.
- Grow young seedlings at 60° to 70°F (15-21°C); allow a gentle breeze from a fan to rustle over young seedlings each day so that they grow strong stems.
- About two weeks after germination seedlings can be transferred to larger 4-inch (10cm) pots; be careful not to disturb the roots. This is called potting up.
- More seed starting tips at Tomato Seed Starting Tips.
- Don’t let tomato seedlings grow on in small pots too long; they will become rootbound and stunted. Pot up if you can’t get them in the garden before they grow taller than 6 inches.
Potting up tomatoes
As your seedlings grow larger, you will likely need to give them more room for root growth. “Potting-up” means transplanting seedlings from a smaller container to the next larger container—the next deeper container. When you repot, set the seedling stems deeper than they were growing before—so the first set of leaves is just above the soil surface (you are actually burying most of the stem). New roots will grow from the buried stem and that will make for a stronger plant.
Potting up is the process of re-planting tomato seedlings that are not yet ready for the garden into larger pots. Potting up (also called potting on) allows plants to continue their steady growth until they are strong enough to withstand outdoor growing conditions.
Potting up allows for the development of strong roots and because a tomato plant can be re-potted up to its uppermost leaves, it also prevents plants from growing too leggy and accidentally snapping when moved.
Tomato seeds are commonly started indoors 6 to 8 weeks before they are transplanted into the garden.
Tomato seedlings are usually potted up about 10 days after they have sprouted—potted up from seed starting tray into a small pot, and again in another 10 days when they are about 6 to 8 inches tall—from a small pot, 4-inch container, or quart container. At potting up time, multiple plants in a container should be thinned to the strongest single plant for growing on.
Plants in quart containers can be potted up a second or third time into half-gallon or gallon containers if air and soil temperatures in the garden are not yet warm enough for tomato plants. (Tomato plants grow best when the soil and air temperatures are 65°F or greater.)
Potting up tomato seedlings–from 2-inch soil blocks to 4-inch pots and on to 6-inch pots–before transplanting to the garden will allow for larger and stronger roots: the stronger the roots, the stronger the plant.
Steps to pot up tomatoes
- Water the plants in advance and allow the soil to drain.
- Place the soil mix in the bottom of the new pot; tap the pot a couple of times to settle the soil mix.
- Snap off any leaves along the stem except for the top two sets. Simply start at soil level and work your way up the stem using your thumb and forefinger to pinch or snap away any small branches or leaves. Tomatoes grow rapidly; pinching early on will allow the plant to direct its energy to root development and away from top growth.
- Re-pot (transplant) the tomato to the larger container that will hold the plant from the bottom roots all the way to just below the topmost leaves. (A quart milk carton will work well if you are potting up from a 4-inch pot.)
- Fill the new container with soil mix and firm the soil in so that the root clump and stem make good contact with the soil mix. Give the soil a gentle watering so that the soil mix is moist but not soggy.
- Place the plant back in a bright window or greenhouse. Shelter the plant from direct sun for a day or two. As plants grow in breadth, move the pots apart so that there is good air circulation and little opportunity for disease to set in.
New roots will develop along the now-buried stem where the leaves once grew.
When to plant tomatoes in the garden
Don’t rush the growing season by putting tomatoes in the garden too soon. Nighttime temperatures below 55°F can cause blossoms to drop and prevent fruit from setting. If temperatures are going to dip, you need to protect young tomatoes with cloches or plastic tunnels. (Always plant tomatoes in your garden’s warmest spot. If your garden temperatures run cool, plant tomatoes near a south or west-facing fence or wall. The heat taken up by the wall during the day will warm your tomato plants by night.)
Planting time in short-season climates. If you live in a region where the growing season is short, choose extra-hardy, early-maturing tomato varieties.
Selecting garden center seedlings
Tomato seedlings can be purchased at garden centers. Select plants 6 to 8 weeks old, usually in a 4-inch (10 cm) pot. Check the bottom of the pot to make sure roots are not growing through and the plant is not root bound. The best seedlings are short bushy plants with dark foliage and no flowers.
Transplanting tomato seedlings to the garden
Tomato plants can be transplanted into the garden once the garden soil temperature has reached 60°F; that will be about 2 weeks before the last spring frost date. A week before you plan to transplant your tomatoes into the garden set them outdoors for an hour each day, then two, then three. Over the course of several days, you will expose the plants to outdoor conditions; this is called “hardening off” – which means preparing plants for their life outdoors.
Tomato seedlings that have 5 to 7 true leaves are ready for planting out in the garden—but be sure the garden soil temperature is greater than 50 degrees F. If the soil is chilly, warm it by placing black plastic sheeting over the planting row. Cut an X in the plastic to set seedlings in the soil.
Set out tomato seedlings in midafternoon after the air and soil have warmed for the day. Seedlings set out on cold mornings are more susceptible to chilling injury—their metabolic reserves have been depleted overnight.
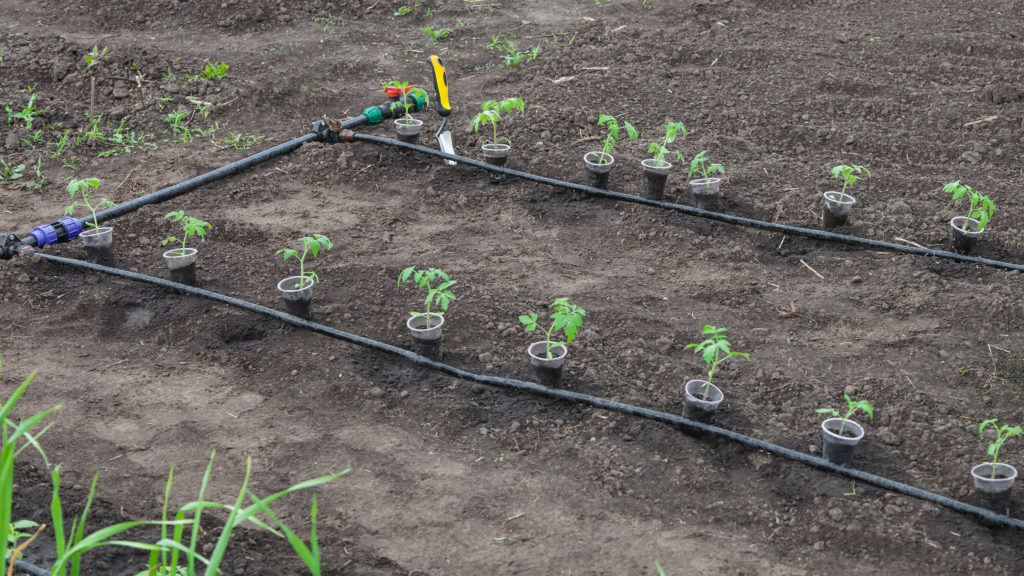
Transplant tomato seedlings 12 to 24 inches (30–60 cm) apart for a determinate or bush variety and 24 to 36 inches (60–90 cm) apart for indeterminate or climbing varieties. Place tomatoes into a 6-inch (15 cm) hole, allowing 4 inches (10 cm) of the plant to remain above the soil. Clip off leaves below the soil line. The plant will form added roots on the buried stem.
Plant tomato seedlings deeply—you can nip off all but two or three branches and bury the rest of the stem. If the soil is cold, lay most of the stem on its side in a shallow trench; this will create a strong root system. Mulch with aged compost around tomato plants once the soil has warmed.
Add a few pinches of Epsom salts in the planting hole. Epsom salts are rich in magnesium which is important for strong cell growth.
- Garden soil is usually warm enough for tomato transplants about 2 to 3 weeks after the last frost in spring.
- Tomato seedlings can be transplanted into the garden when the outdoor soil temperature is at least 55°F (13°C) and the nighttime air temperatures are consistently 50°F (10°C) or warmer.
- Set young plants out protected from direct sun during the day for two weeks to harden off and acclimatize before transplanting. This is called hardening off.
- Plants will not thrive in temperatures cooler than 50°F (10°C). If an unexpected frost threatens, transplants must be covered and protected.
- Set a tomato transplant into the garden deeper than it was growing in its pot. Remove the lower leaves on the stem up to the top two sets of leaves. Bury the stem up to the top two sets of leaves. New roots will grow on the buried stem. Burying stems at transplanting will make for sturdier plants.
- Water newly transplanted seedlings. Give transplants a B-1 solution to guard against transplant shock.
Protecting transplants
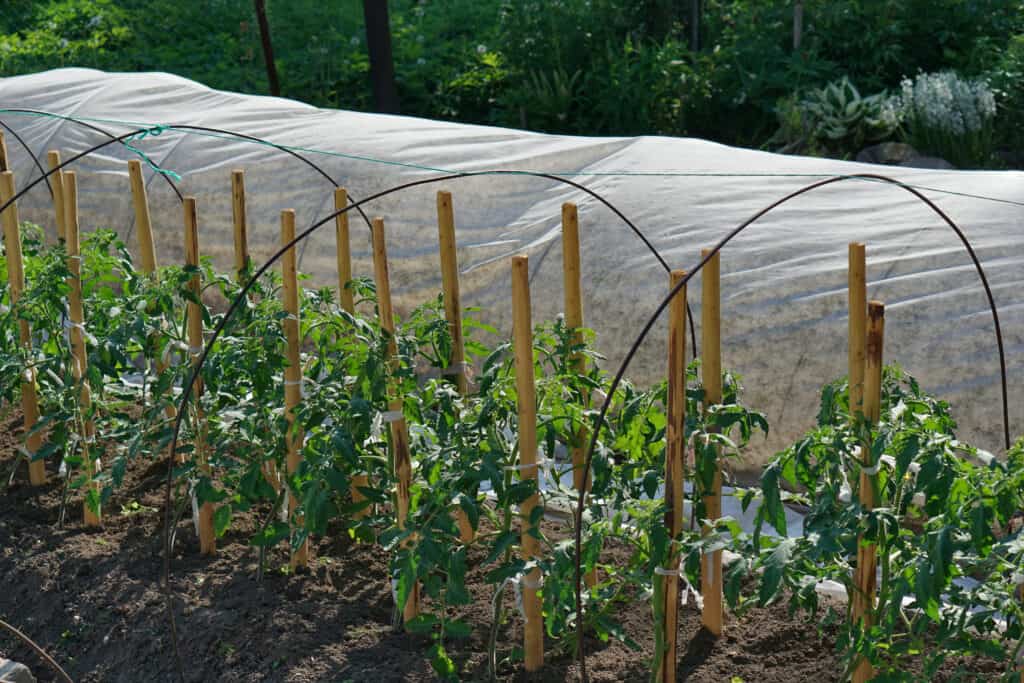
If the weather is unpredictable, wrap plastic sheeting around each tomato cage once plants are in the garden; this will protect young plants from drying winds and cool night temperatures. Once temperatures stabilize—and night temperatures do not dip below 55°F—you can remove the plastic wrap to avoid overheating.
Trenching tomato seedlings
Tomato seedlings can be transplanted into the garden using a planting method called trenching.
When transplanting, lay the tomato plant on its side in a trench as long as the seedling is. Bury the stem vertically or horizontally (called “trenching”) so that only the top two leaves show. Strip off the leaves below the top two; new roots will grow all along the buried stem, strengthening the plant. To head off blossom-end rot, put half a handful of lime, ground oyster shells, or crushed eggshells at the bottom of your planting hole. The calcium will help build strong cell walls once your tomatoes start fruiting. For strong plants, add a handful of aged compost and half a handful of bone meal to the bottom of the hole as well.
Where to plant tomatoes
Plant tomatoes in full sun. In cool regions, plant tomatoes near a wall or the side of a house or building that faces west or south. The wall will soak up the day’s heat and release it at night keeping tomatoes warm.
- Grow tomatoes in full sun, at least 8 hours of sun each day.
- Prepare planting beds by adding 2 to 4 inches (5-10cm) of aged compost or commercial organic planting mix before transplanting. Turn the soil to at least 12 inches (30cm) deep before planting.
- Tomatoes require warm, well-drained but moisture-retentive soil rich in organic matter. Tomatoes will produce earlier in light, sandy soil, but the yield will be greater in loamy soil.
- Tomatoes prefer a soil pH of 5.5 to 6.8.
- Planted in containers tomatoes require the most soil you can provide–a large container–and good drainage.
Sunlight for tomatoes
Tomatoes require sun; plant tomatoes where they will get at least 6 hours of sun each day.
- Less Sun. If your garden, gets less sun—as little as 4 hours each day, plant early-season or determinate varieties such as ‘Early Girl’, ‘Oregon Spring’, or ‘Stupice’; these cultivars were bred for regions with short seasons, cool climates, and cloud cover.
- Too Much Sun or Heat. If you live where summers are long and hot—common in southern gardens, plant tomatoes where they get morning or late afternoon sun and are protected from excessive mid-day sun and heat. Shade cloth attached to a frame directly over your crop can protect tomatoes from mid-day heat and sun. Where the growing season is long, plant one crop in spring and the second crop in early summer—that way your tomatoes will not mature in the extreme heat of summer; sunburn can easily ruin an otherwise great tomato crop.
Garden soil
Tomatoes prefer light, loose, fertile, well-drained soil with plenty of organic matter or compost added. Add a handful of bone meal to each planting hole. If you live in a cool region, warm the soil by placing black plastic on the bed a few weeks before planting.
Tomatoes thrive in average soil that is well-draining (meaning water does not sit on the soil surface for long after rain or irrigation). If the soil drains slowly, add planting mix or compost to the garden or plant tomatoes in raised beds. Loosen the soil to at least 1 foot deep—the length of a shovel blade to help the roots grow down deep. To get a bumper crop, add a couple of shovelfuls of aged compost to the bottom of each hole when you plant.
Pre-warm the soil
Tomatoes thrive in warm soil. Two weeks before transplanting tomatoes to the garden, cover the planting bed with black plastic—which will store solar heat in the soil. Raised beds or mounded beds also warm more quickly in spring than in-ground beds. When your garden soil has reached 60°F, you can transplant tomatoes into the garden.
Spacing tomatoes in the garden
Set tomato plants at least 3 feet apart, 4 feet is better, if you are going to allow them to sprawl without caging or staking. Caged or staked tomatoes can be planted slightly closer. The closer you set tomato plants the more pruning you will need to do as the season progresses. If you tend to let tomatoes go, if you don’t manage their growth every week—then give them more room. Tomato plants do best when they get plenty of sun and fresh air, and it will be easier to harvest the fruit.
- Plant bush tomato varieties 24 inches (61cm) apart. Plant vining varieties 36 to 48 inches (91-122cm) apart.
Planting tomatoes for a long harvest
At planting time, plant several tomato varieties with differing maturity dates. Plant early harvest, midseason harvest, and late season varieties all at the same time. You will have a continuous harvest without the succession of plantings.
Tomato companion plants
Grow tomatoes close to basil, chives, asparagus, carrots, marigolds, nasturtiums, onions, and parsley. These are tomato companion plants. These plants will repel insects that attack tomatoes.
The notion behind companion planting is that some plants naturally grow better together, and that they form natural alliances. How such alliances work is not completely clear; companion planting is based widely on reported observation.
Tomato companion plants—said to ward off disease, encourage growth, and improve flavor–are carrots, leaf lettuce, nasturtiums, parsley, onions, chives, and marigolds. Conversely, poor tomato-growing companions are cabbage, fennel, potatoes, and kohlrabi.
Some plants grown as companions seem to discourage pests and disease; some seem to encourage growth and flavor. Others act to balance the soil.
One plant may be a good companion to another because it does not draw heavily on soil nutrients that the other favors. One plant may be a good companion because it more readily attracts insects that otherwise might attack the other.
Interplanting often goes hand-in-hand with companion planting. For example, a shallow-rooted plant such as leaf lettuce is an excellent companion when it is interplanted with a more deeply and complex-rooted tomato.
Here are some other good companions: to benefit carrots grow onions; to benefit collards grow tomatoes; to benefit corn grow beans; to benefit cucumbers grow broccoli; to benefit potatoes grow tansy; and to benefit tomatoes grow dandelion.
And here are some poor companions: growing beans avoid chives, garlic, leeks, onion, and shallots; growing beets avoid pole beans; growing cabbage family crops avoid kohlrabi and pole beans; growing carrots avoid dill; growing corn avoid tomatoes; growing cucumbers avoid potatoes and sage; growing onions avoid beans, peas, and sage; growing peas avoid chives, garlic, leeks, onions, and shallots; growing potatoes avoid cucumbers, squash, and tomatoes; and growing tomatoes avoid corn, dill, kohlrabi, and potatoes.
Garden Planning Books at Amazon:
- Vegetable Garden Almanac & Planner
- Kitchen Garden Grower’s Guide Vegetable Encyclopedia
- Tomato Grower’s Answer Book
- Vegetable Garden Grower’s Guide
Container growing tomatoes
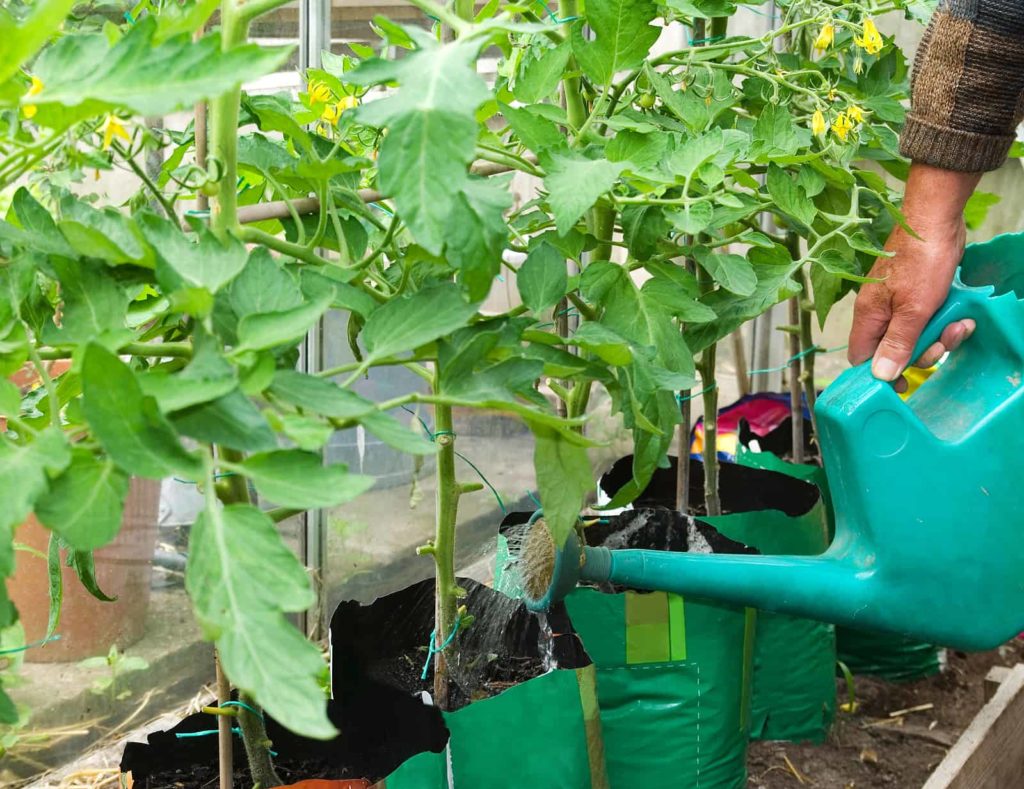
Tomatoes can be grown in containers indoors year-round. Minimum container depth should be 12–18 inches (31-45 cm) deep and just as wide Indoors use ultraviolet “grow lights” to promote flowering and fruiting—tomatoes require a minimum of 6 equivalent full-sun hours per day. For container plants, install a cage at the time of planting to support the plants’ foliage and fruits.
- Small determinate varieties are easily grown in 5-gallon (19 liters) containers. Grow indeterminate tomatoes in 10 to 15-gallon (38-57 liter) containers.
- Place the container where tomatoes get 8 hours of sunlight each day.
- Provide a stake, cage, or trellis for support at planting to avoid the risk of damaging the growing root later on.
- Keep the soil evenly moist. The soil in containers can dry quickly in hot weather.
- Move tomatoes in containers indoors if frost threatens. Tomatoes can be grown in containers through the winter indoors.
More tips on growing tomatoes in containers: Growing Tomatoes in Containers.
Watering tomatoes
Tomatoes require even watering. Never let the soil completely dry out. A deep soaking once a week is better than several light waterings. A good gauge is to give each tomato plant between 1 and 2 inches of water each week. An inch of water means covering a square foot with 1 inch of water. That requires a bit more than a half gallon of water. An inch of water for a garden bed that is 4 feet by 8 feet is about 20 gallons per week.
- Tomatoes require regular even watering. Keep the soil moist but not wet.
- Water deeply. Water thoroughly before the soil dries out.
- Water at the base of the stem; avoid wetting leaves.
- Leaves may curl on hot days; this is a way for plants to conserve moisture and is not necessarily a sign of distress. If leaves wilt in the morning, tomatoes need an immediate slow, deep watering.
- Mulch with straw or aged compost around plants to prevent soil moisture evaporation.
- Keep the soil evenly moist–not too wet and not too dry. Too much water will drown the plants; too little water will stop fruit production.
- Test soil moisture by sticking your finger into the soil–if it comes out dry, it’s time to water; if it comes out wet, hold off.
- During periods of drought deep-water tomatoes once a week and slow soil moisture evaporation by mulching with aged compost or straw.
- A constant, even supply of water can prevent blossom end rot, but too much water will cause it.
Feeding tomatoes
Tomatoes are medium to heavy feeders. A 2-inch layer of compost or composted manure should be spread across each square foot of the tomato patch twice a year, once in fall and again in spring two weeks before planting. Liquid seaweed which is high in phosphorus–the element essential for fruiting–can be given once a week. Side-dress plants with compost at flowering time. When fruits appear, use manure tea every 10 days until harvest.
Tomatoes require a moderate amount of nitrogen and ample amounts of phosphorus and potassium. Abundant soil phosphorus is important for early high yields. Too much nitrogen will encourage leaf growth, but not flowers and fruit or soft fruit susceptible to rot. Once the plants are well established and in full blossom, feed your tomatoes with a weak compost tea or fish emulsion every 2 weeks from the first blossoms set until the end of harvest.
- Foliar-feed (spray the leaves of your plants) every 2 weeks with liquid kelp or compost tea. Avoid feeding tomatoes too much nitrogen—you won’t get the fruit you want. Hold off on feeding once plants begin to flower.
- Side dress tomatoes with dilute fish emulsion or kelp meal every 3 to 4 weeks. Add aged compost around plants at midseason.
- Blossom-end rot can be the result of uneven watering or a lack of calcium in the soil. Crushed eggshells added to spot watering every two weeks can provide the calcium needed.
- Compost tea applied every two weeks will provide nitrogen and other nutrients needed.
- Prepare the tomato-growing bed with well-rotted garden compost and a trowelful of aged manure added to the soil where each plant will grow.
- Add a trowelful of bone meal into the bottom of each hole–the extra phosphorus will speed ripening.
- Too much nitrogen will give you abundant foliage but delay ripening.
- Sprinkle additional nitrogen around each plant when the top leaves turn yellow or the stem turns deep purple.
- Fish emulsion you can find at the garden center. Compost tea is easily prepared: place a handful of compost in an old gym sock, tie off the sock, and place it in a container of water until the water turns the color of tea. Your compost tea is ready; it will contain all of the major and minor nutrients found in compost.
Tomato plant fertilizers
- A complete organic fertilizer 5-10-10 or 10-10-10 is a good alternative to compost tea or fish emulsion. (A cupful of fertilizer–about a half pound should be enough for 10 plants.) Avoid high-nitrogen fertilizers such as urea or ammonium sulfate which will produce tall green plants with little or no fruit.
Side-dressing tomatoes
- Side-dressing is easily accomplished: place the fertilizer in a one-inch-deep circular furrow around each plant. The furrow should be 3 or 4 inches away from the stem. Cover the fertilizer with 1 or 2 inches of soil and allow the rain or irrigation to carry the nutrients down into the root zone.
- Phosphorus is the most important tomato nutrient. Phosphorus supports root and fruit growth and contributes to good yields and early harvests.
Simple schedule for feeding tomatoes
Here are tomato feeding instructions from seedling to harvest:
- Seedlings: Give tomato seedlings a balanced fertilizer once a month while they are still in the greenhouse or hothouse. Use a dilute fish emulsion, 3-3-3, or a nitrogen-phosphorus-potassium formula that is similar.
- Transplanting: When tomatoes are ready to go into the garden, dig a hole as deep as the length of the seedling. Place a layer of aged compost or well-rotted manure at the bottom. Add a handful of bone meal and 1 tablespoon of Epsom salt (which contains magnesium and sulfur to benefit roots). Next, add an inch or half-inch buffer layer of soil so that the plant’s tender roots do not set directly on the fertilizer. Set the seedling into the hole burying all but the top four branches or leaf sets.
- Two weeks after transplanting: Side-dress plants: water with compost tea or dilute fish emulsion
- After the first flowers appear: Side-dress plants: water with compost tea or dilute fish emulsion
- When fruit is the size of a golf ball: Side-dress plants: water with compost tea or dilute fish emulsion.
- First ripe tomato: Side-dress plants: water with compost tea or dilute fish emulsion.
Supporting tomatoes
Bush tomato varieties can be grown without support although cages may be used. Climbing tomato varieties should be staked, trellised, caged, and pruned for best results. Train indeterminate tomatoes using a 2-by-2-inch (5 cm) 6-foot-long (1.8 m) stake, a wire tomato cage, or a cylinder with an opening large enough to put your hand through. Set the support in place at planting time. Anchor cages to a pair of 4-foot (1.2 m) stakes driven into the ground before planting. Use soft ties to train the plant to a stake, or train branches through the cage as the plant grows. Tie the main stem every foot or so with soft twine or horticultural tape.
- Cages, stakes, and trellises can be used to support tomato plants. Supports will keep leaves and fruits off the ground. Tomatoes that sprawl across the ground will be susceptible to disease and insect pests.
- Stakes can be used to train tomatoes upwards. Staked tomatoes are commonly pruned to one or two main stems (called leaders) which are trained up by tying the stem to the stake with elastic horticultural tape.
- Trellises can be used to support tomatoes. Fashion a trellis out of 6 by 6 inch (15cm) galvanized mesh. Stretch the mesh between two stakes set about 8 feet (2.4m) apart. Tie off the vines as they grow up, similar to staked plants.
Staking tomatoes
Stakes are commonly used to support single-stem plants. Place the stake 3 to 4 inches away from the newly transplanted tomato and train its main stem up the stake. Tie the plant to the stake with loose garden twine or stretchy horticultural tape. A determinate tomato will need a stake 3 to 4 feet tall (early-season tomatoes that ripen in 70 days or less will not need staking or pruning), and an indeterminate tomato will need a stake 5 to 6 feet tall. Use one- to two-inch square wooden stakes or metal stakes. Staked, single-trunk tomato plants can be spaced as close as 12 inches apart.
- A staked tomato requires the least amount of growing space.
- Stake tomatoes with 6-foot (1.8m) stakes. Set stakes at the time of transplanting.
- Tie stems to stakes with elastic horticulture tape or garden twine.
- Staked tomatoes are best pruned so that they grow on a straight stem against the stake.
- Prune staked tomatoes to one or two stems by pinching out the growing tip of each side branch after it has sprouted at least two leaves.
- To prune to more than one main stem, choose the stems you want to keep and pinch out the rest.
- Do not pinch back side shoots until two leaf sets develop; this will provide foliage cover from sunburn for fruits and stems later.
- Note that pruning will reduce the total crop and is likely to increase the incidence of blossom-end rot.
- More tomato pruning tips: How to Prune a Tomato.
Caging tomatoes
Cages are useful for multi-stemmed free-standing tomatoes not growing in a row. Square or triangular cages may offer more balance than round cages. Use a stake to anchor light cages and keep them from toppling. Prune the tomato to fit the confines of the cage and top the plant when it reaches the top of the cage.
Set cages in place around each plant at planting time and be sure to stake each cage in place. Indeterminate, vining tomatoes can overgrow a cage later in the season causing it to topple. An extra stake or two will keep this from happening. Place cages at planting time to avoid severing maturing roots later on.
- Use tomato cages to support upward growth.
- Use an 18-inch/46 cm-diameter cage for small, bush tomatoes.
- Use a 24-inch/61 cm-diameter cage to support large, vining tomatoes.
- Round or square cages can be bought ready-made; square cages are easily folded and stored.
- To make your own cage use 6 by 6 inch (15×15 cm) mesh reinforcing wire. A five-foot (1.5m) width cut five feet long and bent into a cylinder and tied off will support a six-foot-tall (1.8m) tomato plant. Remove the bottom horizontal wire and push the cage into the ground six inches deep surrounding the tomato plant. Add a supporting stake in windy areas.
- Cages are commonly set in place when a plant is young so that it can grow up and into the cage. Caging, like staking, allows tomatoes to be grown in tight spaces, the fruit is kept up off of the ground and open to air circulation.
- Caged tomatoes may or may not require pruning.
Trellis tomatoes
Trellises for tomato plants are supports similar to horizontal wire supports used to support berry canes. Trellises are useful when you are growing several multi-trunk tomato plants in a row. Drive a stake just to the outside of every other plant, about 4 inches from the main stem. Run heavy twine or wire between the posts. As the plants grow tall, gently move their branches to the cross wires and loosely tie the stems to the trellis. Grow the tomatoes to the top of the support and then remove or top new growth. As plants grow wide, you can string twine between the posts to contain the plants and keep them from sprawling, or you can tie stems along the cross-wires like grapes.
Tomatoes with no support
If you don’t want to cage or stake your tomatoes, set an arch of construction wire in place and let your tomatoes sprawl across the arch keeping fruit up just above the soil. Free-grown tomatoes will be heavy producers and you’ll do no pinching or pruning during the growing season.
Maintaining tomatoes
- Mulch around the base of tomatoes with aged compost to slow soil moisture evaporation.
- For stronger plants and bigger fruit, pinch out all suckers that start to grow in the crotch of the main stem and side branches. Root the suckers in a starting mix to start a second crop for succession planting.
- As plants grow tall, remove leaves and branches from the bottom 12 inches (30cm) of the plant; this will help prevent the spread of soil-borne diseases.
- Night temperatures colder than 55°F (13°C) or day temperatures above 95°F (35°C) will keep flowers from setting fruit. Protect plants under a plastic tunnel or floating row cover.
- Protect tomato plants from extremes of temperature–cold and hot, strong winds, weeds, pests, and diseases.
- Place tomatoes in the garden where they will be protected from drying winds.
- Protect plants from cutworms with a paper collar set in the soil at transplanting.
- Protect roots by adding aged compost around each plant; aged compost will feed roots and protect them from the hot summer sun.
- Examine plants often to be rid of tomato hornworms and other pests early.
- Avoid fungal and bacterial diseases by watering at the base of plants and rotating tomatoes to new beds each year.
- Where summer temperatures exceed 95°F, shade cloth protection will protect leaves and fruit.
Pinching and pruning tomatoes
Tomatoes produce new branches at each leaf node–between the main stem and the leaf axils. Pinching away these new branches will allow the plant to put its energy into larger fruits. Stems with fruit clusters will often keep right on growing to form new branches sapping the plant’s energy. Pinch away new growth just beyond each fruit cluster. The best practice is to pinch and prune once a week. Don’t let suckers be a substitute for fruit. (You can root the suckers you pinch out in seed starting mix and start a second crop.)
Indeterminate vines should be pruned so that only one or two main stems develop. Pinch off suckers that grow between the main stem and the branches. (Suckers are non-flowering shoots that grow in the angle between the main stem and leaf stalks.) Pruning allows nutrients to be used for fruit development. Pinch out the growing tips when the plant reaches the top of its support.
Planting tomatoes for fall harvest
Plant tomatoes for fall harvest in mid to late summer in regions where frost does not come until very late autumn or early winter.
Use suckers cut from spring-planted tomatoes to start new plants. A sucker is 4 to 5 inches of new growth usually taken from wherever two stems come together to form a V-shape. New plants also can be grown from a stem cut from the top foot or so of a healthy plant.
How to root tomato suckers
To root a sucker or cutting remove the lower leaves and set it in a jar of water for an hour or two to start the rooting process. Then plant the cutting in loose compost-rich soil directly in the garden or in a gallon nursery pot containing potting mix. Firm the soil around the sucker and water heavily for two or three days. Suckers should grow roots in a week; you may want to start more than one sucker or cutting to hedge against transplant failure.
Not all spring-planted tomato varieties are a good choice for planting in summer. Choose suckers from tomatoes with a short number of days to maturity–about 55 to 70 days.
Tomato varieties for fall harvest
Two tomato varieties well-suited for summer transplanting and fall harvest are ‘Celebrity’ which is ready to harvest 72 days after transplanting and ‘Heatwave’ which is ready for harvest 68 days after transplanting. Other so-called early-season tomatoes are also good choices for summer planting; early-season tomatoes as a group are ready for harvest in less than 70 days from transplanting.
Both Celebrity and Heatwave will tolerate late summer and autumn heat.
It is important to know when the first frost will come to your region in autumn or winter. Choose a tomato that can grow to maturity and produce fruit in the number of frost-free days you have left in the season.
Tomato pests
Protect young tomato plants from cutworms with cardboard, plastic, or metal collars. Handpick tomato hornworms or use Bacillus thuringiensis (Bt).
Here are common insect pests which attack tomatoes (go the Index to find additional articles about these pests):
- Cutworms live in the soil and attack seedlings; place paper collars around seedlings.
- Aphids: suck plant juices leaving plants weak; knock them off plants with a strong spray of water.
- Whiteflies spray with insecticidal soap.
- Tomato hornworms are large green caterpillars that can defoliate a plant; handpick and destroy or spray with spinosad.
- Tomato fruitworms bore into fruits; spray with insecticidal soap or Bacillus thuringiensis.
Tomato diseases
Tomatoes are susceptible to fungal, bacterial, and viral diseases. Disease control can be difficult. Disease prevention is the best course of action. To stave off disease plant disease-resistant varieties and keep the garden clean and free of debris.
Plant geneticists have developed disease-resistant varieties, identified by the letter “V” (verticillium wilt), “F” (fusarium wilt), “N” (nematodes, a microorganism that causes cankers on the roots), and “T” (tobacco mosaic virus—tomatoes are a relative of the tobacco plant, and subject to viral diseases of that plant species). Select resistant varieties; use young, healthy transplants.
- Verticillium and fusarium wilt are fungal diseases that cause tomato plants to suddenly wilt, turn brown, and sometimes die. These diseases are brought on by wet weather or overhead watering.
- Early blight and late blight are fungal diseases. These diseases usually strike during warm, humid, or wet weather, Yellowing of lower leaves and the discoloration of stems are signs of blight. See also How to Identify Early Blight, Late Blight, and Leaf Spot.
- Bacterial diseases are marked by black spots or specks on leaves or the black discoloration of stems.
- Mosaic virus or herbicide injury can cause tomato leaves to grow distorted, twisted, and stunted. Tomatoes are a relative of tobacco and can be attacked by tobacco plant diseases such as tobacco mosaic virus; wash your hands thoroughly before working with tomato plants if you smoke.
- Remove diseased plants from the garden immediately before the disease can spread.
- Grow disease-resistant varieties. Disease-resistant varieties are identified by a letter code which will be found on seed packets or transplant identification stakes: “V” (verticillium wilt), “F” (fusarium wilt), “N” (nematodes–microorganisms that cause root cankers); and “T” (tobacco mosaic virus).
- Blossom-end rot or rotting at the blossom or bottom end of the fruit is caused by fluctuations in soil moisture and the insufficient uptake of calcium from the soil. To control blossom end rot, water regularly and add crushed eggshells to the soil or an organic fertilizer than includes calcium.
- Cracking fruit is caused by the uneven uptake of water—when the soil goes dry, then wet, then dry. Keep the soil evenly moist to avoid fruit cracking.
- Trouble-shoot tomato pest and disease problems by going to this article: Tomato Growing Problems.
Blossom-end rot and treatment
Blossom end rot is a black, sunken area at the blossom end of tomatoes or peppers. The blossom end is the end of the fruit opposite the stem. Blossom end rot is most often seen on green fruits, usually, the first fruits to appear on the plant.
Blossom end rot is caused by a calcium deficiency in the fruit. That deficiency can be caused by a lack of calcium in the soil or the plant’s inability to draw up calcium from the soil–most often caused by a lack of water. Blossom end rot is aggravated by drought or uneven soil moisture. Soil moisture taken up by plant roots delivers calcium to plant cells or by the excessive application of fertilizer, usually nitrogen or potassium.
Keeping the soil evenly moist, not allowing it to dry out between watering, is the first step to controlling blossom end rot. As well, avoid cultivating too close to plant roots; damaged roots may not take up water and, in turn, calcium from the soil.
The excessive application of nitrogen or potassium can alter soil chemistry and “lock up” calcium so that it is chemically not available to plant roots. Feeding tomatoes and peppers with compost tea is one of the best ways to make sure plants are well-fed but not over-fertilized.
A soil test will tell you if the soil is calcium deficient. If that is the case, add agricultural lime to the soil.
Besides blossom end rot, calcium deficiency results in the dieback of growing tips and the scorching of new leaves. Calcium deficiency in cabbage and Brussels sprouts will cause internal leaves to brown, in carrots oval pits will form on roots, and in celery, leaf growth is stunted.
Harvesting tomatoes
Harvest tomatoes in late summer 50 to 90 frost-free days after planting. Pick the fruit when it is evenly colored but still firm. Support the vine in one hand and gently pull the fruit to prevent damage to the plant. A month before the first expected frost, start plucking new flowers off the plants. This will direct the plant’s energy into ripening tomatoes already on the vine.
When your tomatoes begin to ripen, check your crop every day. The best-tasting tomatoes are picked at the peak of maturity–not a week or two later. Cut or gently twist off the fruit. Six weeks before the first expected frost, pinch away all of the growing tips and new blossoms. This will terminate new growth and allow the plant to put its energy into ripening its last fruits.
When to harvest tomatoes
Tomatoes also can be classified by when they come to harvest:
- Early season: require 40 to 60 days to reach harvest from transplanting.
- Midseason: require 60 to 80 days to reach harvest from transplanting.
- Late season: require 80 or more days to reach harvest from transplanting.
- For a long harvest plant early, mid-season, and late-season tomatoes at the same time in spring or early summer.
- Some tomatoes are picked green and ripened indoors. ‘Mature green’ tomatoes have reached full size and are just beginning to turn color. They can be ripened on the kitchen counter indoors.
- Note on a calendar when you plant then count ahead of the number of days to maturity to know when harvest will begin.
- Allow tomatoes to ripen on the vine when possible.
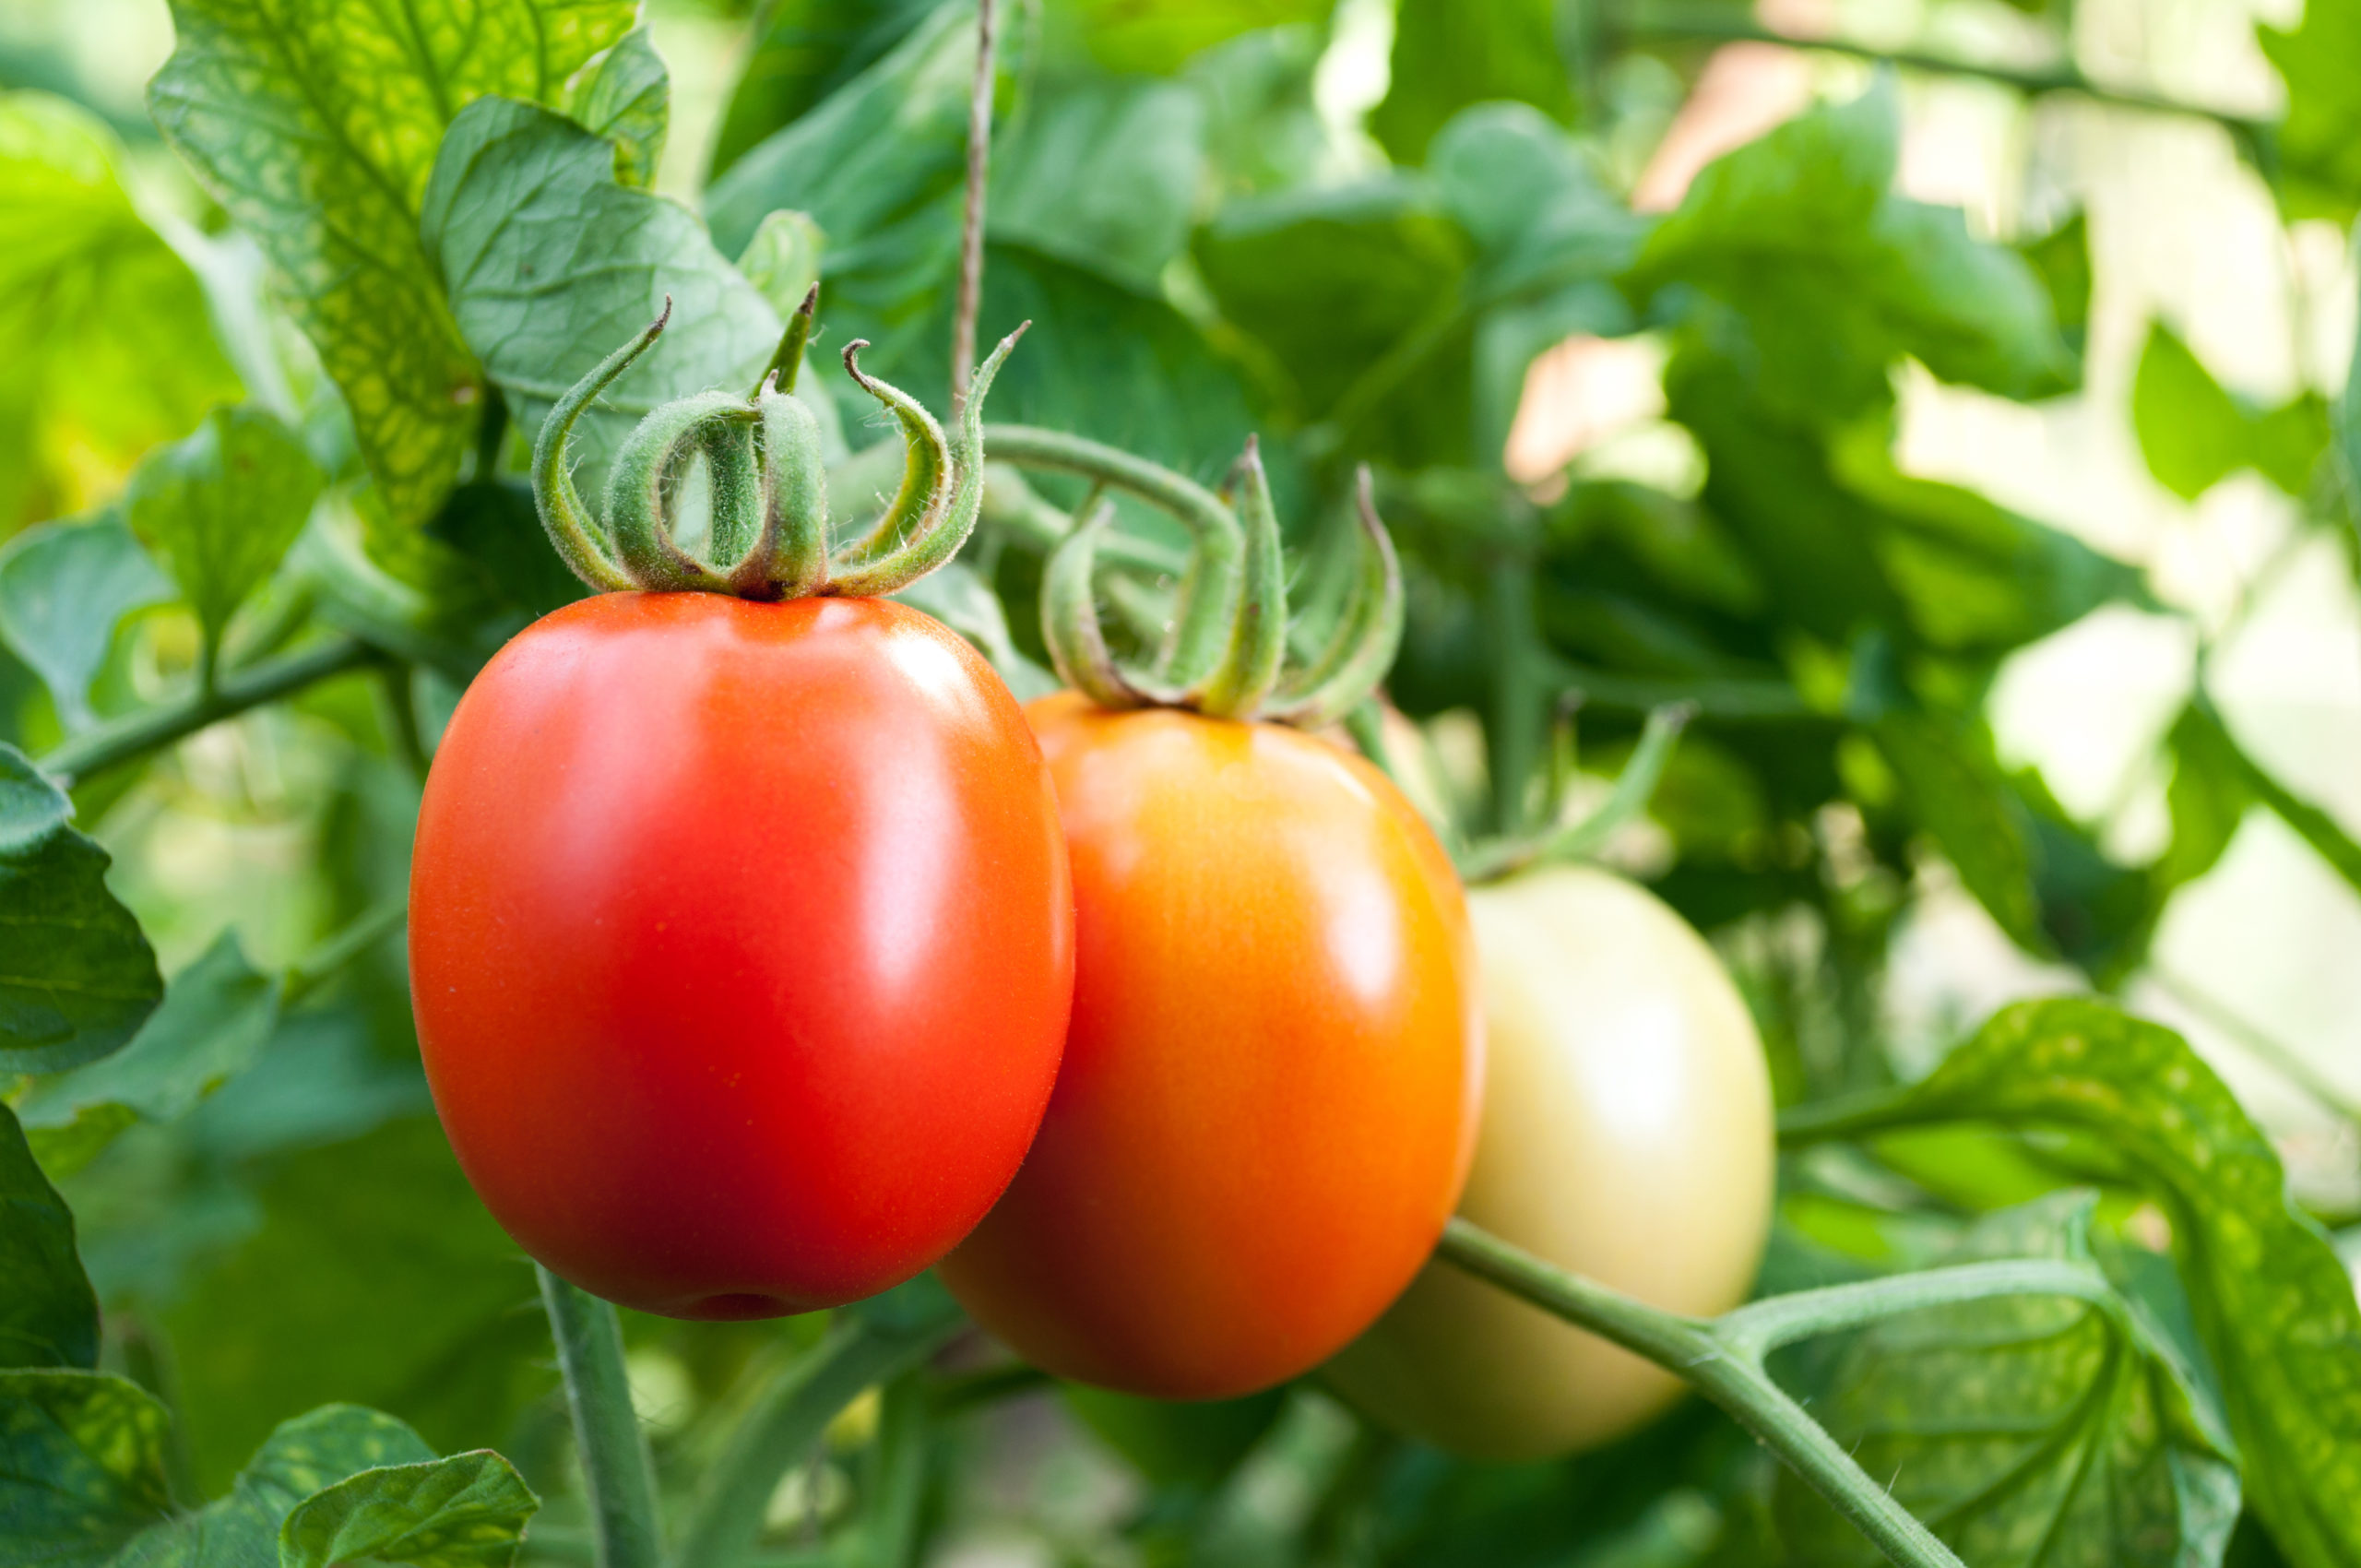
- A tomato will be ripe when its skin turns from dull to glossy.
- Tomatoes that have begun to turn color will ripen off the vine. Place them in a cool place out of the direct sun with the stem end up.
- Harvest tomatoes before the first frost; you can lift whole plants and hang them upside down in a shed or garage to ripen.
Tomato harvest before first fall frost
When the first heavy frost is predicted, pick ripening fruit–even green ones–and set them on the kitchen counter out of the sunlight. They will ripen in time. Alternatively, you can remove your tomato plants from the garden roots, fruits, and all and hang them upside down in the garden shed, garage, or basement–away from freezing temperatures. The fruits on these vines will ripen in time as well.
Tomato plant yield
Plant 1 to 4 tomato plants for each household member. Consider the variety and how the tomato will be used: eating fresh, cooking, canning, or preserving. If possible, plant both early and late cultivars and determinate and indeterminate tomatoes to allow for a staggered and continuous harvest. Double the number of plants if you plan to crush the fruit for juice.
Storing and preserving tomatoes
- Ripe tomatoes are best stored on the kitchen counter, not in the refrigerator.
- Tomatoes also can be frozen, canned, dried whole, or sliced.
- Tomatoes can be made into juice, paste, relish, or pickles.
- Green tomatoes harvested before the last frost can be set in a cool, moist, place for up to one month as they ripen.
- More tips How to Freeze Tomatoes and How to Can Tomatoes.
- More tips on tomato harvest: How to Harvest and Store Tomatoes and Tomato Ripening Tips for Season End.
How to choose the right tomato
- There are thousands of varieties of tomatoes; several hundred named varieties are readily available as seeds or starts.
- Choose tomatoes for fresh eating, cooking, canning, preserving, or drying.
- Choose beefsteak and slicing tomatoes or cherry or miniature tomatoes for fresh eating.
- Choose standard or globe-shaped tomatoes for canning.
- Choose paste tomatoes for cooking.
- Choose a tomato to fit the length of your growing season: early (50 to 60 days), main crop (70 to 85 days), or late harvest (85 days or more).
- Choose a bush or determinate tomato for a small garden or container or a short harvest.
- Choose a vining or indeterminate tomato for caging and long harvest.
- Here are more great tomatoes varieties for your garden: Tomatoes to Grow for Flavor.
Tomato terminology and vocabulary
There are more than 1,000 varieties of tomatoes.
In the kitchen there are three major tomato categories based on use: (1) cherry or miniature tomatoes used for salads and snacking; (2) slicing and eating tomatoes used on sandwiches and hamburgers as well as eaten out of hand, and (3) cooking tomatoes for canning and sauces.
Here is a tomato vocabulary, common types, labels, and tomato descriptors you will find referenced in seed catalogs and at the farmers’ market.
- Beefsteak tomato: a large tomato that can be eaten raw or cooked. These are large, bright red tomatoes with a slightly elliptical shape. The beefsteak is the classic sandwich or hamburger tomato. It is so large and juicy with such a large seed cavity that it usually does not hold its shape when cooked.
- Bicolored tomato: a two-colored, usually striped tomato. Bicolored tomatoes are often heirloom varieties.
- Black tomato: a black or deep-purple-skinned tomato variety. Black tomato varieties include ‘Black Cherry’, and the globe tomatoes ‘Black Krim’ and ‘Black Russian’.
- Cherry tomato: a small tomato about 1 inch (2.5 cm) in diameter, red or yellow-gold in color for snacking, adding to salads, or eating raw. Also, use the cherry tomato as a garnish. It has excellent flavor.
- Cool-summer tomato: a tomato variety that will ripen where the accumulated heat over the course of the growing season is too low for most tomatoes. Cool-summer tomatoes are suited for cool-summer regions. Cool-summer tomato varieties include ‘San Francisco Fog’, ‘Oregon Pride’, and ‘Seattle Best of All’.
- Currant tomato: a very small tomato, smaller than a cherry tomato, about ½ to ¾ inches (13-19 mm) in diameter, and weighs about ⅛ ounce. Currant tomatoes are sometimes called “mini cherry tomatoes.” Currant tomatoes are usually red or yellow and are sweet and crisp for snacking or using on salads.
- Early tomato: a tomato variety that sets fruit at lower night temperatures than a main crop tomato. Early tomato varieties are grown in short-season regions and often in high-elevation areas. Early tomato varieties include ‘Early Girl’. ‘Burpee’s Early Pick’, ‘Quick Pick’, and ‘Stupice’.
- Globe tomato: a medium-sized, round, usually red tomato that is firm and juicy. The globe tomato is similar to the beefsteak tomato but smaller. It is good raw for slicing and eating out of hand and cooked.
- Grape tomato: an elliptical, egg- or pear-shaped tomato about the size of a grape. The grape tomato can be a baby Roma or a variety such as ‘Juliet’ which produces grapelike clusters of small fruit. The Roma is a tomato variety that is meaty, with few seeds, red or yellow, and most often used as a canning or sauce tomato.
- Green tomato: tomato varieties that are green when mature. Some green tomato varieties are globe tomatoes and some are beefsteak. These tomatoes have a piquant flavor and are best used for frying, broiling, and adding to relishes. Green tomato varieties include ‘Aunt Ruby’s German Green’, ‘Emerald Evergreen’, and ‘Green Bell Pepper’.
- Hawaiian tomato: a tomato variety developed for growing especially in Hawaii where many tomato diseases flourish. Hawaiian tomato varieties include ‘Anahu’, ‘Healani’, ‘Kalohi’, and ‘Puunui’.
- Heirloom tomato: an old–more than 50 years–tomato variety. Heirloom tomatoes vary in size and appearance. Many heirloom tomato varieties have been in cultivation for hundreds of years. Heirloom tomatoes come in a rainbow of colors, textures, and tastes. Most are the size and shape of a globe or beefsteak tomato.
- Hybrid tomato: first-generation tomatoes from controlled parent lines. Hybrids grow to a uniform size and often are very similar in quality. The seeds of hybrid tomatoes do not breed true.
- Hydroponic tomato: a tomato grown in water without soil in a greenhouse. Hydroponic tomatoes often lack flavor.
- Large-fruited tomato: a tomato variety that grows a large tomato. Large-fruited tomato varieties include ‘Beefsteak’, ‘Beefmaster’, ‘Big Beef’, and ‘Burpee’s Supersteak Hybrid’. Large-fruited tomatoes are often used for slicing.
- Main crop tomato: a tomato variety that grows to full size in regions where the days and nights are warm and well-suited for tomato growing. ‘Celebrity’, ‘Big Boy’, and ‘Better Boy’ are main-crop tomatoes. Main crop tomatoes are also called standard tomatoes.
- Orange tomato: an orange-skinned tomato variety. Orange tomato varieties include ‘Amana Orange’, ‘Ida Gold’, and ‘Orange Jubilee’.
- Paste tomato: small, oval, thick-meated tomato with the maximum amount of flesh and virtually no seed cavity. Paste tomatoes are used to make tomato paste or for sun-drying. Paste tomatoes are sometimes called plum tomatoes.
- Pear tomato: smaller than a cherry tomato, egg- or pear-shaped, and looks like a small plum tomato. The pear tomato is used like a cherry tomato for snacking or on salads.
- Pink tomato: a pink-skinned tomato variety. ‘Brandywine’ and ‘New Big Dwarf’ are beefsteak-size tomatoes with pinkish-colored skins. ‘Dwarf champion’, ‘Giant Belgium Pink’, and ‘Pink Beefsteak’ are globe-sized pink tomatoes.
- Plum tomato: also called Italian plum tomato and Roma tomato. The plum tomato is egg-shaped, red or yellow, and flavorful. The plum tomato can be 2 to 4 inches (5-10 cm) long and 1 to 2 inches (2.5-5 cm) in diameter. The plum tomato is thick and meaty, not juicy, and contains few seeds. It is sometimes called a paste tomato.
- Purple tomato: an heirloom tomato with purple skin. Purple-skinned tomato varieties include ‘Purple Calabash’, ‘Brandywine’, and ‘Cherokee Purple.’ Purple tomatoes can be dusky pink with purple shoulders to dusky rose-purple all over. Purple tomatoes are usually the size of a globe or beefsteak tomato.
- Roma tomato: a tomato variety that is meaty, with few seeds, red or yellow, and most often used as a canning or sauce tomato.
- Round tomato: a globular or oval tomato 2 to 5 inches (5-13 cm) in diameter, usually red, pink, orange, yellow, or green colored. The round or common round tomato is usually firm and juicy and used for slicing, eating out of hand, or cooking.
- Sauce tomato: usually plum tomato, Roma tomato, Italian tomato, or paste tomato. Sauce tomatoes are usually egg-shaped with thick meat and few seeds. Sauce tomatoes are excellent for sauce making. Their thick flesh holds shape when cooked and canned.
- Slicing tomato: a large slightly squat-shaped tomato used for slicing. The large seed cavity of the slicing tomato contains lots of juice. The beefsteak tomato is a slicing tomato, up to 6 inches (15 cm) in diameter. The slicing tomato is used raw, not cooked.
- Standard tomato: a main crop tomato variety suited for growing in warm weather regions. See “Main crop tomato.”
- Striped tomato: a tomato striped, sometimes red and yellow, sometimes red and green, sometimes red and white, as well as other colors. Striped tomatoes are often heirloom tomato varieties. Striped tomato varieties include ‘Marvel Striped’, ‘Big White Pink Stripe’, ‘Hillbilly’, ‘Green Zebra’, and ‘Mister Stripey’.
- Sun-dried tomato: a tomato that has been dried in the sun or in a tomato dryer. Sun-dried tomatoes are usually chewy, sweet-flavored, and dark red. They are used to flavor sauces, soups, sandwiches, salads, and other dishes.
- White tomato: a tomato variety that has white skin. White tomato varieties include ‘White Queen’, ‘White Wonder’, and ‘Snow White Cherry’.
- Yellow cherry tomato: the same size as its red counterpart but slightly less acidic and usually blander in flavor. Cook the yellow cherry tomato as a side dish or sauté it with herbs.
- Yellow pear tomato: the yellow version of the pear tomato: is slightly smaller than a cherry tomato and resembles a tiny pear. The yellow pear tomato may be blander tasting than the red pear tomato.
- Yellow tomato: a yellow-skinned tomato variety. Yellow tomato varieties include ‘Azoychka’, ‘Banana Legs’, ‘Garden Peach Tomato’, and ‘Yellow Brandywine’.
Beefsteak tomato varieties to grow
- ‘Big Beef’ is a great beefsteak, flavorful and consistent.
- ‘Brandywine’ is many-colored– pink or yellow or purple-black. It tops many tomato flavor lists.
- ‘Cherokee Purple’ and ‘Black Krim’ are purple beefsteaks.
- ‘Beefmaster’, ‘Big Bite’, ‘Heavy Weight’, ‘Goliath’, and ‘Watermelon’ are descriptive names of beefsteak varieties.
- Mortgage Lifter’ is the best beefsteak for storytelling. During the Big Depression, a West Virginia farmer by the name of Mr. Byles was about to lose the farm. Farmer Byles crossed several fat beefsteaks until he came up with a new beefsteak variety so big and so flavorful that his tomato sales paid off the mortgage, the ‘Mortgage Lifter.’
About beefsteak tomatoes
- The beefsteak tomato is more than a variety of tomatoes; it is many varieties (dozens) and a class of tomatoes. Beefsteaks are one of the largest varieties of tomatoes growing. Some easily weigh more than 2 pounds (1 kilogram)
- Beefsteak tomatoes come in a rainbow of colors: red, pink, yellow, orange, green, and purple-black for starters.
- Beefsteaks are not round; they’re fat and saucer-shaped in a squatty sort of way. Oblate is a descriptor for the beefsteak.
- Slice a beefsteak and you will find a tomato filled (filled!) with lush seed cavities (many). There’s no core as you might find in smaller slicing tomatoes. The beefsteaks’ seedy interior maze is Byzantine but an architecture of amazing strength. The beefsteak is made for slicing and eating raw and staying together.
About tomatoes
- The tomato is a tender subtropical perennial grown as an annual.
- Tomatoes are native to southern Mexico.
- Tomatoes are weak-stemmed with vining or sprawling habits depending upon the variety. Tomatoes have alternate lobed and toothed leaves.
- Yellow flowers grow in clusters either along stems or at the end of stems.
- Depending on the variety, fruits vary in size from marble-sized to apple-sized and in color from red to yellow to orange to white. Some tomatoes may be green or purple-black.
- Botanical name: Lycopersicon esculentum
Tomato articles at Harvest to Table:
How to Plant and Grow Tomatoes
How to Choose a Tomato for Your Garden
Growing Tomatoes in Containers
Growing Early Season Tomatoes for Great Taste
Epsom Salt, Milk, and Organic Fertilizers for Tomatoes and Peppers
How to Prevent Blossom Drop – Tomatoes and Peppers
How to Harvest and Store Tomatoes
Nine Ways to Cook and Serve Tomatoes
Tomato Sauce–Basic, Herbed, or Vegetables Added
How to Make Tomato Juice Simply
How to Home Can Tomatoes for Beginners
How to Sun Dry and Oven Dry Tomatoes
Tomato Growing Problems Troubleshooting
How to Prevent Tomato Blossom Drop
How to Identify Early Blight, Late Blight, and Leaf Spot
Tomato Hornworm Organic Pest Control
Garden Planning Books at Amazon:
- Tomato Grower’s Answer Book
- Vegetable Garden Almanac & Planner
- Kitchen Garden Grower’s Guide Vegetable Encyclopedia
- Vegetable Garden Grower’s Guide
More how to grow articles:
Learn how to plant, grow, and harvest your favorite vegetables. Click below for all you need to know.
- Artichoke
- Arugula
- Asparagus
- Beans, Snap
- Beets
- Broad Beans
- Broccoli
- Brussels Sprouts
- Cabbage
- Cantaloupe — Melons
- Cardoon
- Carrots
- Cauliflower
- Celeriac
- Celery
- Chard
- Chayote Squash
- Chickpeas
- Chicory
- Chinese Cabbage
- Collards
- Corn Salad
- Corn, Sweet
- Cresses
- Cucumbers
- Eggplant
- Endive and Escarole
- Fava Beans
- Florence Fennel
- Garbanzo Beans
- Garlic
- Horseradish
- Jerusalem Artichoke
- Kale
- Kohlrabi
- Leeks
- Lettuce
- Lima Beans
- Melons
- Mizuna
- Mustard Greens
- New Zealand Spinach
- Okra
- Onions
- Parsnips
- Peanuts
- Peas
- Peppers
- Potatoes
- Pumpkins
- Radicchio
- Radishes
- Rhubarb
- Rutabaga
- Salsify
- Shallots
- Sorrel
- Southern Peas
- Soybeans
- Spinach
- Squash, Summer
- Squash, Winter
- Sunchokes
- Sweet Potato
- Swiss Chard
- Taro
- Tomatillo
- Tomatoes
- Turnips
- Watermelon
- Zucchini