The Ultimate Garlic Growing Guide: From Seed to Harvest
Garlic is a cool-weather perennial plant commonly planted in the cool of autumn or early spring.
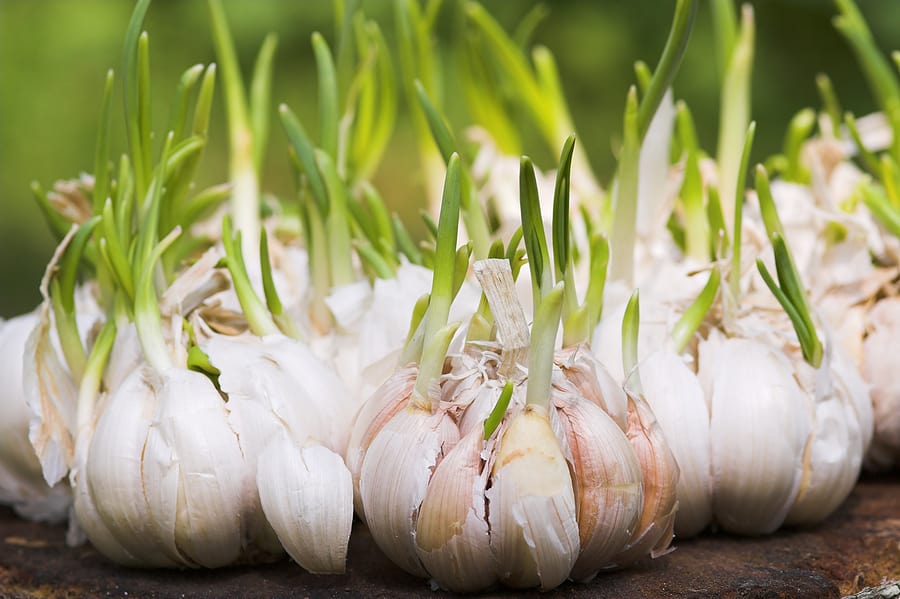
Garlic–which is sometimes classified as an herb–is grown from cloves selected from medium to large bulbs, called heads, harvested the season before. You can plant cloves from garlic heads purchased at a grocery store or farm market as long as they have not been treated to prevent sprouting.
Garlic requires a long season for optimal yield; garlic’s long season of growth must include 6 or more weeks of chilly weather for optimal bulb or head production. Allow eight months to maturity after autumn planting for the largest bulbs; spring-planted garlic (set out 6 weeks before the last frost) will reach maturity in about 100 days, but bulbs will not be as large as autumn-planted garlic.
Garlic can tolerate frost, but autumn-planted cloves should be protected from frost-heaving and freezing ground in cold-winter regions. Garlic can be grown in containers.
Related articles:
- Five Ways to Cook and Serve Garlic
- Snap Green Beans with Garlic
- Garlic Plant Starting Tips
- How to Harvest and Store Garlic
- How to Plant and Grow Garlic
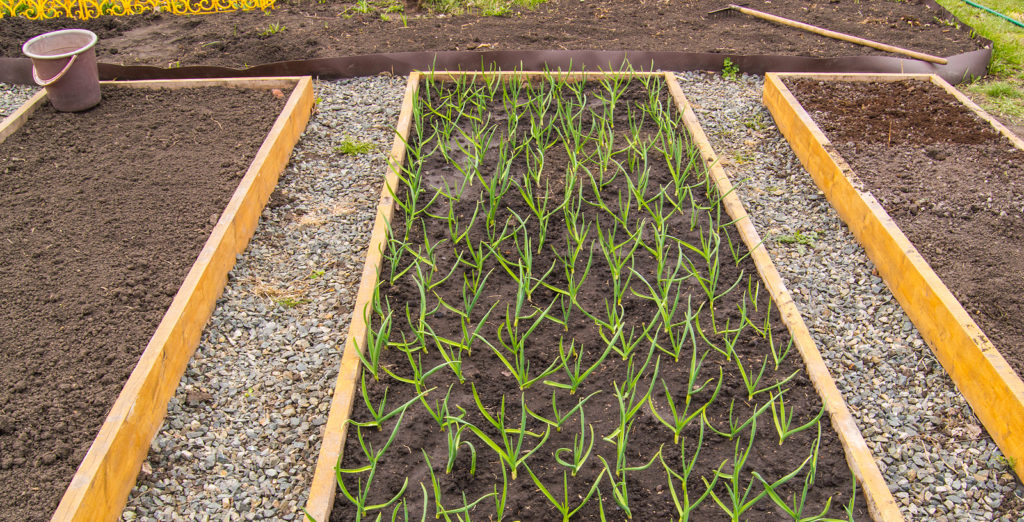
Garlic Yield. One soft-neck garlic head will yield 10 to 40 cloves. One hard-neck garlic head will yield 4 to 12 cloves. There are about 50 cloves in one pound.
When to plant garlic
The best time to plant garlic in the home garden depends on your climate and the type of garlic you’re planting, but in general, garlic is best planted in the fall or early spring. Fall planting is typically preferred, as it allows garlic to establish strong roots before winter dormancy and results in larger, healthier bulbs. Here’s a breakdown of when to plant garlic:
Fall planting (most common and recommended)
- Timing:
- Plant garlic 4-6 weeks before the ground freezes. In most temperate climates, this means planting from late September to November.
- In warmer climates where the ground doesn’t freeze, garlic can be planted through December or even early January.
- Why plant in fall?:
- Garlic needs a period of cold temperatures (vernalization) to form large bulbs. Planting in fall ensures that garlic will experience this cold period over winter.
- Fall planting allows the garlic to establish roots before going dormant in winter, which promotes vigorous growth in spring.
- Hardneck vs. Softneck:
- Hardneck garlic is best suited for fall planting in colder climates because it thrives in areas with a cold winter. It needs the cold to form large cloves.
- Softneck garlic can also be planted in the fall and is more adaptable to mild climates.
Spring planting (less common but possible)
- Timing:
- In colder climates, you can plant garlic in early spring, as soon as the ground is workable (usually February to April).
- Considerations for spring planting:
- Garlic planted in spring may not form bulbs as large as those planted in the fall because it misses the full cold period.
- Spring-planted garlic might mature later than fall-planted garlic and typically has a shorter growing season.
- For areas with mild winters or gardeners who missed the fall planting window, spring planting can still produce decent results, especially with softneck garlic.
Climate considerations
- Cold climates: In northern zones (Zones 3-6), fall planting is strongly recommended, especially for hardneck varieties. Plant 4-6 weeks before the first frost, and mulch the beds with straw or leaves to insulate the bulbs over winter.
- Warm climates: In southern zones (Zones 7-10), garlic can be planted in late fall or even into winter. Softneck garlic tends to perform better in warmer climates as it doesn’t require as much cold for vernalization.
Garlic description
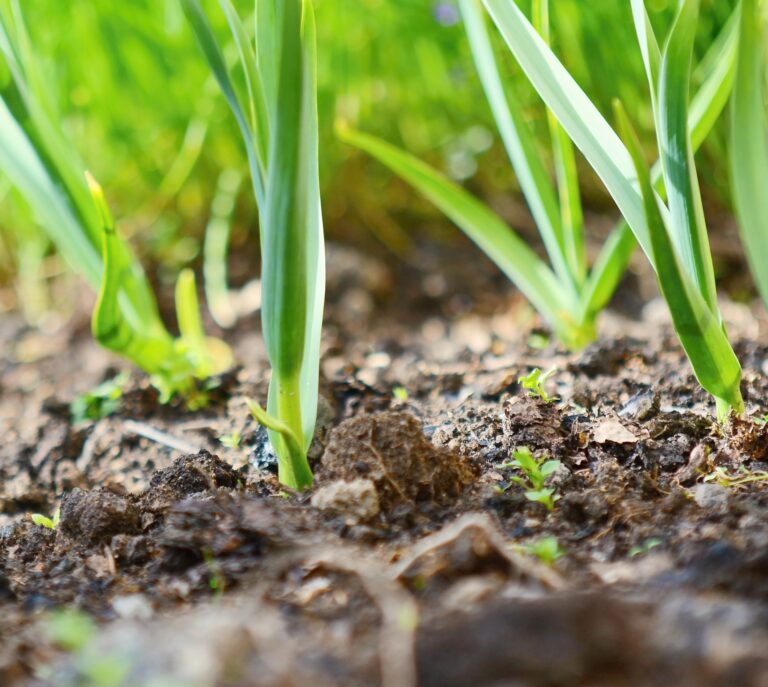
Garlic has solid, narrow, strap-shaped stalks that can grow 12 to 24 inches tall and 6 to 8 inches wide. Underground, garlic forms round, white papery sheathed bulbs or heads. A head is divided into a cluster of individual cloves. Garlic bulbs form 4 to 5 inches below the soil surface. Garlic flowers in spring and summer; small, white to pinkish flowers form atop globular umbels atop, a tall central stalk.
Types of garlic
There are three botanical groups of garlic:
• Softneck garlic: The necks of this garlic type are soft and pliable at maturity. Softneck is the strongest-flavored garlic. It is less winter hardy than hard-neck garlic but stores better. ‘Silverneck’ is a soft-neck suited to cool climates. ‘Red Torch’ is a soft neck suited for warm climates.
• Harneck, also called Rocambole, and Spanish garlic: This garlic has a stiff central stem or neck which curls at the top forming a 360° coil. This garlic has a mild flavor. Harneck garlic is commonly left in the ground for two years before harvesting. ‘German Porcelain’ is a hard-neck type. ‘Killarney Red’ is a hard neck garlic.
• Elephant garlic: Elephant garlic is not true garlic; it is a type of leek. This plant gets its name from its size; it has large fist-size bulbs weighing up to ½ pounds or more. Elephant garlic has a mild flavor.
Garlic quick-growing tips
Garlic can be planted in spring or in fall. Spring-planted garlic is harvested late in the summer or early autumn. Fall-planted garlic is harvested in mid-summer, the summer after fall planting. Fall-planted garlic will produce larger bulbs and cloves than spring-planted garlic.
- Plant garlic in spring 4 to 6 weeks before the last average frost date.
- Fall-planted garlic should be set in the ground in mid-October; plant a couple of weeks earlier in very cold winter regions; plant a couple of weeks later in mild-winter regions.
- Fall-planted garlic should be in the ground 6 to 8 weeks before the first expected frost.
Wherever you plant, keep in mind garlic requires cool temperatures of 32° to 50°F (0-10°C) during its first two months of growth. Cool temperatures at planting time are important for garlic to establish its extensive root system.
Where to plant garlic
Garlic requires full sun for best growth and bulb production. Grow garlic in well-drained, sandy loam, soil rich in organic matter if possible, but average soil will suffice. Prepare planting beds in advance by working in 1 to 2 inches of well-rotted compost. Chives prefer a soil pH of 4.5 to 8.3. Don’t plant garlic in heavy, clay, or constantly wet soil.
- Plant garlic in full sun
- Plant garlic in loose, humus-rich soil that is well-drained.
- Plant in a raised or mounded bed if you live where the ground will freeze in winter.
- Garlic prefers a soil pH of 6.0 to 7.0.
Garlic requires cool temperatures of 32° to 50°F during its first two months of growth.
Garlic planting time
Plant garlic in late summer or fall and allow it to overwinter for a harvest of large bulbs next summer.
Plant garlic in the spring and harvest it in the fall for smaller bulbs (and usually a small yield).
Late summer or fall planted garlic should be in the ground about a month or so before the soil freezes. In warm-winter regions, garlic can be planted in early winter. Elephant garlic—a very large cultivar and mild flavored—should be planted in late summer allowing time for it to make root growth before cold weather comes.
Protect fall-planted garlic with mulch—a thick layer of straw or leaves—to protect bulbs from freezing or heaving ground. Be sure to mulch the garlic bed before the ground freezes. If you live in a very cold winter region, no amount of mulch may protect bulbs so it may be best to plant in spring as soon as the soil can be worked.
Choose large cloves for planting in the fall to produce large bulbs next summer. Small cloves can be planted in spring to grow green garlic for the summer harvest.
In mild-winter regions, give cloves a pre-planting cold treatment by putting them in potting soil in a plastic bag and setting them in the refrigerator for 8 weeks or more. When the cloves begin to sprout, plant them out into the garden. In cold-winter regions, protect cloves from frost-heaving and severe cold by insulating the planting bed with 6 inches of straw or dry leaves after cloves have been planted 2 to 4 inches below the soil surface.
Garlic planting temperature
Garlic germinates in soil temperatures of 55°F and grows best in soil temperatures ranging from 55°F to 75°F (13-24°C). Garlic that has established roots will overwinter best.
- Garlic requires cool air temperatures of 32° to 50°F (0-10°C) during its first two months of growth when roots are established and bulbs begin to form. Garlic is not affected by hot weather as it matures.
- Plant garlic in spring while the soil is still cool. You can plant 4 to 6 weeks before the last spring frost or as soon as the soil has thawed and is workable. Spring planting will come to harvest at the end of the growing season, about 120-150 days after planting.
- Plant garlic in late summer or autumn as the soil again begins to cool. Plant about 6 weeks before the first freeze. Autumn planting will come to harvest about the middle of the following summer.
Planting and spacing garlic
Garlic is grown from cloves taken from garlic bulbs. The cloves are planted like seeds. The size of the seed clove is important to yield. A large clove will produce the largest bulbs. Small cloves will produce small plants. (The small center cloves you find in a bulb are best used in cooking and not used for planting; their yield will not be significant.)
Cloves should be chilled in storage at 41°F (5°C) for several months before planting.
Garlic prefers short, cool days at the start of growth and long, warm days to produce bulbs. Plant cloves in early spring up to 6 weeks before the last expected frost for a summer harvest. Plant in autumn about 6 weeks before the soil freezes for a harvest the following mid-to late-summer.
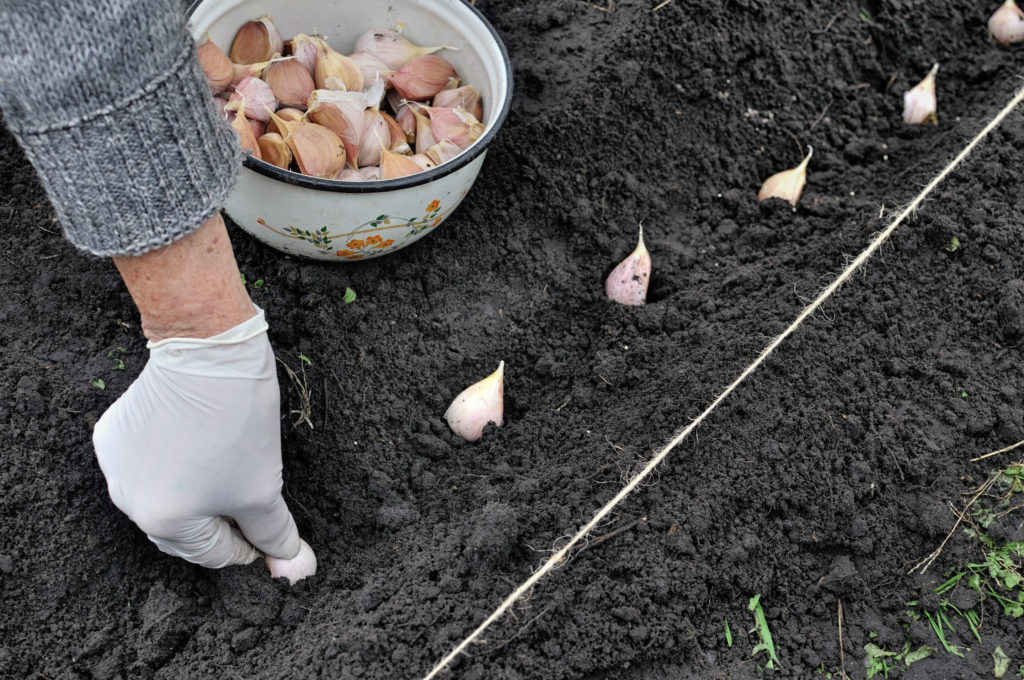
Plant cloves 2 inches (5 cm) deep—a bit deeper if you fear frost heaving or cold damage in cold-winter regions. Set elephant garlic cloves 4 inches deep. Always set cloves pointed end up.
Plant cloves 4 to 8 inches apart in all directions. Set cloves of elephant garlic 12 inches apart.
- Grow garlic from cloves or bulblets. Set cloves in the ground plump side down (that is the root side) and pointed side up.
- Set cloves 1 to 2 inches (2.5-10cm) deep and 6 to 8 inches (15-20cm) apart.
- Space rows 12 inches (30cm) apart.
- Add a tablespoon of 5-10-10 fertilizer or bone meal or fish meal to the bottom of the hole at planting time. Sprinkle a bit of soil over the fertilizer before setting the clove in place.
- Plant only firm, healthy-looking bulbs or cloves that are insect and disease-free.
- Separate cloves carefully to avoid bruising and to keep the skins intact (do not remove the skins). Plant the largest cloves; use small cloves for cooking.
- Plant garlic purchased from seed catalogs, a garden center, or that you have grown yourself. Garlic from a grocery store may have been treated with a growth inhibitor.
- Garlic from a local or nearby grower is likely to be a cultivar that will grow well in your area.
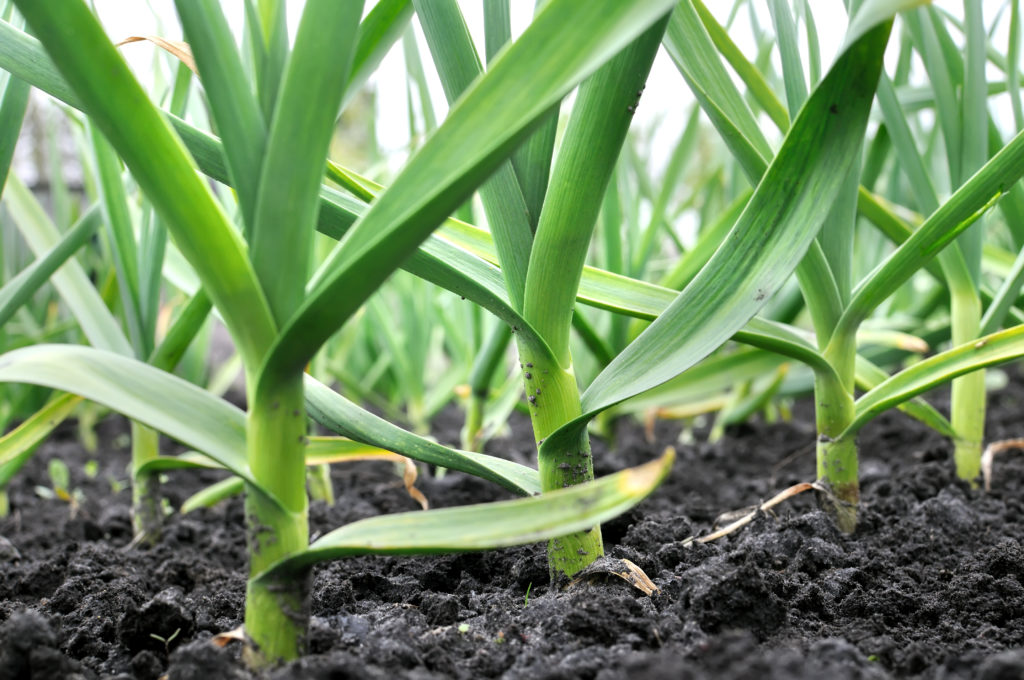
Growing garlic
Garlic prefers steady water, but do not saturate the soil. Add compost to the soil in the spring. Spray plants with liquid seaweed extract 2 to 3 times during the growing season. If seed stalks appear in spring, pick them off promptly. In early summer, when flower stalks appear, pinch them back allowing the plant to devote its energy to bulb development. After flowering when stems are yellow, bend the yellowing-green stems but do not break them.
- If you are using bulbs harvested from your garden the season before, plant the plump outer cloves; use small center cloves for cooking. (The average garlic bulb weighs 2-3 ounces and yields 6 to 8 plantable cloves.)
- Plant 12 to 16 plants per person.
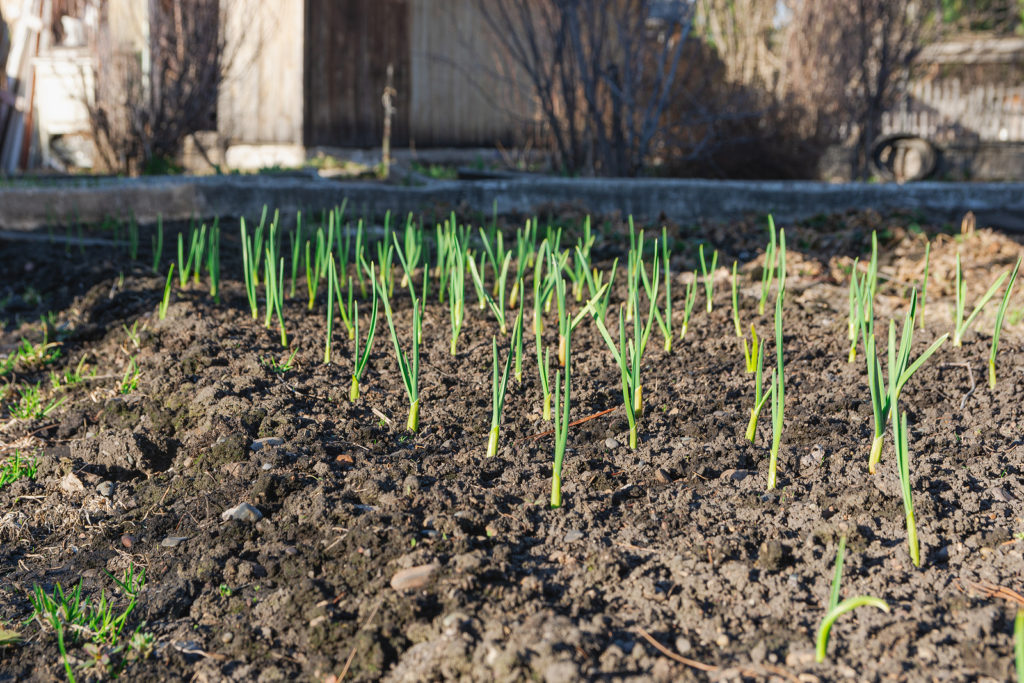
- Autumn-planted cloves will establish their root system before the first freeze. Roots and shoots will resume growth in early autumn.
Leave winter mulch in place until spring when daffodils break the soil, then pull mulch back from the garlic bed and spread aged compost across the bed. Thick compost will protect the soil around the garlic from drying, or reapply the mulch.
Spring flowers: Garlic will send up a center stalk in spring and a flower bud will develop; snip off the bud to redirect the plant’s energy from producing seed to producing a larger-sized bulb.
Watering garlic
Garlic prefers steady water, but you should not saturate the soil. Garlic is shallow-rooted and requires irrigation where rainfall is not adequate. Keep the soil moist during the growing time but not wet. Keep the soil evenly moist from spring through early summer for best bulb formation; letting the growing bed go dry will hinder bulb development. Reduce water as bulbs near maturity.
- Keep the soil moist but not wet after planting. If the soil freezes in winter, roots will resume growth in spring; resume watering in spring as well. Keep the soil moist during the growing time but not wet.
- Reduce water as bulbs near maturity. Allow the soil to go just dry soil 3 to 4 weeks before harvest; this will improve the flavor of garlic.
- Keep weeds out of the garden; they will rob garlic of soil moisture and nutrients.
Feeding garlic
Encourage leafy growth by applying a foliar seaweed or fish emulsion spray every two weeks beginning in spring. dd compost to the soil in spring. Spray plants with liquid seaweed extract 2 to 3 times during the growing season. Keep nitrogen, phosphorus, and potassium moderate.
- Add well-aged compost or a commercial organic planting mix to planting beds twice a year.
- Mist-spray garlic leaves every two weeks with fish emulsion or kelp extract. Side dress plants with a light application of blood meal.
- Begin feeding garlic that has been in the ground over the winter in spring as the days begin to lengthen.
- Heavy applications of nitrogen-rich fertilizers will decrease the flavor of garlic bulbs; use a 5-10-10 formula if you apply fertilizer.
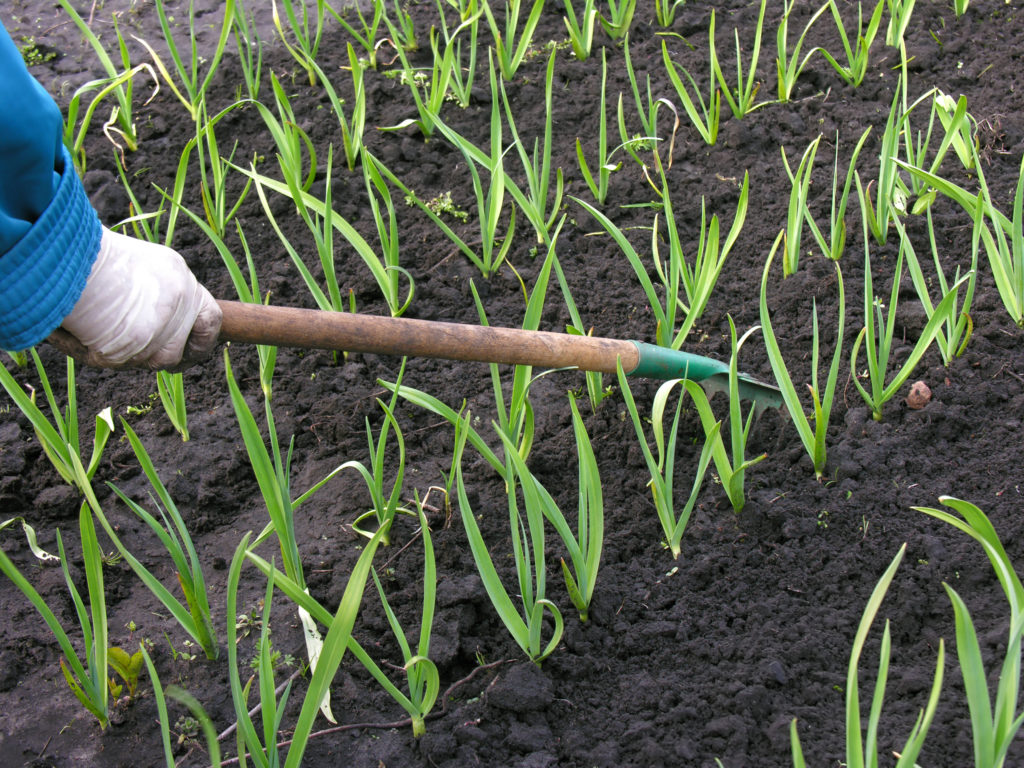
Caring for garlic
Garlic requires time to develop bulbs; if plants begin to flower in spring or seed stalks begin to form, pick or break them off promptly allowing the plant to devote its energy to developing bulbs. After flowers form and stems yellow in summer, stop watering for about unless the weather is very hot and dry; bulbs will finish development during this time.
- Keep planting beds weed-free.
- Mulch around plants with aged compost to keep down weeds and feed the plants.
- Pinch away blossom if you are growing hard-neck garlic to focus a plant’s efforts on bulb formation rather than foliage. Flowers will appear in early summer. (Flower stalks can be added to stir-fries.)
- Mulch planting beds heavily with straw or hay before the first hard freeze if garlic is staying in the ground over the winter.
- After planting in the fall, cover the garlic bed with a thick layer of mulch (like straw) to insulate the bulbs over the winter and protect against extreme cold.
- In spring, the mulch helps suppress weeds and retain moisture as the garlic grows.
- Avoid planting garlic where onions or garlic have recently grown.
Companion plants for garlic
Plant garlic with beets, cabbage and cabbage family plants, chamomile, lettuce, strawberries, summer savory, and tomatoes. Avoid planting garlic with beans or peas. Do not plant garlic in the same bed after onion family crops.
Container growing garlic
Garlic can be grown in containers as long as it is positioned in a warm spot and gets regular water. Because garlic requires a long growing period, you may want to interplant garlic with lettuce or another green. Choose a container that is at least 15 inches (38cm) wide and deep.
Garlic pests
Garlic can be attacked by aphids, nematodes, and thrips. Control aphids and thrips with a strong, steady stream of water or insecticidal soap. Plant nematode-resistant varieties or solarize the soil to control nematodes.
- Onion thrips may attack garlic. If onion maggots or wireworms have been a problem in the past, apply parasitic nematodes to the soil at planting time.
- Spray aphids and onions thrips off of plants with a heavy stream of water.
How to protect garlic: Onion Family Growing Problems: Troubleshooting.
Garlic diseases
Botrytis and white rot can attack garlic; control botrytis and other molds with a commercial fungicide that contains baking soda.
- Mildew may occur in a warm moist environment. Keep plants dry.
- Destroy bulbs with any sign of disease—mold, mildew, wilted leaves, or soft spots.
- Do not plant garlic or other onion family crops in the same bed more than once every three year
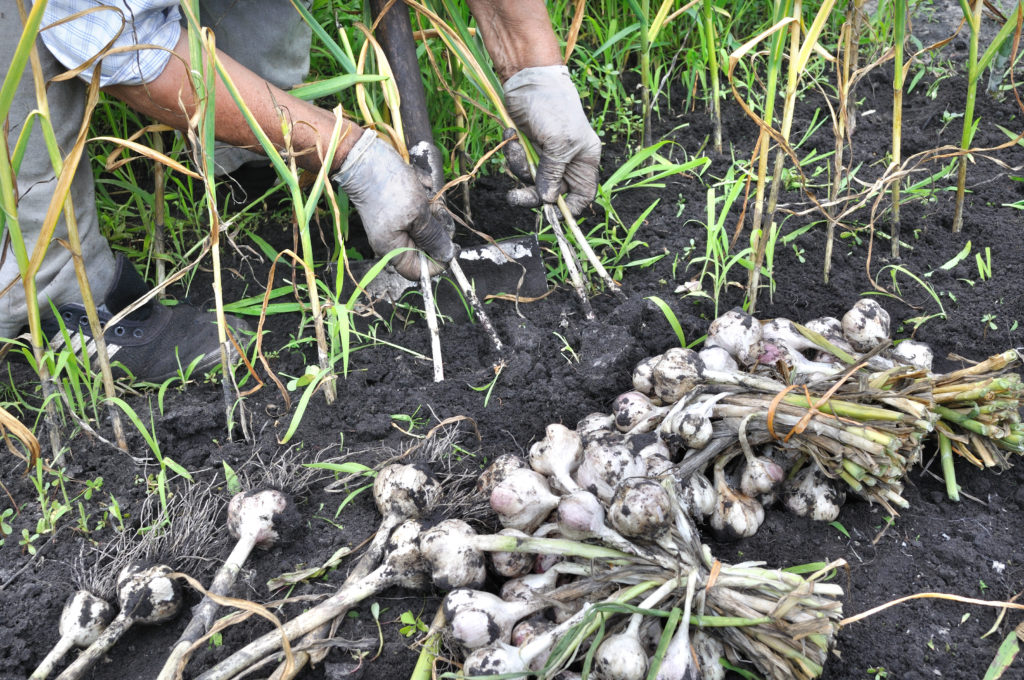
Harvesting garlic
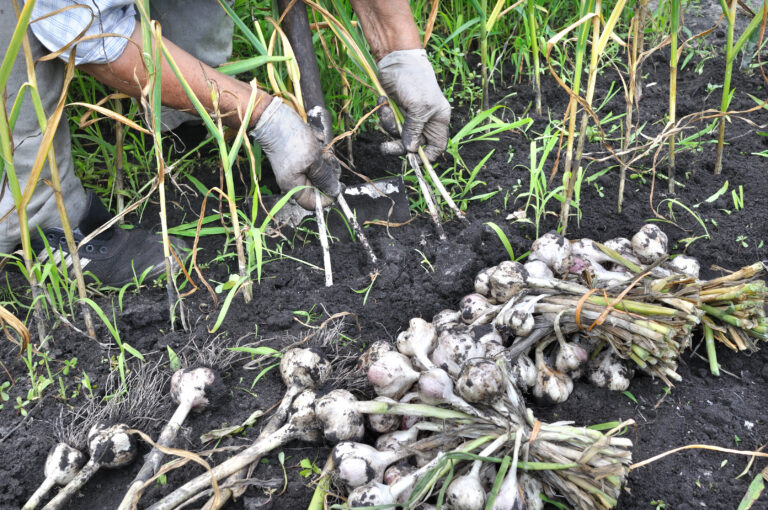
Garlic is ready for harvest when leaves turn brown and begin to die back. The skins of garlic bulbs should be thick, dry, and papery at harvest time.
Harvest garlic in the summer when tops have begun to yellow and are partially dry and when heads are fully formed. About 75 percent of the top growth should be brown at harvest time.
Take up bulbs with a spading fork. Remove any clinging soil and allow heads to dry (cure) for 3-4 weeks.
- Harvest bulbs when the tops start to dry and turn brown. About 75 percent of the top growth should be brown at harvest time.
- To know if bulbs are ready for harvest, lift one or two and break them apart. If bulbs are unsegmented and difficult to separate, it is too early. Check again in a week or two.
- Ripe bulbs should easily pull away from the stems.
- The skins of bulbs just right for harvest will be thick, dry, and papery.
- The skins of bulbs left in the ground too long will be loose and deteriorate; these bulbs will be inferior and not keep well. It is better to harvest a bit early than too late.
- Lift garlic bulbs with a garden fork being careful not to bruise or cut the skins.
- Allow bulbs to dry in an airy place for 3 to 4 weeks after harvest until the outer skins turn papery.
- Save the largest bulbs to replant next season.
Harvest tips: How to Harvest and Store Garlic.
Curing garlic
Garlic should be cured or dried so that it will store without spoiling or rotting. Cure garlic in a hot, dry, dark place with good air circulation. Cure bulbs for two to three weeks.
Curing is complete when the skins are dry and stand the necks are tight. Store cured garlic in a well-ventilated container or nylon net bag in a cool, dry, dark place. Bulbs may start to shrink if stored at temperatures above 77°F (25°C); cloves may sprout if temperatures fall to around 41°F (5°C). Remove clinging soil and allow the head to cure or dry for 3 to 4 weeks.
During curing, protect heads from sunburn or rainfall and allow for good air circulation during curing. Outer skins will turn papery. Discard cloves that have blue-green spots or mold. Curing is complete with the skins are dry and the necks are tight.
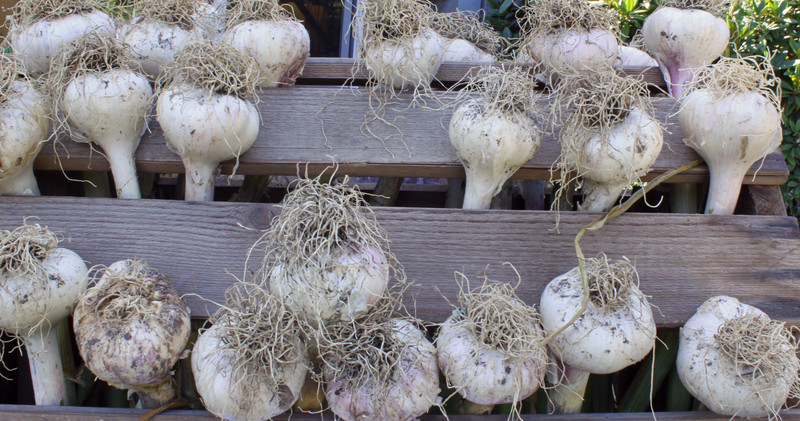
Storing and preserving garlic
Store cured garlic in a well-ventilated container or nylon net bag or in a dry, cool, and dark place. Partially dried garlic can be braided into strands for short-term storage. Bulbs will start to shrink if stored at a temperature above 77°F.
- Use garlic fresh or cure it for storage.
- Cure garlic in a hot, dry, dark place with good air circulation. Cure bulbs for two to three weeks.
- You can hang garlic in loose bunches to cure. Braid the tops of the plants together with twine and hang them to dry.
- Cure garlic at 60° to 90°F (15-32°C).
- Trim away the leaves and roots after the garlic has cured.
- Store mature bulbs in a cool, dry location in a mesh or net bag.
- Garlic can be stored for 5 to 8 months at 35° to 40°F (1.7-4.4°C).
- Peeled cloves can be stored in an air-tight container in the freezer.
- Peeled garlic cloves can be canned or frozen.
- Fresh garlic leaves can be snipped and used like chives.
Hard-neck garlic will set bulblets at the top of twisted flower stalks in addition to the underground bulbs.
Garlic types and varieties
There are hundreds of named varieties of garlic, but all of them can be categorized into two major types: soft-necked and hard-necked. The stalk that grows up from a garlic bulb is called a “neck.”
Because the hard stalk grows up through the middle of the bulb. Hard-neck garlic produces a few large cloves around the outside of the bulb.
Soft-neck garlic, by contrast, does not send up a woody stalk. Instead, it sends up strappy leaves. The absence of a stalk growing from the center of the bulb allows several smaller cloves to grow at the center of each head and larger cloves on the outside layer. Because of the layers of cloves, soft-neck garlic is plump looking.
Soft-neck garlic
Soft neck garlic (also known as silverskin or artichoke garlic) commonly grows larger bulbs than hard-neck garlic. The neck or stem is soft compared to hard-neck varieties. The flavor of soft-neck garlic is strong and intense.
The stalk of soft-neck garlic is pliable and soft at maturity. The stalk of hard-neck garlic is still at maturity.
The botanical name of soft-neck garlic is Allium var. sativum. Soft-neck garlic is sometimes called “silverskin garlic” for the white or silver color of its skin or “artichoke garlic” because the cloves overlap like the scales of an artichoke.
Soft-neck garlic also is referred to as braidable varieties because their soft stems dry almost grass-like and can be tied or braided together into long chains.
Soft-neck garlic stores best. The garlic you find at the market is probably soft-neck.
Soft-neck garlic is commonly grown in the United States–mainly in California, Texas, and Louisiana. Soft-neck garlic is also grown in France, Spain, Italy, and Mexico.
Popular varieties of soft-neck garlic include ‘California Early’, a market cultivar with 10-12 plump, even-sized cloves; ‘Italian Purple’, which is large and mild flavored; ‘Clermont Ferrand’, from the Massif Central of France; and ‘Silverskin’, a large white-skinned garlic that is a culinary favorite. Soft-neck varieties include: ‘Silverskin’, ‘California Late’, ‘California White’, ‘Lorz Italian’, ‘New York White’, ‘Polish White’, and ‘Inchelium Red’.
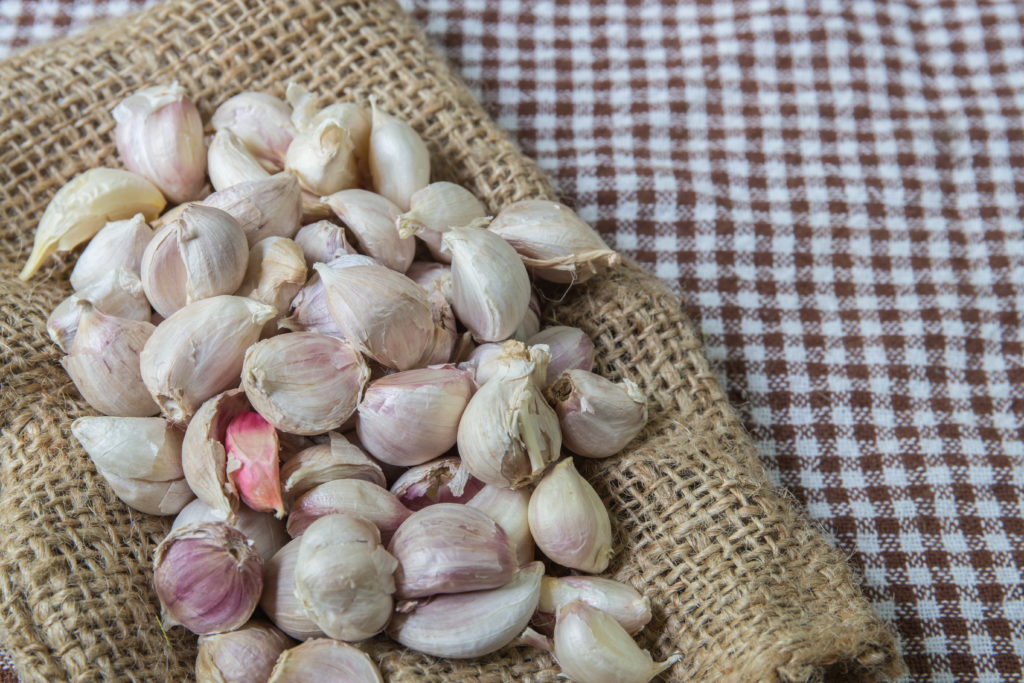
Hard-neck garlic
Hard neck garlic (also known as top-setting garlic, serpent garlic, or rocambole) will grow one ring of cloves around the stem. Hard-neck garlic is very cold hardy but does not store well.
Hard-neck garlic will set bulblets at the top of twisted flower stalks in addition to the underground bulbs. The green stems are called scapes. Scapes can be harvested and stir-fried without harming the bulbs in the ground.
Hard-neck garlic is mild tasting and is best used soon after harvest. It has only a few layers of papery skin and does not store well. The flavor of hard-neck garlic is mild compared to soft-neck garlic.
Hard-neck garlic is commonly grown in Central Asia and Russia.
Hard-neck refers to the woody flower stalk that grows through the center of the bulb. This stalk does not produce flowers but small bulbils resembling seed heads at the end of the stalk.
The botanical name of hard-neck garlic is Allium var. ophioscorodon. Hard-neck garlic is also referred to as “stiff-neck”, “top-setting garlic”, or “ophio garlic”—a shortened version of its botanical name.
Hard-neck bulbs form large outside cloves and no inner cloves. Hard-neck garlic has a mild taste and is easy to peel.
Popular varieties of hard-neck garlic include ‘German Red Garlic’ which has a bright purple bulb with lemon-fleshed cloves; ‘Continental’ which is spicy and originated in Russia; and ‘Spanish Roja’ which is large, reddish-skinned garlic with an intense fragrance and flavor. Hard-neck varieties also include ‘Korean Red’ and ‘Chesnok Red’,
Rocambole
Another well-known hard-neck garlic is rocambole. The woody stem of rocambole can curl to form a 360° coil. Rocambole is sometimes nicknamed “serpent garlic.”
Rocambole—which is very mild flavored–is very popular in Europe.
(For the record, rocambole can also refer to another onion family plant, Allium scorodoprasum. This plant can be used like garlic but resembles more closely a leek, and is thus also known as “sand leek”.)
Elephant garlic
Elephant garlic is also called great-headed garlic. Elephant garlic is not true garlic; it is more closely related to leeks. Elephant garlic has large bulbs and about 4 cloves for each bulb.
Garlic Growing Hub
Start here: The Ultimate Garlic Growing Guide: From Seed to Harvest
🌱 Garlic Planting & Timing Clusters
- Garlic Plant Starting Tips: How to Get Going
- When to Plant Garlic: Fall vs. Spring Compared
- Garlic Planting Calendar by Zone (Month-by-Month Guide)
- Ideal Soil Temperature for Planting Garlic and Why It Matters
- Climate Guide: Growing Garlic in Warm vs. Cold Regions
🧄 Garlic Types & Varieties Clusters
- Softneck vs. Hardneck Garlic: Key Differences for Gardeners
- Best Softneck Garlic Varieties for Home Gardens
- Best Hardneck Garlic Varieties for Flavor and Storage
- Rocambole Garlic: What It Is and How to Grow It
- Elephant Garlic: Tips for Planting and Harvesting Giant Bulbs
🌿 Growing & Care Clusters
- Proper Garlic Spacing for Bigger Bulbs
- How to Water Garlic the Right Way
- Fertilizing Garlic: Feeding Tips Bigger, Healthier Bulbs
- Essential Garlic Care: From Planting to Harvest
- Best Companion Plants for Garlic (And What to Avoid)
- How to Grow Garlic in Containers: Step-by-Step Guide
🐛 Pests & Disease Clusters
🌾 Harvest & Storage Clusters
- How to Tell When Garlic Is Ready to Harvest
- How to Harvest and Store Garlic
- How to Cure Garlic for Long-Term Storage
- Best Ways to Store and Preserve Garlic at Home
🍳 Kitchen & Use Clusters
- Garlic Cooking and Severing Ideas for Your Harvest Table
- Fresh Garlic vs. Stored Garlic: Flavor and Cooking Differences
- Garlic Scapes: What They Are and How to Use Them
- Leeks vs. Green Onions vs. Garlic: What’s the Difference
Garlic articles at Harvest to Table:
How to Harvest and Store Garlic
Five Ways to Cook and Serve Garlic
Oyster Mushroom Sauteed in Garlic
More how to grow articles:
Learn how to plant, grow, and harvest your favorite vegetables. Click below for all you need to know.
- Artichoke
- Arugula
- Asparagus
- Beans, Snap
- Beets
- Broad Beans
- Broccoli
- Brussels Sprouts
- Cabbage
- Cantaloupe — Melons
- Cardoon
- Carrots
- Cauliflower
- Celeriac
- Celery
- Chard
- Chayote Squash
- Chickpeas
- Chicory
- Chinese Cabbage
- Collards
- Corn Salad
- Corn, Sweet
- Cresses
- Cucumbers
- Eggplant
- Endive and Escarole
- Fava Beans
- Florence Fennel
- Garbanzo Beans
- Garlic
- Horseradish
- Jerusalem Artichoke
- Kale
- Kohlrabi
- Leeks
- Lettuce
- Lima Beans
- Melons
- Mizuna
- Mustard Greens
- New Zealand Spinach
- Okra
- Onions
- Parsnips
- Peanuts
- Peas
- Peppers
- Potatoes
- Pumpkins
- Radicchio
- Radishes
- Rhubarb
- Rutabaga
- Salsify
- Shallots
- Sorrel
- Southern Peas
- Soybeans
- Spinach
- Squash, Summer
- Squash, Winter
- Sunchokes
- Sweet Potato
- Swiss Chard
- Taro
- Tomatillo
- Tomatoes
- Turnips
- Watermelon
- Zucchini
Garden Planning Books at Amazon:

