The Ultimate Tomato Growing Guide: From Seed to Harvest
Tomatoes are one of the most rewarding crops for home gardeners, offering a wide variety of flavors, textures, and colors that can’t be matched by store-bought options. With thousands of varieties to choose from—ranging from sweet cherry tomatoes to meaty beefsteaks—there’s a tomato for every culinary need. Having grown tomatoes for years, I’ve learned that success starts with selecting the right variety for your climate, garden space, and intended use. Whether you’re planting in raised beds, containers, or a traditional garden, providing the right soil conditions, support, and care will make all the difference in your yield and fruit quality.
Through experience, I’ve found that understanding tomato growth habits is key. Determinate (bush) tomatoes provide a concentrated harvest, great for canning, while indeterminate (vining) varieties produce fruit all season long when properly supported and pruned. But growing tomatoes isn’t just about planting and waiting—factors like soil health, watering consistency, and pest management play a major role in overall success.
This guide draws on years of hands-on gardening experience, offering practical advice on everything from selecting the best seedlings to preventing common tomato diseases. With the right approach, you’ll be harvesting fresh, flavorful tomatoes for months to come.
Quick Tips for Growing Tomatoes
Growing tomatoes successfully requires more than just planting and watering—it’s about understanding the plant’s needs at every stage. Over the years, I’ve experimented with different techniques and learned that small adjustments can make a big difference in plant health and fruit production. Here are some essential tips to ensure a thriving tomato crop:
- Choose the right variety for your climate and growing conditions. Some tomatoes, like ‘Early Girl’ or ‘Stupice,’ thrive in short-season areas, while heat-tolerant varieties such as ‘Solar Fire’ are best for hot climates. Researching and selecting the right type can mean the difference between a strong harvest and struggling plants.
- Start seeds indoors or purchase healthy transplants from a garden center. If starting from seed, use a high-quality seed-starting mix and provide adequate light to prevent leggy growth. When buying transplants, look for sturdy, dark green plants with no flowers or yellowing leaves. Avoid plants with curled leaves or signs of disease.
- Plant in full sun with well-draining, nutrient-rich soil. Tomatoes need at least 6–8 hours of direct sunlight per day. Amending the soil with compost or well-rotted manure improves fertility, while good drainage prevents root rot. I always mix in a handful of bone meal at planting time for strong root development.
- Provide proper spacing and support for optimal growth. Crowded plants are more prone to disease due to poor airflow. Space determinate varieties about 2 feet apart and indeterminate varieties at least 3 feet apart. Staking, caging, or trellising ensures plants stay upright, reducing disease risk and making harvesting easier.
- Water deeply and consistently to prevent stress and cracking. Inconsistent watering can cause issues like blossom-end rot and fruit cracking. I’ve found that watering early in the morning and using mulch to retain moisture leads to healthier plants. A deep soak 2–3 times a week is better than shallow daily watering.
- Feed regularly with a balanced fertilizer. Tomatoes are heavy feeders, and I’ve seen the best results when using a fertilizer rich in phosphorus and potassium. Start with a balanced fertilizer at planting and switch to a lower-nitrogen formula once flowering begins to promote fruit development rather than excessive leafy growth.
- Monitor for pests and diseases to keep plants healthy. Common tomato pests like aphids and hornworms can be controlled by handpicking or using natural predators like ladybugs. Regularly inspecting leaves for spots or yellowing can help catch diseases early. A preventative copper spray can help with fungal issues in humid climates.
- Harvest at peak ripeness for the best flavor. Tomatoes develop their best taste when left to ripen on the vine. However, if frost or pests threaten, picking them at the “breaker” stage (when they begin to show color) and ripening indoors can ensure a full-flavored harvest.
By following these tried-and-true methods, you’ll set your tomato plants up for success and enjoy a steady supply of delicious, homegrown tomatoes all season long.
Choosing the Right Tomato Variety
With thousands of tomato varieties available, selecting the right one for your garden can be overwhelming. Over the years, I’ve experimented with many types, and I’ve learned that the best tomato for you depends on your climate, space, and how you plan to use the fruit. Whether you’re looking for a compact plant to grow in a container, a high-yielding variety for sauces, or a heat-tolerant tomato for a long summer season, choosing wisely can make all the difference in your harvest.
Types of Tomatoes
Tomatoes can be categorized in several ways, but the most important distinctions are growth habit, shape, and color. Understanding these characteristics helps in selecting the best variety for your needs.
- Bush (Determinate) and Dwarf Tomatoes
- These compact plants grow to a set height, typically around 3–4 feet, and stop growing after setting fruit.
- Ideal for small gardens, raised beds, and containers, as they don’t require extensive staking.
- Produce fruit in a short window, making them perfect for preserving and canning.
- Some excellent determinate varieties include ‘Roma,’ ‘Celebrity,’ and ‘Tiny Tim’ for small-space gardening.
- Vining (Indeterminate) Tomatoes
- These plants continue growing and producing fruit throughout the season until frost.
- Require staking, caging, or trellising for proper support and airflow.
- Yield a continuous harvest, perfect for fresh eating and long-term production.
- Popular indeterminate varieties include ‘Brandywine,’ ‘Cherokee Purple,’ and ‘Sungold.’
- Other Classifications
- By Shape:
- Globe/Slicing: Classic round tomatoes like ‘Better Boy’ and ‘Big Beef,’ great for sandwiches.
- Cherry & Grape: Small, sweet varieties like ‘Sweet 100’ and ‘Juliet,’ ideal for snacking and salads.
- Paste/Roma: Thick-fleshed, low-moisture tomatoes like ‘San Marzano’ and ‘Amish Paste,’ perfect for sauces.
- Beefsteak: Large, meaty tomatoes like ‘Mortgage Lifter’ and ‘Black Krim,’ excellent for fresh eating.
- By Color:
- Red (most common), yellow (mild and sweet), purple/black (rich and smoky), and green (tart and firm).
- Unique varieties such as ‘Green Zebra’ and ‘Black Cherry’ add diversity to the garden and kitchen.
- By Shape:
Selecting Tomato Varieties
Choosing the right tomato depends on your garden’s conditions and your culinary preferences. Here’s what I’ve learned from years of growing different varieties:
- For Fresh Eating: If you love slicing juicy tomatoes for sandwiches and salads, go for beefsteak or slicing varieties like ‘Brandywine’ or ‘Big Rainbow.’ Their large, flavorful fruits are a summer staple.
- For Canning and Sauces: Paste tomatoes like ‘Roma’ and ‘San Marzano’ have thick, meaty flesh and fewer seeds, making them perfect for cooking down into sauces and soups. I always grow a few rows of these for homemade marinara.
- For Short Growing Seasons: If you live in a cooler climate with a shorter summer, choose early-maturing varieties like ‘Early Girl’ (57 days) or ‘Stupice’ (52 days) to ensure you get a harvest before the first frost. These have saved my season more than once!
- For Continuous Harvest: To keep fresh tomatoes coming all summer long, grow a mix of early, midseason, and late-maturing varieties. Combining ‘Sungold’ (early), ‘Cherokee Purple’ (midseason), and ‘Brandywine’ (late) ensures a steady supply.
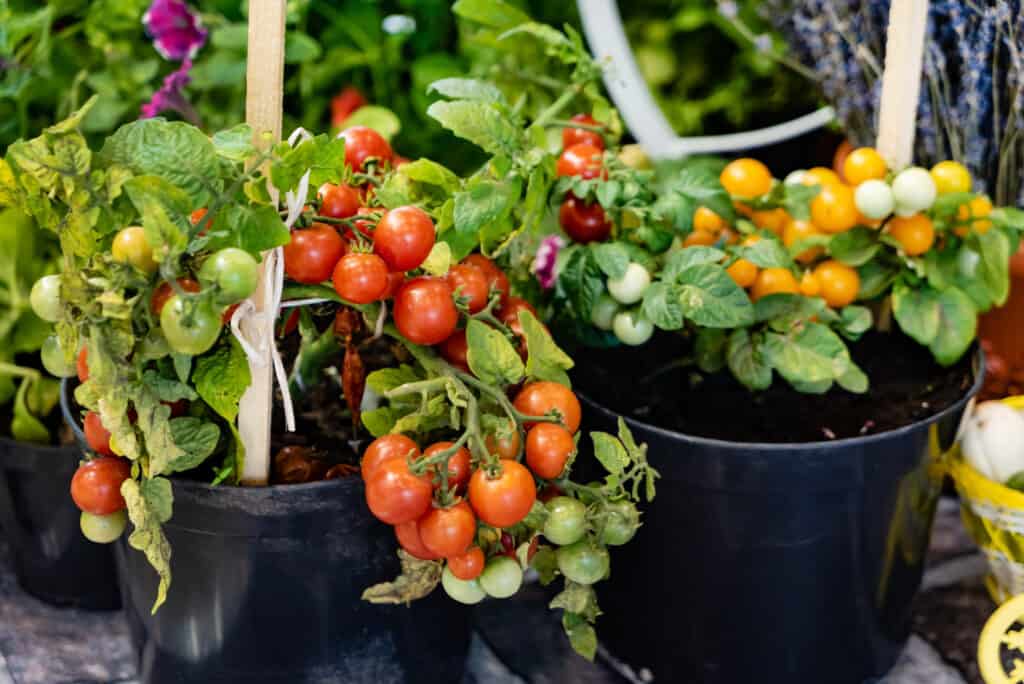
- For Small Spaces or Containers: If you’re limited on space, dwarf or bush varieties like ‘Patio Princess’ or ‘Tiny Tim’ are compact and productive in pots and small beds.
By selecting the right tomato varieties based on your growing conditions and personal preferences, you’ll set yourself up for a productive and rewarding harvest. Whether you’re growing for fresh eating, canning, or market sales, there’s a perfect tomato for every garden.
When and How to Plant Tomatoes
Planting tomatoes at the right time and using proper techniques can significantly impact their growth and yield. Over the years, I’ve learned that giving tomato plants a strong start—whether from seed or transplants—ensures a healthy and productive season. Timing is key, and understanding the best planting methods will set your tomatoes up for success.
Starting Tomato Seeds Indoors
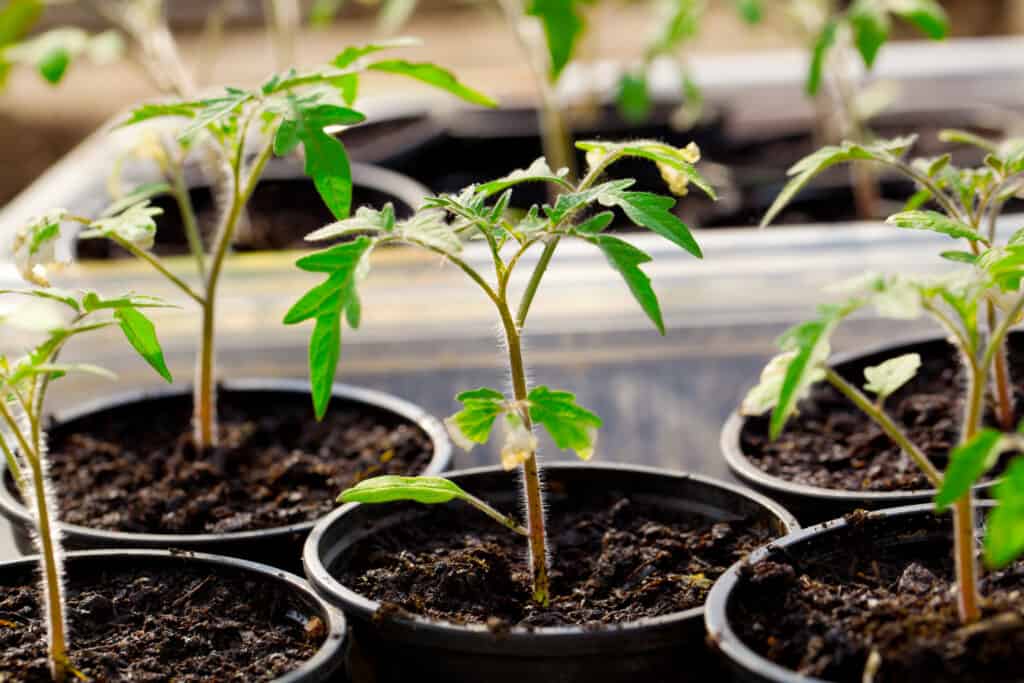
Starting tomato seeds indoors 6–8 weeks before the last expected frost is one of the best ways to get a jump on the growing season. This method allows you to control early growth conditions, resulting in strong, vigorous plants by the time they are ready for the garden. I’ve started countless tomato plants indoors, and here’s what has worked best:
- Use a quality seed-starting mix – Regular garden soil is too heavy and may harbor pathogens. A light, well-draining mix helps prevent damping off, a common seedling disease.
- Provide ample light – Tomato seedlings need 14–16 hours of light per day. I use grow lights positioned just a few inches above the plants to prevent leggy growth.
- Maintain proper moisture and temperature – Keep the soil moist but not soggy, and maintain temperatures around 70–75°F (21–24°C) for optimal germination.
- Thin seedlings early – Once sprouts appear, thin weaker ones to allow the strongest to thrive. Crowding can lead to weak plants and poor airflow, increasing the risk of disease.
Potting Up Tomatoes
Tomato seedlings benefit from being potted up into larger containers at least once before they move to the garden. This step encourages a larger root system, which translates into stronger, more resilient plants. From my experience, potting up has made a significant difference in plant health and productivity.
When potting up:
- Choose a container 2–3 inches larger than the previous one, with good drainage.
- Plant the seedling deeper each time, burying part of the stem to encourage more root growth.
- Use a rich, well-draining potting mix to provide nutrients for continued development.
- Water thoroughly after transplanting and ensure the plant receives adequate light.
If seedlings become too tall and leggy, don’t worry—potting up allows you to correct this by planting deeper. This technique has saved many of my early tomato plants from becoming weak and spindly.
Transplanting Tomato Seedlings
Once outdoor temperatures consistently stay above 50°F (10°C) at night, tomato seedlings are ready for transplanting into the garden. But sudden exposure to outdoor conditions can shock young plants. Over the years, I’ve found that taking the time to harden off seedlings properly makes a huge difference in their ability to thrive.
Here’s how to harden off tomato plants before transplanting:
- Start with short outdoor exposures – Place seedlings outside for 1–2 hours a day in a shaded, wind-protected area.
- Gradually increase sunlight – Over 7–10 days, increase exposure to direct sunlight and outdoor conditions.
- Reduce watering slightly – This toughens the plants and prepares them for less controlled garden conditions.
When planting tomatoes in the garden:
- Space plants at least 18–24 inches apart for proper airflow and disease prevention.
- Use the trench planting method for leggy seedlings—lay the plant sideways in a trench, covering the stem except for the top leaves. This encourages additional root growth.
- Water deeply after planting and apply a layer of mulch to retain soil moisture.
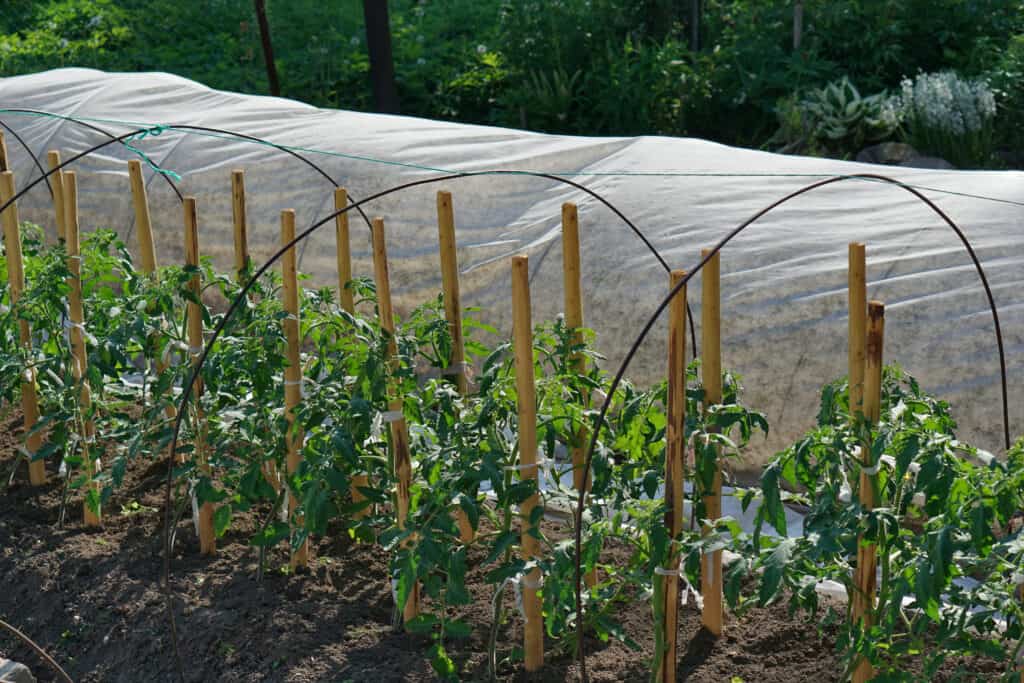
- Protect young plants with row covers or cloches if cool nights persist.
By following these planting techniques, you’ll give your tomatoes the best possible start, leading to strong plants and an abundant harvest.
Where to Plant Tomatoes
Tomatoes are native to warm climates and thrive when given optimal growing conditions. Over the years, I’ve found that selecting the right planting location is critical for a successful tomato harvest. Tomatoes need full sun, which means they should receive at least 6-8 hours of direct sunlight daily. Without enough sunlight, tomatoes can become leggy, producing fewer fruits with lower flavor and quality.
When choosing a location for your tomatoes, look for an area that receives maximum sun exposure throughout the day. If your garden is shaded in the morning or afternoon, consider selecting a different spot that can provide consistent sunlight. I’ve planted tomatoes in both raised beds and in-ground plots, and consistent sunlight is always key to robust growth.
In addition to sunlight, well-draining, nutrient-rich soil is essential. Tomatoes are heavy feeders, meaning they require soil with plenty of organic matter to support their growth. Over the years, I’ve learned that improving soil with compost is one of the best ways to ensure your tomatoes get the nutrients they need. Compost adds organic matter, enhances soil structure, and encourages beneficial microbial activity, which helps improve plant health.
A trick I’ve used to jumpstart the growing season is to pre-warm the soil using black plastic mulch. This technique absorbs heat from the sun, raising the soil temperature by several degrees, which encourages faster germination and stronger plant growth. I’ve found this particularly helpful in cooler climates where the growing season is shorter. Using black plastic also helps suppress weeds, which compete with your tomatoes for nutrients and water.
Supporting Tomatoes
Providing proper support to tomato plants isn’t just about keeping them upright—it’s a critical step in ensuring healthy growth and maximizing fruit production. As tomatoes grow, they can become top-heavy, and without support, they may sprawl on the ground, leading to increased susceptibility to disease and pests. Supporting your plants improves air circulation, which helps reduce the risk of fungal infections, and it makes harvesting easier since you’ll have better access to the fruit. Based on my experience growing tomatoes, I can attest to the importance of choosing the right support method for your plants.
Here are some of the most common and effective ways to support tomatoes:
Staking
One of the simplest and most effective methods is staking. I use a 6-foot sturdy stake, usually made from wood or metal, to provide vertical support for indeterminate varieties. When staking tomatoes, it’s important to tie the main stem loosely to the stake with soft ties or twine to prevent damage. This method works well because it encourages a strong central stem and minimizes the risk of diseases like blight that thrive on leaves touching the ground.
Caging
Tomato cages are another excellent choice, especially for determinate or bush-type varieties. These plants typically grow to a set height and then stop, so a wire cage provides enough support without the need for staking. I recommend placing the cage around the plant at planting time, as it’s much easier to position the cage when the plant is young. As the plant grows, train the stems through the cage to keep them upright and ensure even fruit production. Cages also improve airflow around the plant, reducing moisture buildup that can lead to disease.
Trellising
Trellising is perfect for gardeners with limited space or those who want to grow tomatoes vertically. By training tomato plants along a fence or trellis, you can maximize space while keeping the plants off the ground. I’ve found that indeterminate varieties (which continue to grow throughout the season) respond particularly well to this method. As the vines grow, I gently tie them to the trellis using soft string or plant ties to guide their upward growth. Trellises also allow for better sunlight exposure on all sides of the plant, promoting even ripening of the fruit.
No Support
Some determinate tomato varieties (such as ‘Bush Early Girl’) naturally have a compact growth habit and are often capable of growing without support. These tomatoes are perfect for small gardens or containers, as they don’t require a lot of vertical space. However, without support, the plants may sprawl on the ground, making them more prone to disease, pests, and rot. If you choose to grow tomatoes without support, I recommend using mulch to keep the soil clean and prevent soil-borne diseases from splashing up onto the plants. Additionally, mulch helps retain moisture, so your plants won’t experience stress during hot spells.
In my experience, the method of support you choose depends on the variety of tomato you’re growing, the space available, and your overall garden goals. I’ve had great success using a combination of staking and caging for different varieties, but the key is to ensure your plants have the support they need to thrive and produce a bountiful harvest.
Watering and Feeding Tomatoes
Proper watering and consistent fertilization are critical elements to growing healthy, high-yielding tomato plants. Over the years, I’ve found that giving my tomatoes the right amount of water and nutrients has a significant impact on both the size and flavor of the fruit. Here are the best practices I follow to ensure a robust harvest:
Watering Deeply
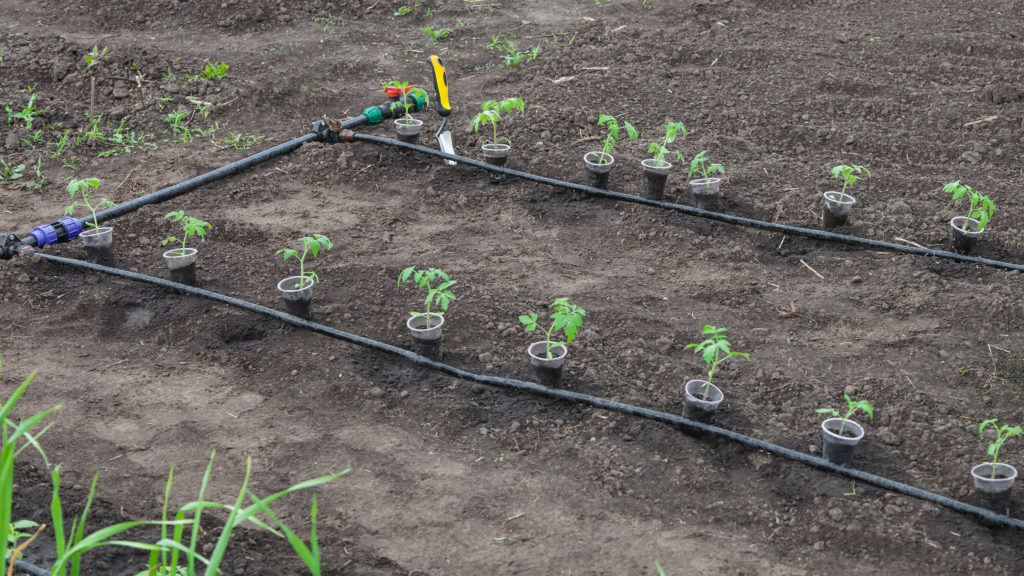
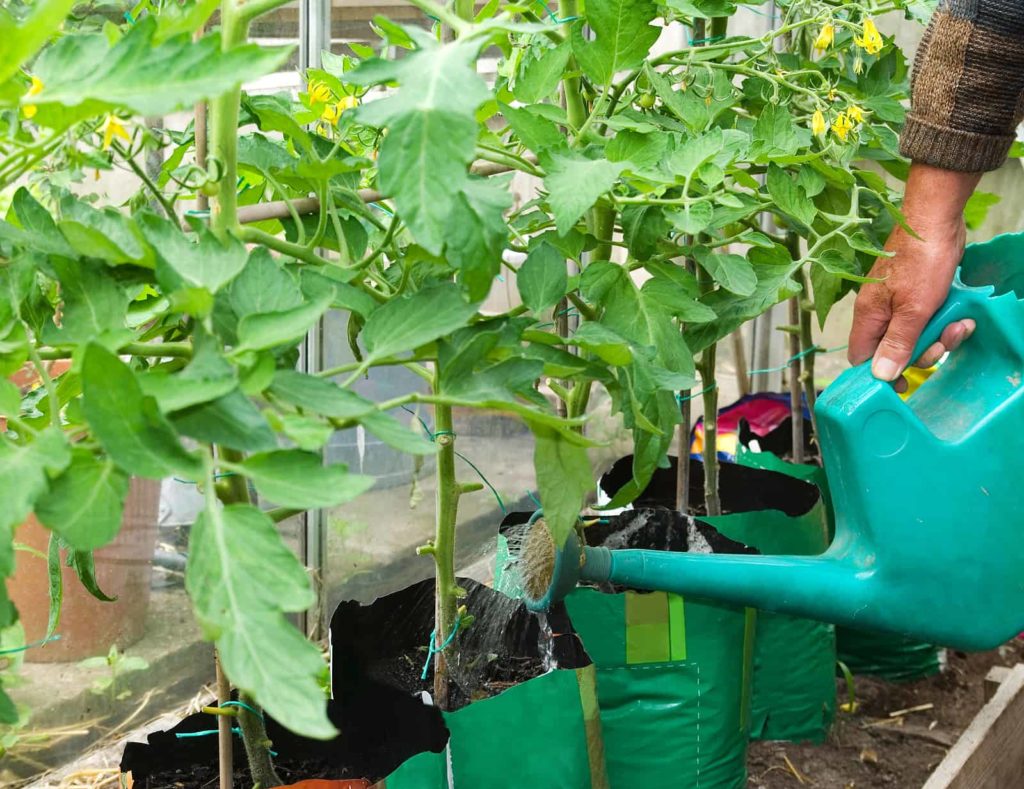
Tomatoes thrive when they receive consistent moisture. To encourage deep, strong root systems, it’s essential to water tomatoes deeply, especially during dry periods. I recommend watering 1 to 2 inches per week—whether through rainfall or irrigation. This deep watering ensures that the water reaches the root zone, encouraging roots to grow downward rather than staying near the surface, where they can dry out easily. One important thing I’ve learned through years of experience is that watering early in the day reduces the risk of diseases such as blight, which thrive in humid environments. Avoid overhead watering whenever possible, as wet foliage can lead to fungal problems.
Fertilizing Regularly
Tomatoes are heavy feeders and require a balanced mix of nitrogen, phosphorus, and potassium for optimal growth. Based on my gardening experience, I’ve found that starting with a balanced fertilizer (such as a 10-10-10 mix) at planting time sets my plants up for success. As the plants grow, I apply additional feedings throughout the season to ensure they’re receiving the nutrients they need. Typically, I fertilize every 4-6 weeks, but this can vary depending on the type of fertilizer used and the growth rate of the plant.
Side-Dressing with Compost
In addition to regular fertilization, side-dressing with compost is a technique I use to give my tomatoes a midseason boost. Around the time the plants begin setting fruit, I add a layer of rich compost around the base of each plant. This not only provides extra nutrients but also helps improve the soil structure by increasing organic matter. I’ve found that side-dressing with compost also improves soil moisture retention, which helps keep my tomatoes happy during hot summer months.
Feeding Schedule
Sticking to a feeding schedule is essential for avoiding nutrient deficiencies. Regular, balanced feedings ensure that my plants have the nutrition they need to grow strong and produce delicious tomatoes. During the early stages, I focus on providing more nitrogen to promote healthy leaf growth. Once fruit begins to form, I shift to fertilizers with a higher phosphorus and potassium content to encourage fruit development and flavor. Maintaining this balance ensures a consistent supply of nutrients throughout the growing season, preventing the common pitfalls of over or under-fertilizing.
Side dress tomatoes with dilute fish emulsion or kelp meal every 3 to 4 weeks. Add aged compost around plants at midseason.
Pruning and Maintaining Tomatoes
Tomatoes are generally low-maintenance, but proper pruning and pest management are essential to keeping plants healthy and maximizing yield. Here’s how I approach pruning and maintaining my tomato plants based on years of personal experience:
Pinching and Pruning to Remove Suckers
One of the most crucial pruning tasks is removing suckers, the small shoots that grow in the axils between the main stem and branches. These suckers, while harmless initially, can divert energy away from fruit production, resulting in smaller yields and weaker plants. Over the years, I’ve learned that pinching out suckers as they appear helps my plants put more energy into growing larger, tastier tomatoes. I usually prune indeterminate varieties weekly, while determinate varieties may need less frequent attention. Pruning not only encourages better fruit production but also improves air circulation, reducing the risk of fungal diseases.
Monitor for Pests and Diseases
Pest and disease control is another area where experience plays a critical role. Tomatoes are prone to a variety of pests such as aphids, whiteflies, and hornworms. I keep a close eye on my plants and look for signs of damage—like yellowing leaves or holes in the fruit. When I find pests, I address the issue immediately with organic pest control methods like neem oil or insecticidal soap. In addition, diseases like early blight, late blight, and wilt are common threats. I find that keeping the garden clean, removing infected leaves, and avoiding wetting the foliage reduces the spread of these diseases. Crop rotation is another technique I’ve employed in my garden to minimize soil-borne diseases.
Common Tomato Growing Problems
- Pests – Watch for hornworms, aphids, and whiteflies.
- Diseases – Prevent blight, wilt, and mosaic virus with proper spacing and crop rotation.
- Blossom-End Rot – Caused by calcium deficiency; maintain consistent watering.
Mulching for Moisture Retention and Weed Control
One of the most valuable tools in my tomato maintenance routine is mulching. I apply a thick layer of organic mulch around the base of my plants to help retain moisture in the soil and suppress weeds. Mulch helps regulate soil temperature, keeping it cooler during the summer heat, which I’ve found prevents stress on the plants. It also prevents weeds from competing for nutrients and water. Over time, I’ve learned that organic mulches, such as straw or wood chips, also break down and enrich the soil with additional organic matter, making them even more beneficial to plant health.
By regularly pruning, monitoring for pests, and using mulching to maintain a healthy growing environment, I ensure that my tomato plants stay productive and resilient throughout the growing season. Through years of experience, I’ve found that these practices are key to growing healthy, disease-free plants that yield delicious tomatoes.
Harvesting Tomatoes
Harvesting tomatoes at the right time is crucial for achieving the best flavor and texture. Over the years, I’ve learned that waiting for the perfect balance of color and firmness ensures tomatoes reach their full flavor potential.
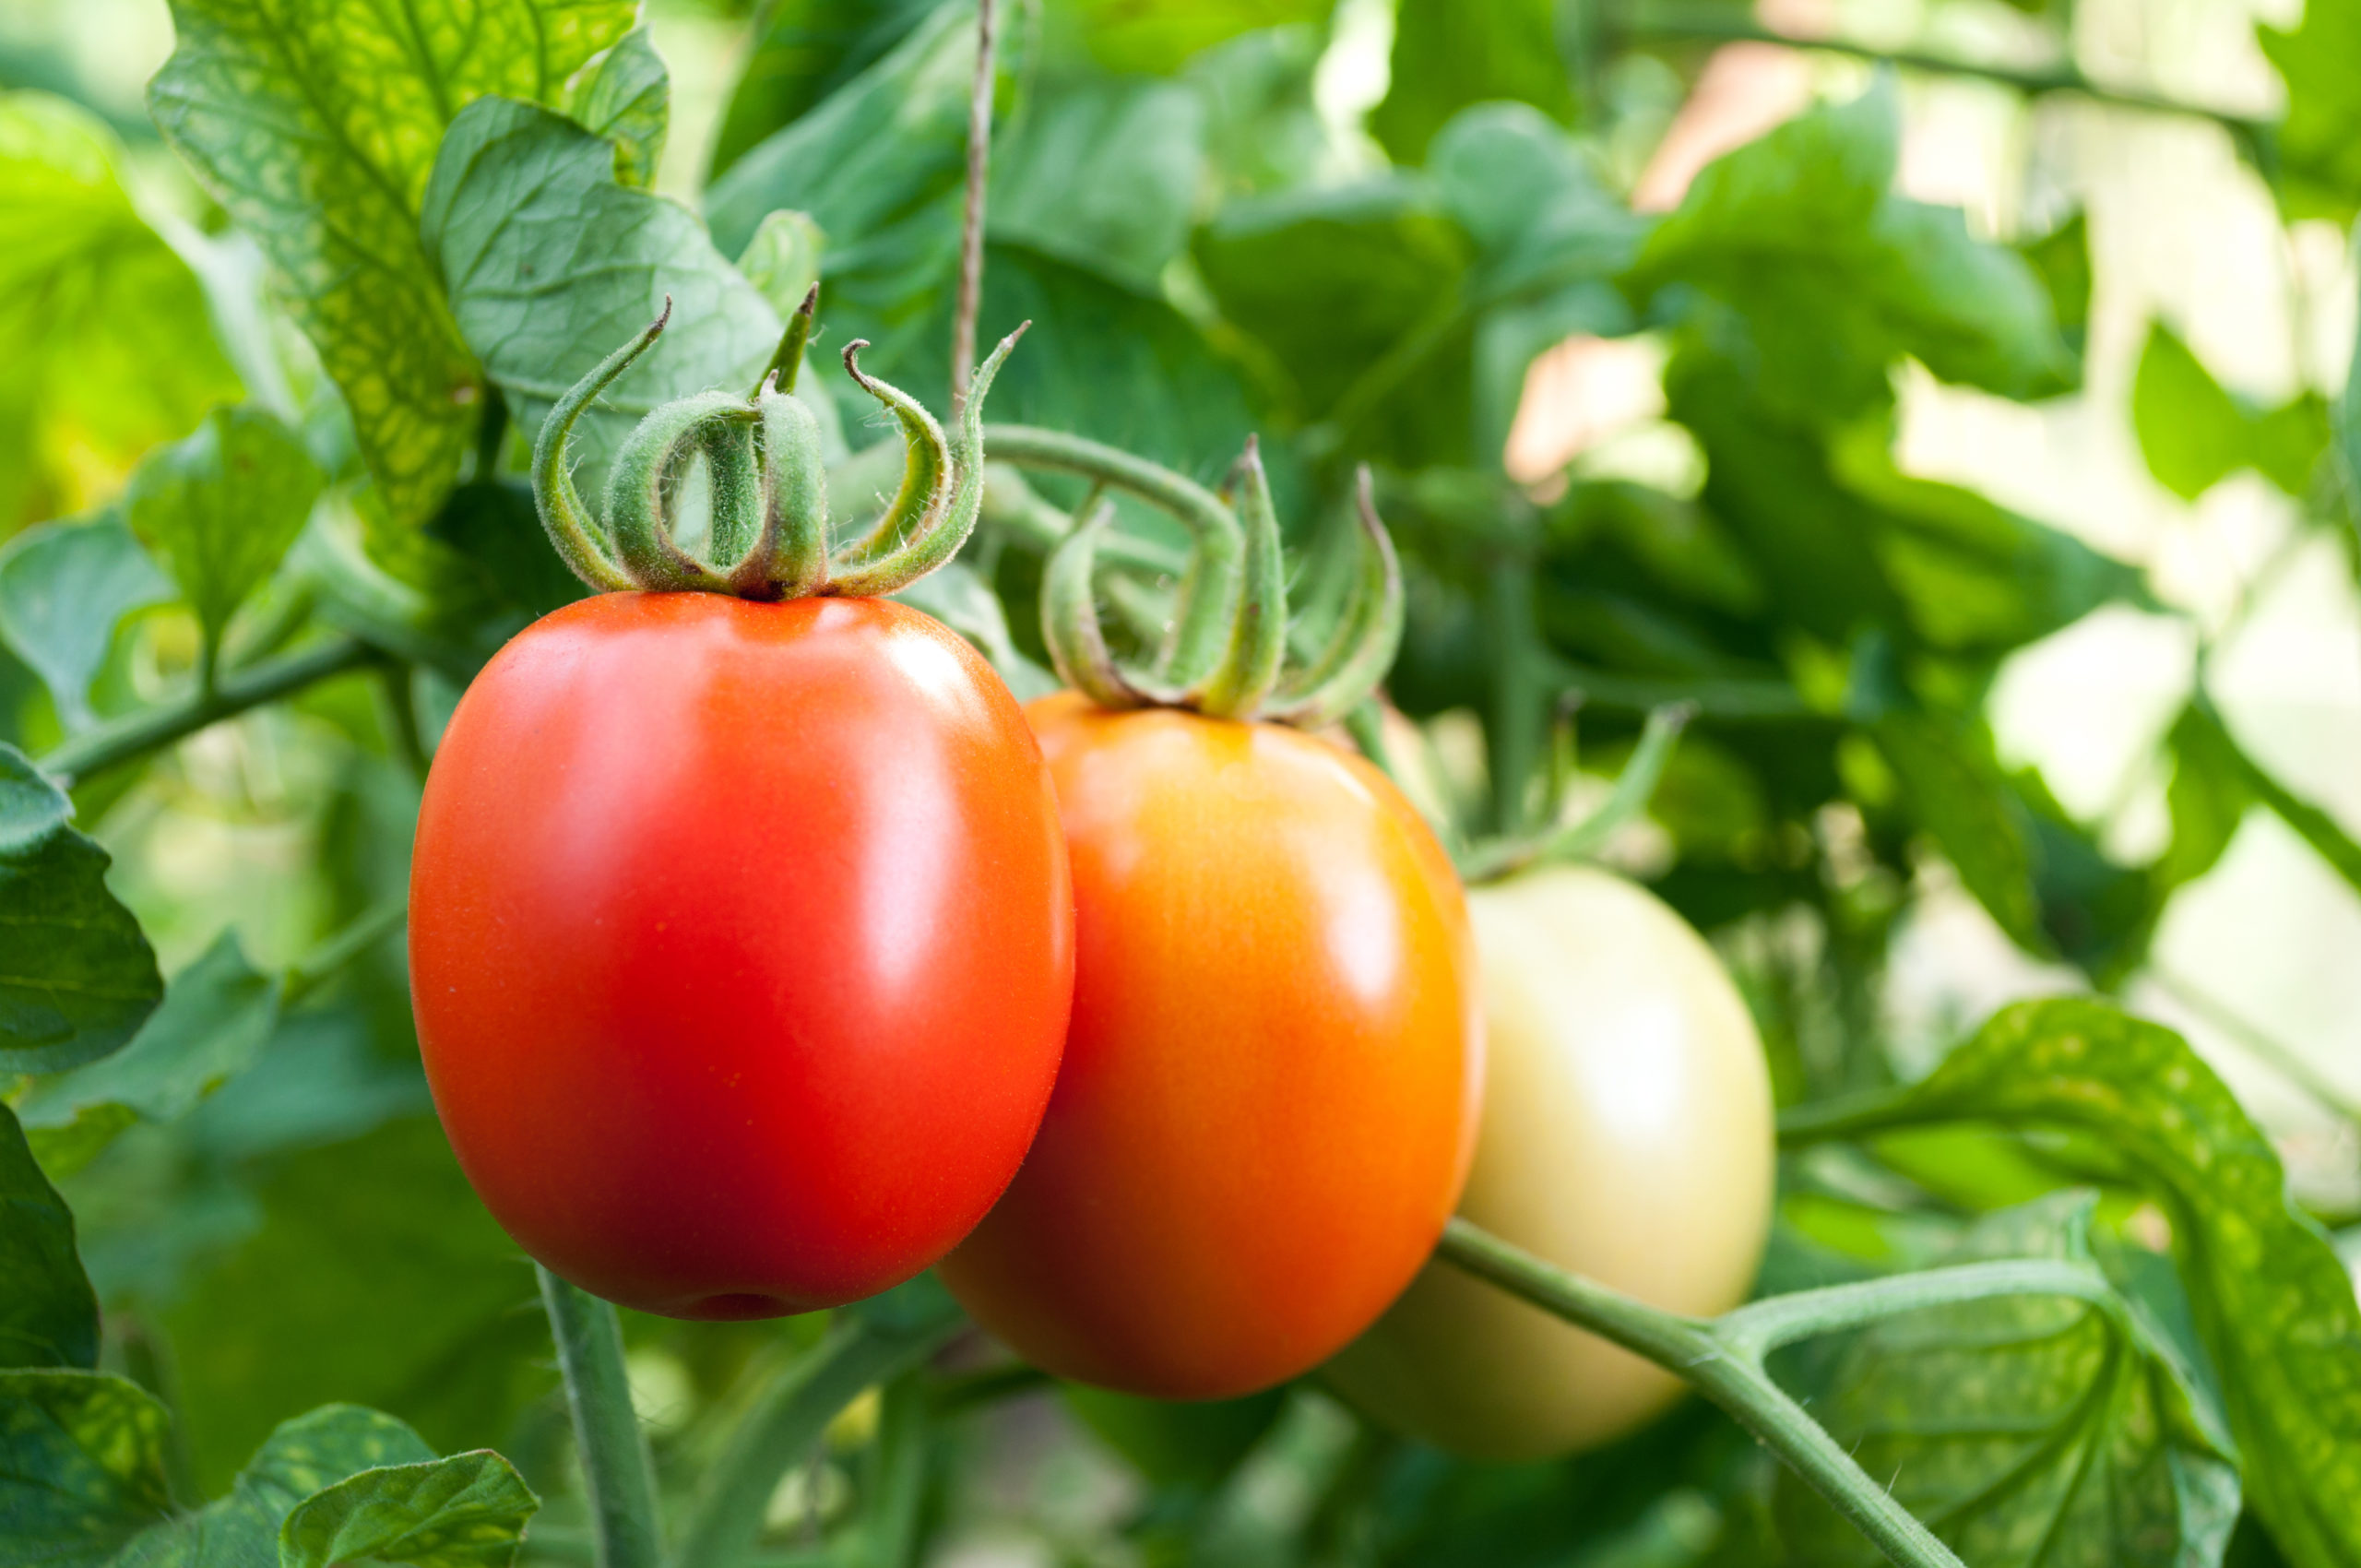
Picking Ripe Tomatoes
Tomatoes should be harvested when they are fully colored (red, yellow, or orange, depending on the variety) and slightly firm to the touch. For me, this is the sweet spot, as tomatoes ripened on the vine develop the fullest flavor. When I pick tomatoes, I gently twist them off the vine to avoid damaging the plant. One common mistake I made early on was picking tomatoes too early, before they were fully ripe. Tomatoes that are left to ripen on the vine have a far better taste and texture than those picked prematurely and left to ripen indoors.
Harvesting Green Tomatoes Before Frost
In regions where the first frost comes early, I’ve learned to harvest green tomatoes before the frost hits. Frost can damage tomatoes, turning them mushy and inedible. If you’re facing the possibility of frost but still have green tomatoes on the vine, it’s a good idea to pick them and allow them to ripen indoors. Simply place the green tomatoes in a paper bag or on a windowsill, and they will gradually ripen over the next few weeks. While they may not develop the same sweetness as fully vine-ripened tomatoes, I’ve found that many green tomatoes still turn out delicious, especially in sauces or salsas.
Storage and Preservation
For tomatoes that are fully ripe, I store them at room temperature to preserve their flavor. Storing tomatoes in the fridge can diminish their taste and texture. If I have an abundance of ripe tomatoes that I can’t consume immediately, I rely on my favorite preservation methods, such as canning or drying. Canning tomatoes allows me to enjoy homegrown flavor throughout the winter, while drying tomatoes is a great way to create a concentrated flavor that can be used in sauces and soups. Both methods are simple and incredibly effective for preserving the harvest, and I’ve learned that the extra effort is always worth it when enjoying homegrown tomatoes months after the season ends.
Final Thoughts
Growing tomatoes successfully requires the right variety, proper planting techniques, and ongoing care. With attention to watering, feeding, and pest management, you can enjoy a delicious and abundant harvest season after season. Whether you’re a beginner or an experienced gardener, this guide provides everything you need to grow healthy, productive tomato plants.
This guide references our in-depth cluster posts, covering every aspect of tomato growing for a thriving garden.
Related Posts You Might Find Helpful:
Tomato Growing Hub
Start here: The Ultimate Tomato Growing Guide: From Seed to Harvest
Growing Tips
- Getting Started with Tomatoes: A Gardener’s Guide to Success
- How to Choose a Tomato for Your Garden
- How to Choose the Right Tomato for Your Garden and Kitchen
- Growing Early-Season Tomatoes for Great Taste
- Heirloom and Hybrid Tomatoes
Planting Tips
- Tomato Seed Starting Tips
- Mastering Tomato Seed Starting: How to Grow Strong and Healthy Plants Indoors
- When to Plant Tomatoes: A Gardener’s Guide to Timing and Success
- Plant Tomatoes for a Thriving Crop: Sun, Soil, and Spacing
- How to Transplant Tomato Seedlings: A Gardener’s Guide
- Growing Tomatoes in Containers
Tomato Care
- Watering and Feeding Tomatoes: Expert Tips for a Healthy, Productive Crop
- Best Ways to Support Your Tomato Plants
- Pinching and Pruning Tomatoes: A Gardener’s Guide to Healthier, More Productive Plants
- How to Prune Tomatoes
- Grow Tomatoes on Stakes
- Best Companion Plants for Thriving Tomatoes: What Works & What to Avoid
Pest & Disease Control
- Tomato Growing Problems: Pests, Diseases, and Solutions
- How to Prevent Blossom Drop — Tomatoes and Peppers
- How to Identify Early Blight, Late Blight, and Leaf Spot on Tomatoes
Harvest & Preparation
- When and How to Harvest Tomatoes for the Best Flavor
- How to Ripen Tomatoes
- Planting Tomatoes for a Long Harvest
- Planting Tomatoes for a Fall Harvest: How to Grow Fresh Tomatoes Before Frost
- Tomato Flavor Explained
- Nine Ways to Cook and Serve Tomatoes
Garden Planning Books at Amazon:
- Tomato Grower’s Answer Book
- Vegetable Garden Almanac & Planner
- Kitchen Garden Grower’s Guide Vegetable Encyclopedia
- Vegetable Garden Grower’s Guide
More how to grow articles:
Learn how to plant, grow, and harvest your favorite vegetables. Click below for all you need to know.
- Artichoke
- Arugula
- Asparagus
- Beans, Snap
- Beets
- Broad Beans
- Broccoli
- Brussels Sprouts
- Cabbage
- Cantaloupe — Melons
- Cardoon
- Carrots
- Cauliflower
- Celeriac
- Celery
- Chard
- Chayote Squash
- Chickpeas
- Chicory
- Chinese Cabbage
- Collards
- Corn Salad
- Corn, Sweet
- Cresses
- Cucumbers
- Eggplant
- Endive and Escarole
- Fava Beans
- Florence Fennel
- Garbanzo Beans
- Garlic
- Horseradish
- Jerusalem Artichoke
- Kale
- Kohlrabi
- Leeks
- Lettuce
- Lima Beans
- Melons
- Mizuna
- Mustard Greens
- New Zealand Spinach
- Okra
- Onions
- Parsnips
- Peanuts
- Peas
- Peppers
- Potatoes
- Pumpkins
- Radicchio
- Radishes
- Rhubarb
- Rutabaga
- Salsify
- Shallots
- Sorrel
- Southern Peas
- Soybeans
- Spinach
- Squash, Summer
- Squash, Winter
- Sunchokes
- Sweet Potato
- Swiss Chard
- Taro
- Tomatillo
- Tomatoes
- Turnips
- Watermelon
- Zucchini