How to Grow Fall Shallots: Planting Through Harvest

Fall is the traditional planting season for shallots, especially in regions with mild to moderate winters. These small, flavorful alliums establish roots during cool autumn weather, survive winter, and divide into clusters of bulbs that are harvested the following summer.
The secret to growing successful shallots is planting at the right time. Shallot cloves need cool soil to develop roots before winter, followed by a period of cold weather that encourages bulb formation.
Like garlic, shallots are planted as individual cloves rather than seeds in most home gardens. Each planted clove has the potential to produce a cluster of new bulbs.
This guide explains when to plant fall shallots, how to choose planting stock, how winter weather affects growth, and when to harvest and cure bulbs for storage.
Know What to Plant This Week
Every week I answer the gardener's most important question: what should I plant now? Get seasonal planting advice free — or go Pro for my full Soil Temperature Garden Report, with soil temperature, moisture, weather trends, and crop-by-crop recommendations.
Best Soil Temperature for Planting Shallots
Every vegetable has an ideal soil temperature range for successful establishment. Shallots are a cool-season allium that prefers to begin growth in autumn.
Shallot cloves perform best when planted into cool, workable soil.
- Ideal soil temperature: 45–60°F (7–16°C)
- Minimum soil temperature: about 40°F
- Maximum practical soil temperature: about 70°F
- Root establishment period: 4–8 weeks before winter dormancy
When soil temperatures are between 45° and 60°F:
- Roots develop before winter.
- Cloves establish strong growth.
- Plants enter dormancy naturally.
- Spring growth begins quickly.
Avoid planting too early in warm soil because shallots may produce excessive top growth instead of concentrating energy into bulb formation.
Harvest to Table Soil Tip
Shallots are planted in cool soil but harvested in warm, dry weather. Fall soil temperatures determine establishment, winter temperatures influence bulb development, and summer warmth finishes bulb maturity.
Planting Window by Climate
The goal with fall shallots is to allow roots to establish before the coldest weather arrives without encouraging excessive fall growth.
Plant:
4–8 weeks before the ground freezes
Cold Climates (Zones 3–5)
Plant:
September through October
Use:
- Cold-hardy varieties.
- Heavy mulch protection.
In very cold regions, spring planting may be more reliable.
Moderate Climates (Zones 6–7)
Plant:
October through November
Fall planting usually produces excellent results.
Mild Climates (Zones 8–10)
Plant:
October through January
Mild winters are ideal for shallots because plants can establish roots and continue slow growth through winter.
Choosing Shallot Varieties
Shallots are grown from individual cloves, similar to garlic.
Common types include:
French Gray Shallots
Also called true gray shallots.
Characteristics:
- Traditional gourmet variety.
- Excellent flavor.
- Smaller bulbs.
- Good storage.
French Red Shallots
Characteristics:
- Copper-red skin.
- Mild, sweet flavor.
- Reliable garden performer.
Dutch Shallots
Characteristics:
- Larger bulbs.
- Good storage.
- Often easier for home gardeners.
Choose planting shallots that are:
- Firm.
- Disease-free.
- Adapted to your climate.
Avoid planting grocery store shallots unless you know they are suitable for growing.
Preparing the Soil
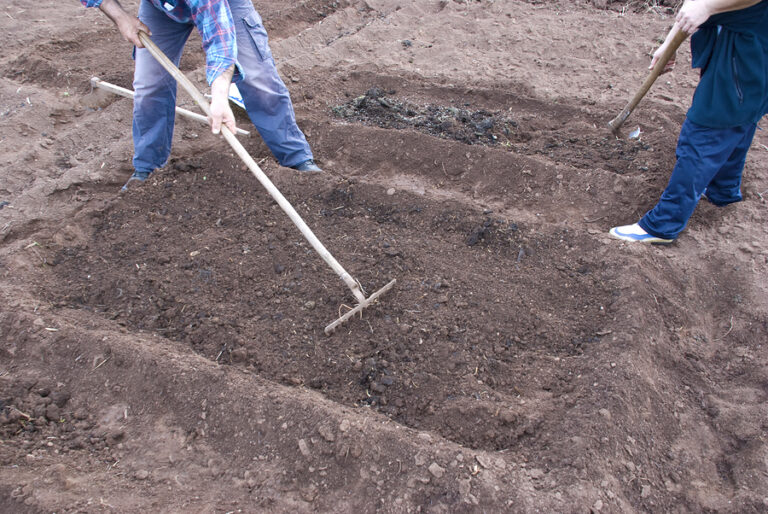
Shallots grow best in loose, fertile, well-drained soil.
Before planting:
- Loosen soil 8–12 inches deep.
- Add compost.
- Maintain soil pH between 6.0 and 7.0.
- Remove rocks and compacted soil.
Good drainage is especially important because shallots are prone to rot in wet conditions.
Planting Shallot Cloves
Plant individual shallot cloves with:
- Pointed end upward.
- Root end downward.
Depth:
- 1–2 inches deep.
Spacing:
- 4–6 inches apart.
Rows:
- 12 inches apart.
Leave the tip of the clove slightly visible above the soil surface.
Each planted clove will divide into a cluster of new shallots.
Mulching Fall Shallots
Mulch protects shallots during winter and keeps soil temperatures stable.
Apply:
- 2–4 inches of straw, chopped leaves, or compost.
Benefits:
- Prevents frost heaving.
- Protects shallow roots.
- Maintains soil moisture.
- Suppresses weeds.
In cold climates, increase mulch depth after the ground begins to freeze.
Winter Tolerance
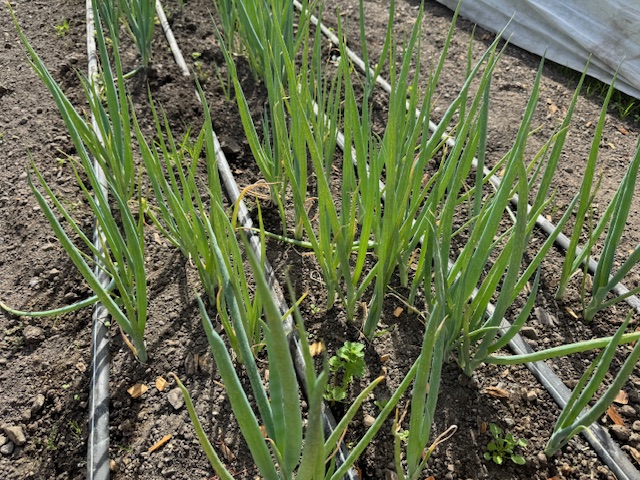
Established shallots are surprisingly cold tolerant.
They can withstand:
- Light freezes.
- Temperatures in the 20s°F.
- Cool winter conditions.
In mild climates:
- Shallots may grow slowly throughout winter.
In colder regions:
- Mulch protection improves survival.
The key is planting early enough for root development before severe cold arrives.
Watering Shallots
Shallots have shallow root systems and need consistent moisture.
Provide:
- About 1 inch of water per week.
Critical periods:
- Fall establishment.
- Spring leaf growth.
- Bulb enlargement.
Reduce watering:
- As bulbs mature.
Excess moisture late in the season can reduce storage quality.
Fertilizing Shallots
Shallots benefit from fertile soil but do not require heavy feeding.
Before planting:
- Add compost.
During growth:
- Side-dress with compost.
- Apply nitrogen early if growth is weak.
Stop nitrogen feeding:
- Once bulbs begin enlarging.
Excess nitrogen late in the season can delay maturity.
Common Problems
Small Bulbs
Caused by:
- Poor soil preparation.
- Crowded planting.
- Insufficient growing time.
- Poor planting stock.
Rotting Bulbs
Caused by:
- Poor drainage.
- Excess moisture.
- Damaged cloves.
Bolting
Caused by:
- Temperature stress.
- Severe cold followed by warm weather.
Bolted shallots usually produce smaller bulbs.
Harvesting Shallots
Fall-planted shallots are usually harvested:
Late spring through summer
Signs of maturity:
- Leaves yellow and begin to fall over.
- Bulbs enlarge above the soil surface.
- Tops begin drying naturally.
Harvest:
- Loosen soil with a fork.
- Lift bulbs gently.
- Allow bulbs to dry before storage.
Young shallots can also be harvested earlier as green shallots.
Curing Shallots for Storage
Proper curing improves storage life.
After harvest:
- Leave bulbs in a dry, shaded, ventilated area.
- Cure for 2–4 weeks.
- Do not wash bulbs before storage.
After curing:
- Trim roots.
- Remove dry outer skins.
- Store in a cool, dry location.
Well-cured shallots can store for several months.
Growing Tips
- Plant shallots when soil temperatures reach 45–60°F.
- Use healthy planting cloves.
- Provide well-drained soil.
- Mulch overwintering plants.
- Avoid excess nitrogen late in the season.
- Harvest only after bulbs mature.
- Cure thoroughly for long storage.
My Experience Growing Fall Shallots
I’ve grown shallots in different climates, and they are one of the most rewarding fall-planted crops because they require little attention once established. The greatest advantage of fall planting is that shallots use winter to build a strong root system before spring growth begins. Like garlic and onions, they reward gardeners who understand seasonal timing. Planting at the right soil temperature creates the foundation for large clusters of flavorful bulbs months later.
Frequently Asked Questions
What soil temperature is best for planting shallots?
Shallots grow best when planted in soil temperatures between 45° and 60°F.
When should I plant fall shallots?
Plant shallots 4–8 weeks before the ground freezes so roots establish before winter.
Are shallots cold tolerant?
Yes. Established shallots tolerate light freezes and cool winter conditions.
How many shallots grow from one clove?
One planted shallot clove can divide into a cluster of several new bulbs.
Can shallots be grown from seed?
Yes, but most home gardeners grow shallots from cloves because they mature faster and more reliably.
When are fall-planted shallots harvested?
Most fall-planted shallots are harvested in late spring or summer.
Do shallots need to be cured?
Yes. Curing improves flavor and extends storage life.
Can shallots grow in containers?
Yes. Use containers at least 8 inches deep with fertile, well-drained soil.
Fall Garden Planting Calendar
| Stage | Best Conditions |
|---|---|
| Ideal soil temperature for planting | 45–60°F (7–16°C) |
| Planting window | 4–8 weeks before ground freezes |
| Root establishment period | 4–8 weeks before winter dormancy |
| Winter tolerance | Good once established; tolerates light freezes |
| Harvest season | Late spring through summer |
| Best harvest conditions | Dry weather with warm temperatures for curing |
Tip: Plant shallots when soil temperatures cool to 45–60°F. Give cloves time to establish roots before winter, then allow spring growth to create clusters of flavorful bulbs.
The Soil Temperature Takeaway
After decades of growing vegetables in different climates, I’ve learned that shallots are a perfect example of why planting dates alone can be misleading. The right time to plant is when the soil creates the conditions the crop needs. Cool fall soil allows shallots to establish roots, winter provides the resting period they need, and spring growth builds the bulbs that will be harvested months later.
Plant by soil temperature. Harvest by air temperature.
Continue Growing Your Fall Garden
This article is part of the Harvest to Table Fall Planting Through Harvest Series, a collection of crop-by-crop guides that show you the best soil temperature for planting, the ideal planting window by climate, and the temperatures that produce the highest-quality harvests. If you’re planning an entire fall vegetable garden, start with The Complete Guide to Fall Vegetable Gardening: Planning, Planting, Growing, and Harvesting, then explore the crop guides below for detailed planting and growing advice.
Browse the Series
🥬 Leafy Greens
🥕 Root Crops
🥦 Brassicas
🧅 Alliums
🌱 Legumes
🌿 Herbs