Through hands-on experience in my home garden,, I’ve learned that timing the harvest just right makes all the difference in flavor and texture. Whether you’re picking crisp bush beans or tender pole beans, harvesting at the peak of freshness ensures the best taste. When picked young and firm, snap beans are sweet, juicy, and perfect for eating fresh, cooking, or preserving.
Once you’ve gathered a basket of beans, proper storage techniques will help keep them fresh longer. Fresh snap beans can last up to a week in the refrigerator, but if you want to enjoy them beyond the growing season, blanching and freezing is the best way to preserve their color and texture. Over the years, I’ve also experimented with pickling and drying beans, both of which add unique flavors to home-cooked meals.
Speaking of meals, fresh-picked snap beans are incredibly versatile in the kitchen. From quick sautés with garlic and butter to classic Southern-style slow cooking, I’ve tried countless ways to prepare them. In this post, I’ll share the best methods for harvesting, storing, and cooking snap beans, along with my favorite tips to make the most of your homegrown crop.
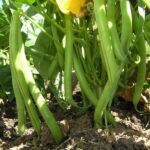
Harvest snap beans (also known as green or string beans) before the seeds swell in the pods when they are no more than the diameter of a pencil. Smaller beans can be served as tender, baby snap beans.

When to Harvest Snap Beans
- Start your snap bean harvest about 2 to 3 weeks after the plants begin to bloom and continue to pick almost daily. Snap beans take about 50 to 60 days from sowing to reach harvest.
- At a minimum, harvest pole beans every 2 days and bush beans at least once a week. Pole-type beans generally bear over a longer period than bush types.
- When you quit picking and allow seeds in the pods to develop and mature, the plant will stop blossoming and producing pods; its life cycle will be complete.
- Your bean harvest will end when temperatures drop below 40°F (4°C); then pods will become opaque and develop rust-colored spots.
Related articles:
- How to Quick Cook and Serve Snap Beans
- How to Plant and Grow Snap Beans for a Productive Harvest
- A Guide to Growing Snap Beans in Containers
- Types of Beans for Home Gardens
- Snap Bean Seed Starting Tips
- Snap Bean Varieties: Which One Should You Grow?
- Harvesting, Storing, and Cooking Snap Beans: A Gardener’s Guide
- The Ultimate Guide to Growing Beans: From Planting to Harvest
- Common Bean Pests and Diseases: What Every Gardener Should Know
How to Harvest Snap Beans
- Harvest beans by holding the stem with one hand and pulling pods with the other. Don’t jerk or yank beans from the plant; you will only break vines and branches and injure the plant.
- By picking often, you encourage more blossoms and more beans. Each plant should produce two or three flushes of pods.
How to Store Snap Beans
- Store snap beans in a cool, moist place, 40°-50°F and 95 percent relative humidity. You can keep snap beans in the crisper section of the refrigerator in a perforated plastic bag; this will keep the beans from drying. (You can purchase perforated plastic bags or make your own by punching 20 holes in a medium-size bag; use a hole punch or sharp object.)
- Snap beans will keep for 8 to 12 days in a cool, moist place.
- Do not refrigerate snap beans at less than 40°F; beans are easily injured by cold developing opaque discoloration, rusty spots, and pitting.
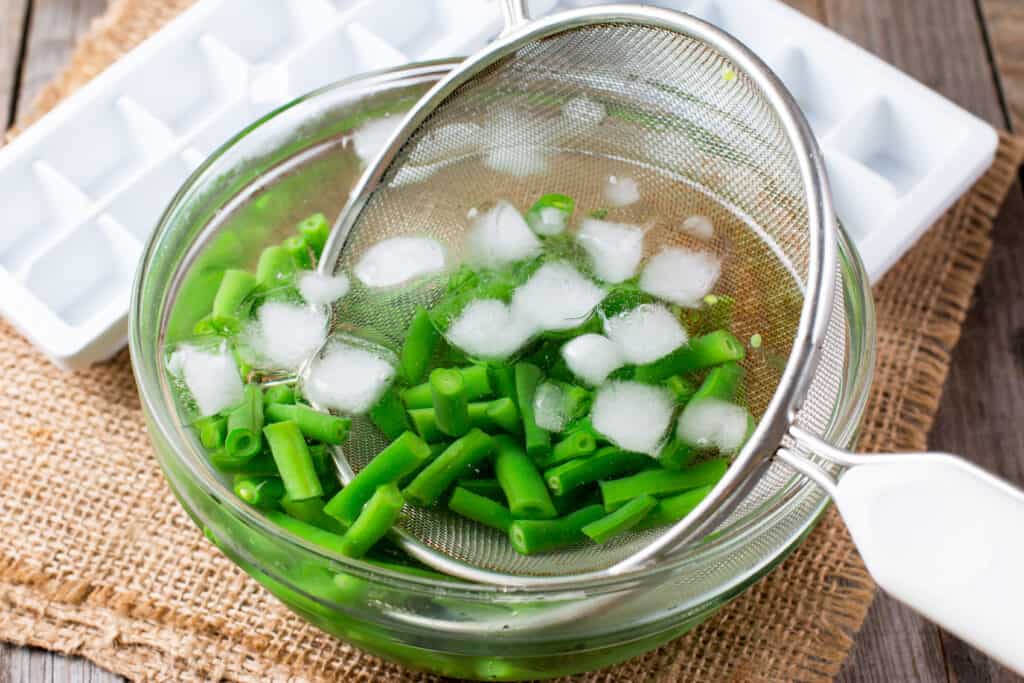
- Blanching and freezing is an easy way to preserve a larger snap bean harvest. Blanch whole beans in boiling water for 1 minute and then quickly cool them in ice water and freeze them. This process will brighten and fix the color while preserving the crisp texture of the pods.
Green beans, shell beans, dry beans — harvest and storage
Your bean harvest time will depend on what you plan to do with the beans after picking.
Snap beans or green beans harvest
Snap green beans are ready for harvest when they are about the size of a pencil. The seeds inside will be just visible–they’ll look like small bumps. Depending on the variety you have planted, snap beans will be ready for picking 50 to 65 days after planting. For a big harvest, pick green beans every day or at least every couple of days. If you allow beans to mature, the plant will stop producing new beans. So pick regularly for an extended harvest. Pinch of cut-off beans; be careful not to pull beans or you may uproot the whole plant. Aging pods will turn yellow and leathery; streaked pods are mealy inside.
Green beans storage
If you can’t keep up with the snap bean harvest at the table, you can freeze or pickle green beans. To freeze green beans, wash the beans and snap off the ends. Cut the beans into 1-inch pieces or slice lengthwise. Blanch the beans for 2 to 3 minutes. Chill. Pack in freezer bags. (To blanch beans, add 1½ to 2 inches of water to the kettle and heat to boiling. Place the colander with beans into the kettle and heat for 2 to 3 minutes.)
Shell beans harvest
Beans for shelling are picked when the seeds reach full size but are still tender. Pick shell beans when the pods are still green and the swollen seeds are visible from the outside. Shell beans are usually ready for harvest 66 to 75 days after planting. Like snap beans, keep picking shell beans and the plant will keep producing; don’t allow the pods to yellow.
Shell beans storage
Shelled beans can be steamed, baked, and boiled for fresh eating. Shell beans also can be frozen: wash the beans and shell them. Blanch shelled beans for 2 to 3 minutes, depending on the size of the bean. Chill. Pack in freezer bags. (To blanch beans, add 1½ to 2 inches of water to the kettle and heat to boiling. Place the colander with beans into the kettle and heat for 2 to 3 minutes.)
Dry beans harvest
Dry beans stay on the plant until the seeds are hard and rattle in the pods. The alternative is to cut the plants when pods turn yellow and hang the plants in a warm dry place until the pods become brittle and the seeds rattle in the pods. It’s best to harvest dry beans before the pods split open and the beans spill out. Dry beans are ready for harvest 90 to 100 days after planting. If the weather forecast calls for rain or frost, pull up the bean plants and dry them indoors. (Pick the pods off of pole beans which are too big to pull up whole. Dry pods on screens or racks indoors.)
Dry bean storage
Store dry beans in airtight jars. Be sure the beans are dry before storing them. To absorb moisture left in beans during storage, place a tablespoon of powdered milk in a folded paper towel inside each jar of dried beans.
Cooking Snap Beans: Hands-On Tips for Delicious Results
Cooking snap beans is one of the simplest and most satisfying ways to enjoy your homegrown harvest. I’ve found that the key to great snap beans is to preserve their fresh, crisp texture and natural flavor while enhancing them with complementary ingredients. Whether you’re looking for a quick side dish or a flavorful main course, snap beans are incredibly versatile in the kitchen.
For a quick and easy sauté, heat a tablespoon of olive oil or butter in a skillet over medium heat. Add your snap beans and cook them for about 5 to 7 minutes, stirring occasionally, until they are tender but still have a slight crispness. Garlic, shallots, or onions are perfect additions to enhance the flavor, and a squeeze of lemon juice at the end brings out the beans’ natural sweetness. You can also sprinkle a little sea salt and freshly ground black pepper to season them. This method works well for both green beans and yellow wax beans, allowing you to experiment with different textures and colors.
For a more flavorful, slow-cooked dish, I often turn to the classic method of simmering snap beans in a pot with a bit of broth or water. Adding aromatics like garlic, onions, or smoked paprika creates a deep, savory base. To give the beans a little extra richness, I sometimes add bacon, ham, or a splash of vinegar. Allow the beans to cook on low heat for about 20 to 30 minutes, until they are tender and have absorbed the flavors of the seasonings. This method works especially well for beans harvested past their peak of tenderness, as the slow cooking softens their texture and enhances their taste.
Lastly, if you’re after a unique twist, roasting snap beans is another fantastic way to prepare them. Toss the beans in a bit of olive oil, garlic, and seasonings, then spread them on a baking sheet in a single layer. Roast them at 400°F (200°C) for 15 to 20 minutes, turning halfway through. The result is crispy, caramelized beans that are perfect as a side dish or even a snack. This roasting method highlights the natural sweetness of the beans and creates a delicious contrast of textures.
With these simple cooking techniques, snap beans can be transformed into a wide range of dishes—from quick, light sides to hearty, comforting meals.
Kitchen tips: How to Quick Cook and Serve Snap Beans
Growing tips: How to Grow Green or Snap Beans
Books to help you grow:
- Vegetable Garden Almanac & Planner
- Kitchen Garden Grower’s Guide Vegetable Encyclopedia
- Vegetable Garden Grower’s Guide
- Tomato Grower’s Answer Book
Related articles:
How to Plant and Grow Snap Beans
How to Harvest and Store Snap Beans
Bean Growing Problems: Troubleshooting
Five Ways to Quick Cook and Serve Snap Beans
How to Can Green Snap Beans for Beginners
Cooking and Serving Yard-Long Beans
How to Grow Chickpeas and Garbanzo Beans
How to Grow Broad Beans and Lima Beans
Garden Planning Books at Amazon:
- Vegetable Garden Almanac & Planner
- Kitchen Garden Grower’s Guide Vegetable Encyclopedia
- Vegetable Garden Grower’s Guide
- Tomato Grower’s Answer Book
More harvest tips:

Learn when and how to harvest your favorite vegetables for the best flavor and texture. Get storage tips for each crop. Click on the vegetable you are growing below.
- Artichoke
- Arugula
- Asparagus
- Beans
- Beets
- Broccoli
- Brussels Sprouts
- Cabbage
- Cantaloupe — Melons
- Carrots
- Cauliflower
- Celery
- Chard
- Collards
- Corn, Sweet
- Cucumbers
- Eggplant
- Endive and Escarole
- Garlic
- Jerusalem Artichoke
- Kale
- Kohlrabi
- Leeks
- Lettuce
- Melons
- Okra
- Onions
- Parsnips
- Peas
- Peppers
- Potatoes
- Pumpkins
- Radicchio
- Rhubarb
- Rutabaga
- Spinach
- Squash, Summer
- Squash, Winter
- Sunchokes
- Sweet Potato
- Swiss Chard
- Tomatillo
- Tomatoes
- Turnips
- Watermelon