How to Grow Orchids
Most orchids are easy to grow. All you need to do is give them what they need. In a nutshell, orchids need suitable potting soil or medium, adequate light, a warm environment–about the temperature of your house, water, fertilizer, and fresh air. These needs are just about the same for all houseplants.
There are about 25,000 species of orchids. Some are tiny and some are quite large. Almost all have showy flowers. Several dozen of the 25,000 species are commonly grown as houseplants. These are widely in cultivation and popular because they can be grown by the average person; you don’t have to be an expert to grow orchids.
A few basics to start growing orchids
To grow orchids, you should know that they are commonly classed by the way they grow in nature. One type, “epiphytic” grows on trees; the other, “terrestrial”, grows in the ground.
- Epiphytic orchids perch on trees–they are not parasites, they are simply at home on a tree branch. Epiphytic orchids take their nutrients from organic matter washed to them by rain, and also from organic debris that collects around their aerial roots. Many epiphytic orchids have thickened stems called “pseudobulbs”. These are storage sites for food and water. Epiphytic orchids are often grown in slotted pots or baskets or attached to a piece of bark. The roots are often exposed to the air–just as they are in their native habitats.
- Terrestrial orchids grow in the ground, often in wooded areas, but sometimes in open meadows as well. They prefer moist, porous soil, rich in humus. Terrestrial orchids require constant moisture and regularly take nutrients from the soil. Terrestrial orchids are grown in pots; their roots are usually tucked into the soil–just as they are in their native habitats.
Look at an orchid’s description–epiphytic or terrestrial–to know where to start.
Know the basic growth habit of each orchid you have. Not all orchids have the same needs. Here are a few general tips to help you grow orchids:
General growing requirements for orchids
Soil or potting medium
- There are a variety of “soils” or growing mediums for orchids: fir bark, tree-fern fiber, redwood bark, osmunda fiber (which contains plentiful nutrients), coconut-husk fiber, charcoal, grit or gravel, lava rock, sphagnum moss, peat moss, and soilless mixes.
- Choose a medium recommended for the type of orchid you are growing.
- Epiphytic orchids grow best in fir bark. Choose fine grade fir bark for small pots, 3 inches/7.6cm or less. Choose medium grade fir bark for pots 4 inches/10cm or more in diameter.
- Terrestrial orchids, such as Cymbidiums, some Epidendrums, and some Paphiopedilums, grow best in a potting soil made entirely of organic matter. Choose a ready-made mix for orchids.
- Most orchid growers use fir bark alone or as the main ingredient in the mixture. Commercial mixes that you find at nurseries are the most convenient for beginners.
Containers
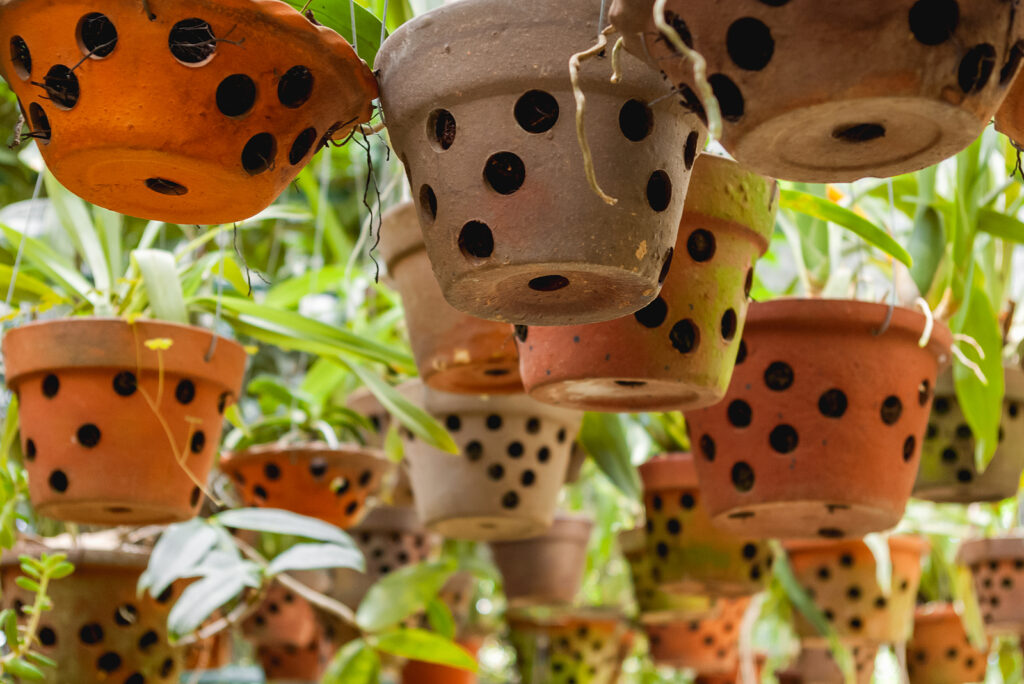
- Orchids are grown in a variety of containers: plastic pots, clay pots, glazed pots, mesh-type pots, and slat baskets.
- There are containers designed specifially for orchids. Look for slotted clay pots or slotted baskets.
- Ventilation–slots or holes–at the base of the pot is important. Slots will ensure excess water does not accumulate at the roots.
- If you use a standard clay pot, enlarge the drainage hole by gently chipping away its edges.
- Small epiphytic and miniature orchids do not need to be growns containers. They can be grown on rafts or slabs of osmunda or tree fern fiber. They can also be attached to pieces of bark or logs.
- Larger epiphytes and terrestrial orchids are best grown in pots.
- It is important to choose a pot that will not tip over with the weight or size of the plant.
- Porous clay pots all the medium to dry out more quickly than clay pots.
- Salts in hard water can accumulate in the wall of clay pots and burn roots.
- Slat pots or baskets allow for rapid drainage, but that can get messy indoors.
Water
- The water orchids need depends on pot size, temperature, and time of the year.
- A small pot requires more frequent watering. Water regularly during the growing season, keeping the soil or medium just moist, not wet.
- Warm temperatures–indoors or out–usually mean more water is needed. Warmer rooms call for more water.
- Less water is needed in winter. Most, not all, orchids do not grow in winter. Water less often, but do not let roots, especially aerial roots, become dry.
- As a general rule: When in doubt, don’t water. Too much water can trigger rot.
- Epiphytic orchids with pseudobulbs or orchid with succulent leaves should be watered with the potting medium is almost completely dry. If you press your finger into the medium and it feels moist, wait a day or two then test again before watering.
- Terrestrial orchids need water all year round, but most epiphytes must stay dry during winter or their slow or no growth time of the year.
- Both epiphytic and terrestrial orchids are able to store waer. A few days without extra moisture will not harm an orchid.
- Always use tepid water—water that is barely warm. Cold water will shock the roots and can damage leaves.
- When you water an orchid, water it thoroughly. If possible set the orchid in a sink or tub and pour water through the potting medium; drench to roots and medium
- Orchid roots need more than water; they also need air. When orchids send roots out into the open air, refrain from cutting them off or forcing them into the growing medium. Orchid roots growing in open air is natural.
Temperature
- Temperature greatly affects the health and flowering of orchids. In their natural habitats orchids commonly experience fluctuations of 10° to 15°F from day to night. This flucturation allows orchids to store at night the carbohydrates they manufacture during the day; carbohydrates are essential for the production of flowers.
- Orchid growers commonly group orchids by their temperature needs. Orchids are divided into three temperature categories: warm, intermediate, and cool.
- Cool-growing orchids prefer temperatures between 60° to 70°F (16° to 21°C) during the day and 50° and 55°F (10° to 13°C) at night ; this group includes Cymbidium, Odontoglossum, and some Paphiopedilums.
- Intermediate temperature orchids prefer 65° to 75°F (18° to 24°C) during the day and 55° to 60°F (13° to 16°C) at night; orchids in this group include Cattleya, some Oncidiums, and hybrid Paphiopedilums.
- Warm-growing orchids prefer temperatures between 70° to 80°F (21° to 27°C) during the day and 60° to 65°F (16° to 18°C) at night; orchids in this group include Vanda, Phalaenopsis, and tropical Paphiopedilums.
- Most orchids grow best in temperature in the intermediate range. If you are unsure what temperature your orchid needs, opt for the intermediate range.
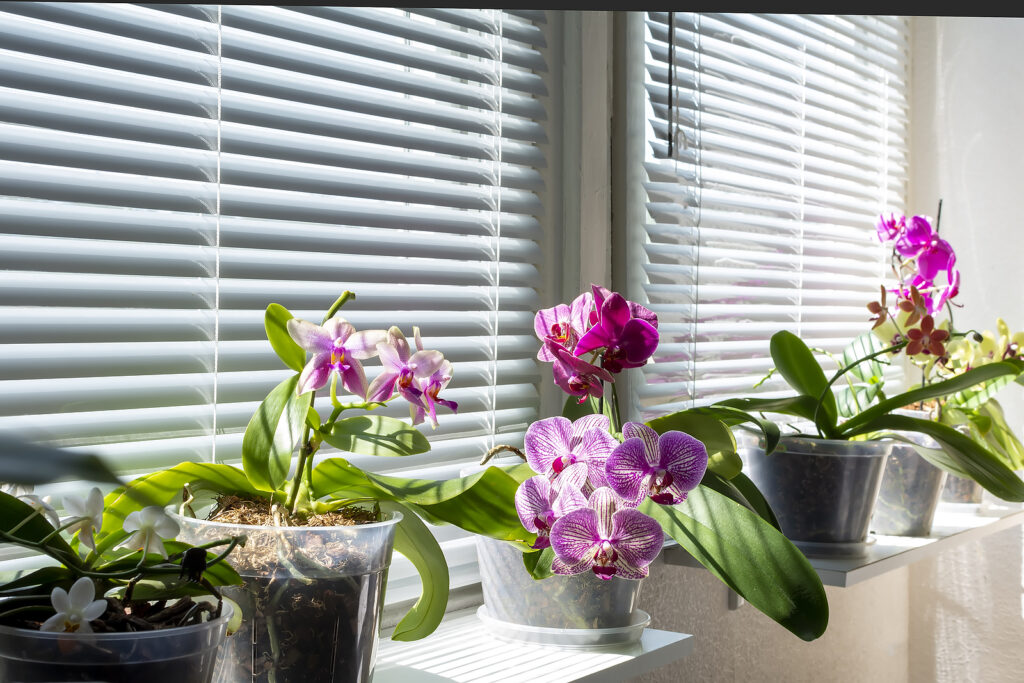
- Indoors, place cool-growing orchids closer to a window, where temperatures will be lower at night or in winter; spots farther from the window pane will probably suit orchids that require more warmth.
- Place orchids with lower temperature needs on a shelf closer to the floor and those with higher temperature needs on higher shelf.
- If you want to accurately measure the tempeature difference where you grow orchids, get a special maximum-minimum thermometer which will record the high and low each day.
- Keep orchids our of hot and cold drafts.
Humidity
- Most orchids will grow happily when the relative humidity in the air measures between 30 to 40 percent; that’s about the same for people. Humidity of 40 to 70 percent is better. (Humidity is moisture in the air, not water on plants or in the growing medium.)
- Hygrometers are intruments that measure humidity. An inexpensive dial-type hygrometer is a good way to measure humidity where you grow orchds.
- Relative humidity fall as the temperature rises. As temperature rise, ensure the air is humid around your orchids.
- You can use a humidity tray to boost the humidity around your orchides. To make a humidity tray: Fill a 2 to 4-inch-deep waterproof metal or plastic tray with gravel, stopping about an inch from the rim; then add enough water to cover the gravel to just below the surface (the surface of gravel should remain dry). Stretch hardware cloth (screening wire) across the top of the tray, leaving about an inch of space between gravel and wire. Set pots on hardware cloth; replenish water as needed.
- During spring and summer, mist orchids daily—even those on a humidity tray—to compensate for a drop in humidity. (This may not be necessary where summers are naturally humid.)
- Mist less frequently during the cooler autumn and winter months.
- Essential to raising healthy, flowering orchids is fresh air: give your orchids near-continuous air circulation, but keep them out of hot and cold drafts. Gentle air circulation from a fan set away from the orchids will keep the air fresh.
Light
- The light needs of orchids varies. Orchids should be grown in the brightest spot they can tolerate without burning.
- Many orchids will thrive near a sunny window that does not emit sunlight so direct that leaves burn.
- One measure of the right light is the orchid itself; if leaves are medium-green and the plant produces many blossoms, the light is right. If the leaves are dark green and there are no blossoms, the light is not bright enough. If the leaves turn yellow or papery, the leaves are likely sunburned and the light is too intense.
- If you place a sun-loving orchid in a shady spot, it will not bloom and will begin to decline.
- If you place a shade-loving orchid in a sunny spot, its leaves will likely sunburn or scorch.
- Moving a plant only an inch or two—into more sun, or less, than it has been getting—can make a difference. Move orchids gradually over several weeks so that they can acclimatize to the change.
- A south-facing window receives bright light for most of the day.
- Experienced orchid growers often measure light in foot-candles. A foot-candle is the amount of light that falls on a 1-square-foot surface located 1 foot away from the candle. A foot-candle is the measurement of light intensity. Foot-candles can be measured with a foot-candle light meter. Low light is about 500 foot candles. High light is 3,500 to 4,000 foot candles. Medium light is about 2,000 foot candles. Nearly all orchids will grow well with 2,000 foot candles. The exceptions are Phalanenopsis which need fewer foot candles and Phragmipedium and Vanda which need more.
- For orchids growing near windows, the intensity of midday sunlight can be difused with curtains or blinds.
- Electric lights can take the place of sunlight for orchids growing indoors. Fluorescent lights–tubes used in offices–are the best choice for artificial lighting. Full-spectrum bulbs emit light with a distribution similar to sunlight; they produce the wavelenghts required for growth and flowering. A fixture that holds four bulbs is the best source of light for orchids.
- Use a timer with lights to set the day length for plants. Orchids need 18 light-hours from late winter to early summer, 16 hours during midsummer, 12 hours from late summr to mid autumn, and 16 hours from mid-autumn to mid-winter.
- Some orchids must have total darkness at night in order to bloom; these include Cattleya, Dendrobium, Oncidium, and Phalaenopsis.
Fertilizer
- Orchids roots absorb nutrients through their roots.
- Most orchids can tolerate a mild fertilizer, such as a 10-10-5 formulation.
- Fertilizers especially formulated for orchids are easiest to use.
- Orchids growing in fir bark require extra nitrogen, they’ll need to be fertilized more often than plants grown in osmunda fiber. During the plant’s growing season, apply a very weak–try a quarter or half solution of fertilizer at every other watering (that is one-quarter or one-half the rate recommended on the label). Always avoid overfertilizing.
- Most orchids, like most plants, do need fertiizer when they are not actively growing. Winter is the time most orchids rest; they do not need fertilizer when they are not producing new growth and when the light intensity is low.
- Many orchid growers alternate fertilizers; they use a higher nitrogen fertilzer during early vegetative growth then switch to a low nitrogen, high-phosphorus fertilzer when vegetative growth ends; higher phosphorus stimulates flower growth and blooming.
- If you are growing orchids mounted on bark, dip the orchid and bark into a pail of fertilizer solution; dip up and down a few times. An alternative is to apply the fertilizer solution using a mister or sprayer.
- Some orchids should not be fertilized during their resting or dormant period; the resting period follow the end of vegetative growth–that is from the time new growth matures until the plant starts producing new growth or flower spikes. Check growing instructions for each genus of orchid you are growing.
- Water plants immediately before fertilizing; do apply fertilizer to dry plants. Fertilizer salts can burn dry plants.
Pests
- Orchids grown outdoors can suffer occasional attacks from weevils, cattleya flies, sowbugs, springtails, and slugs or snails.
- Orhids grown indoors are susceptible to attack by sucking insects such as scale insects, thrips, mealybugs, or red spider mites. Mottled or disfigured foliage usually signals the presence of sucking insects.
- You can brush off light infestations of many insects by hand.
- You can wash away infestations with a dilute solution of soap and water. Use a drop of dishwashing soap in a quart or two of water.
- Use an organic insecticide or oil for thrips and red spider mites and for heavy infestations of scale insects and mealybugs.
Diseases
- Fungal and bacterial diseases can occur when humidity is high. Warmer temperatures and high humidity can encourage disease organisms.
- Water orchids early in the day and avoid wetting leaves; this can help prevent many diseases.
- A diseased orchid should be isolated from healthy orchids.
- Cut off all diseased parts of the plant. Sterilize the tool after each cut so it won’t spread the infection to other parts of the plant. Treat the cut surface with a fungicide.
Common environmental problems
- Overwatering: A sign of overwatering is pseudobulbs and leaves that are shriveled and roots that look brown and decayed.
- Underwatering: Orchids that are underwater will have shriveled pseudobulbs and leave (similar to overwaterngt) but the roots will be firm and white. If underwatering is the problem pseudobulbs will plump up after watering.
- Overfertilizing: Signs of too much fertilizer is burnt leaf edges and tips, also roots that are withered. Pour several gallons of water through the growing medium to leach out excess fertilizer salts.
- Scaly or powdery white mineral deposits on pots: this is a sign that there are high concentrations of minerals in the water. Leaf tips may look burnt and plant growth may be stunted. Pour several gallons of deionized water or rainwater through the growing medium.
- Potbound roots: Yellowing leaves, dull appearance, or stunted growth may be a sign the roots are potbound, especially if pseudobulbs extend over the edge of the pot. Repot the plant.
- Sunburn or too much light: Scortched blotches on leaves is a sign of sunburn. Give the plant more shade; improve air circulation to help prevent heat buildup.
- Too little light: Leaves that are very dark green may be a sign that the light is inadequate. Orchids that fail to bloom may be getting too little light.
- Bud drop: Temperature fluctuations, reduced humidity, and air pollution can cause buds to drop or flowers to become discolored at the tips of the sepals.
- Pleated leaves: This is a sign of inadequate water, low humidity, or poor lightly. The plant will look weak and shriveled.
- Lack of rest: Too much light or too much dark can cause orchids to look tired. Use a timer to make sure the plant gets the right number of hours of light and dark.
- Potted too high: Shriveled leaves may be a sign the plant is potted to high out of its growing medium. The lowermost leave should not be more than an inch (2.5cm) above the medium; replant so that the bottom leaf emerges from the stem at the surface of the medium.
Also of interest: