Vegetable Home Canning Cautions
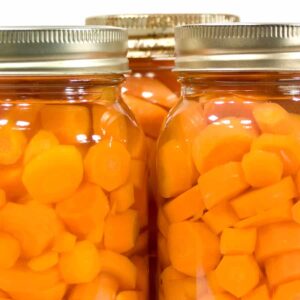
Vegetables—unlike fruits–are low in acid so it is important to use prescribed methods and equipment when canning the overflow of summer and fall harvest.
Use a steam pressure canner for vegetables. Low acid foods must be processed in a pressure canner to be free of botulism and other bacteria, mold, and yeast growth risks. (You can use boiling-water canners for acid foods such as fruits and tomatoes.) A pressure canner will require from 55 to 100 minutes to process jars loaded with vegetables. More time may be required if you are canning at high elevations.
Your nearby cooperative extension or the United States Department of Agriculture can provide you with recommended processing times, pressures, and temperatures for home canning vegetables.
Keep the following cautions in mind when canning vegetables at home:
• Use fresh-picked, firm (not overripe) vegetables for canning. Can vegetables within 6 to 12 hours of harvest. Thoroughly wash vegetables and trim away small bruised spots. Discard diseased and moldy food. Keep vegetables for canning in a cool, shady spot until you are ready to start.
• Use jars and lids made especially for home canning. Your best choice is Mason-type threaded home-canning jars with self-sealing lids. Mason-type jars are made of tempered glass that can withstand the heat and pressure of processing. They come in two sizes: regular (2-3/8 inch opening) and wide-mouth (3-inch opening). Avoid ordinary jars such as mayonnaise jars; they have a narrower sealing surface and are tempered less than Mason jars. Mason jars can be reused several times—needing only new lids each time. Never use jars that are cracked or nicked.
• Use sealing lids only one time. Sealing lids have a gasket compound that forms an airtight seal; once the sealant on a lid has been through the processing stage, it is ineffective for sealing again. Buy new lids each year. Buy only the quantity of lids you will use in a year. Unused lids usually work well for at least 5 years from the time they were manufactured. Examine lids before you use them; do not use old, dented, or deformed lids or lids with gaps or other defects in the sealing gasket. There is no need to risk an unsafe seal.
• Do not overpack jars with food. The unfilled space between the lid and the food in the jar is called headspace. Headspace of 1- to 1¼-inches is required for foods processed in a pressure canner—foods expand in processing then a vacuum is formed when they cool. Low-acid foods require heating to a high temperature; the higher the temperature, the greater the expansion. Too much food in a jar can result in underprocessing and, in turn, spoilage.
• After filling jars with food, release air bubbles by inserting a flat plastic spatula between the food and the jar. Turn the jar slowly moving the spatula up and down to allow air bubbles to escape. Adjust the headspace as necessary then clean the jar rim with a dampened paper towel. Place the lid gasket down on the cleaned jar sealing surface. Fit the metal screwband over the flat lids. As the jars cool, the contents in the jar contract pulling the self-sealing lid firmly against the jar to form a high vacuum. Do not retighten lids after processing jars.
• Use a steam pressure canner for low-acid foods such as vegetables. A steam pressure canner is a heavy kettle with a tight fitting cover that can be locked down to make it steam-tight. The cover is fitted with a pressure gauge and a petcock vent with a safety valve. There are two types of pressure gauges: a weighted gauge or a dial gauge. A weighted gauge automatically limits pressure by a control preset for 5, 10, or 15 pounds; it never needs calibrating. A dial gauge is a numbered instrument that indicates the pressure and temperature at which the jars of food inside the canner are being processed. A dial gauge should be checked for accuracy every season using the manufacturer’s instructions.
• Process jars for the full time required at the correct pressure and temperature. Use USDA guidelines for processing times and temperatures. Make adjustments if you live at altitudes of 1,000 feet or more since water boils at lower temperatures as altitude increases. (Lower boiling points are less effective at killing bacteria so the processing time or canner pressure must be increased.)
• Let the canner cool at room temperature until it is completely depressurized. Let the jars cool at room temperature for 12 to 24 hours. After the jars have cooled, remove the screw bands and test the seals: hold the jar at eye level and look across the lid; a sealed lid should be concave—curved down slightly in the center; if the lid is flat or bulging upwards, it is not sealed. If a lid fails the seal test, remove the lid, clean the jar-sealing surface for nicks, add a new lid and reprocess within 24 hours.
• Never use or even taste canned food that shows signs of spoilage–mold or the odor of decomposition, a smell that is rancid, sour, or cheesy.

