How to Start Seeds Indoors Step-by-Step (Using My 30+ Years of Gardening Experience)
Starting seeds indoors is one of the most satisfying parts of gardening. It gives you a head start on the season, lets you grow varieties you can’t find in nurseries, and ensures stronger, earlier harvests. After more than 30 years of year-round gardening in Sonoma Valley—and starting thousands of seedlings—I’ve honed a simple, reliable method that consistently produces strong, healthy transplants.
Here’s my step-by-step guide with the practical tips that have worked for me season after season.
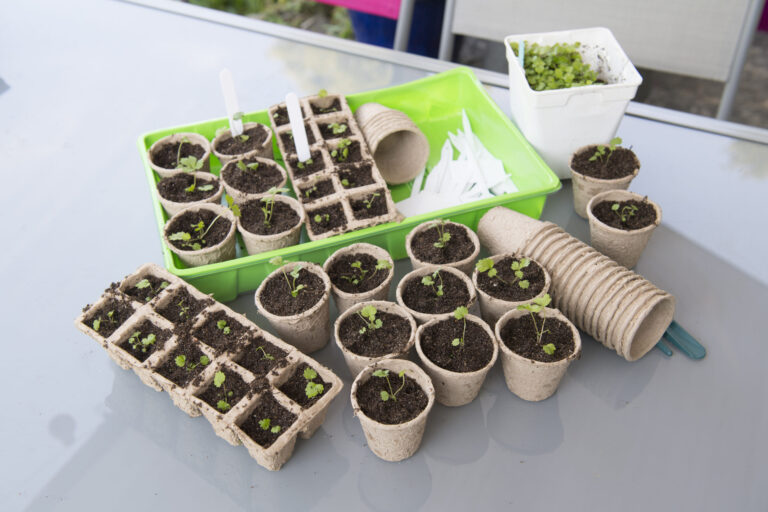
1. Gather Your Seed-Starting Supplies
You don’t need anything fancy—just a few essentials.
What I use in my own garden:
- Seed trays or cell packs
- Clean pots (2–4 inch) for potting up
- Humidity dome or clear cover
- Seed-starting mix (light, sterile, fine-textured)
- Spray bottle for gentle watering
- Heat mat (optional, but excellent for warm crops)
- Labels and a pencil
- Grow lights or a bright south-facing window
Experience tip:
Avoid garden soil for indoor sowing—it compacts easily and carries disease. A fresh, sterile mix prevents damping off.
2. Moisten the Seed-Starting Mix First
Before filling your trays, pre-moisten the mix so it feels like a wrung-out sponge.
Experience tip:
Dry mix repels water and leaves air pockets that prevent even germination. Moistening beforehand creates the perfect seed bed.
3. Fill Containers and Level the Surface
Fill your trays or cells gently. Do not pack tightly.
Then level the surface with your hand.
Experience tip:
A firm but not compacted surface helps seeds make contact with the mix and sprout evenly.
4. Sow Seeds at the Correct Depth
Most seed packets list the proper sowing depth. As a general rule:
- Tiny seeds: Press on the surface, do not cover.
- Small seeds: Cover with ⅛ inch of mix.
- Larger seeds: Cover with ¼–½ inch.
Experience tip:
“Plant twice as deep as the seed is wide” works well—except for light-dependent seeds (lettuce, many herbs), which should stay uncovered.
5. Apply Gentle Moisture
Use a spray bottle or fine mist to moisten the surface after sowing.
Experience tip:
Overhead watering can wash tiny seeds into corners; bottom watering is best once seedlings emerge.
6. Cover Trays and Add Warmth
Use a humidity dome or plastic cover to trap moisture until germination.
Set trays on a heat mat for warm-season crops such as:
- Tomatoes
- Peppers
- Eggplant
- Basil
- Cucumbers
- Squash
- Melons
Experience tip:
Heat mats speed up germination dramatically. Tomatoes that take 7–10 days at room temperature often sprout in 3–4 days with bottom heat.
7. Provide Strong Light Immediately After Germination
Once seedlings appear, remove the dome and move trays under bright lights.
Light guidelines:
- Keep lights 2–3 inches above seedlings
- Run lights 14–16 hours per day
- Raise lights as seedlings grow
Experience tip:
Most home seedlings become leggy because the light source is too far away. Keep lights close for compact, sturdy growth.
8. Water from the Bottom
Place trays in a shallow pan and let the soil wick up water.
Experience tip:
Bottom watering prevents fungal diseases and keeps leaves dry—especially important for peppers, tomatoes, and herbs.
9. Start Airflow
Use a small fan set to low to move air across the seedlings.
Experience tip:
Gentle airflow strengthens stems and prevents damping off. I run my fan for a few hours daily.
10. Feed Seedlings Lightly
When seedlings develop their first true leaves, start feeding with a diluted liquid fertilizer (¼ strength).
Experience tip:
Seedlings in sterile mix need nourishment early. Weak, pale growth usually means lack of nutrients.
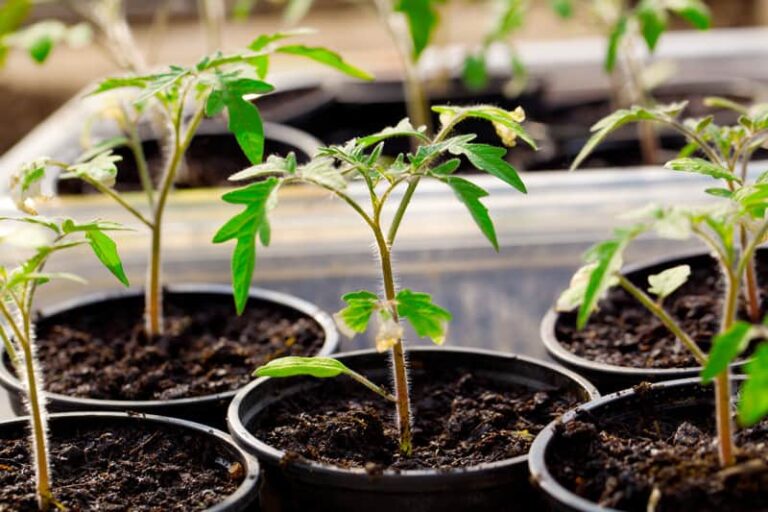
11. Pot Up When Needed
When roots fill the small cells, transplant seedlings into 3–4 inch pots.
This especially applies to:
- Tomatoes
- Peppers
- Eggplant
- Broccoli
- Cabbage
Experience tip:
I bury tomato stems deeply when potting up—new roots form along the stem, creating stronger plants.
12. Harden Off Before Transplanting Outdoors
About 7–10 days before planting out:
- Start seedlings in shade for 2 hours
- Increase outdoor time daily
- Leave plants out overnight at the end of the week
Experience tip:
Skipping hardening off is one of the quickest ways to shock or stunt seedlings. Go slow for the best results.
13. Transplant on a Cloudy Day
Plant seedlings outdoors once:
- Frost danger has passed (for warm-season crops)
- Soil has warmed
- Weather is mild
Experience tip:
Cloudy days with light drizzle are ideal. Bright sun the first day can stress young plants.
Final Thoughts
Starting seeds indoors is one of the most personal parts of gardening—your hands, your light, your soil, your timing. After decades of doing this every winter through spring, I still count the moment seedlings emerge as one of the best parts of the season.
Seed Starting & Propagation Learning Hub
Start here — Seed Starting Basics: A Complete Beginner-to-Advanced Guide for Indoor and Outdoor Seed Starting
Seed Starting Fundamentals
- Seed Starting Guide
- Starting Plants from Seed
- Vegetable Seed Starting Indoors and Out
- How to Start Seeds Indoors Step-by-Step
- Starting Vegetables Indoors: 15 Varieties for Success
- Vegetable Seed Germination
- How to Read a Seed Packet
Planning & Timing
- Seed Starting Calendar: When to Start Seeds Indoors and Outdoors
- Spring Outdoor Seed Sowing Schedule
- Seed Catalog Guide: How to Choose the Best Seeds for Your Garden
- Vegetable Seed Buyer’s Guide
Seed Starting Tools, Supplies & Setup
- Essential Seed Starting Supplies
- Seed Starting Mix Buyer’s Guide
- How to Make Your Own Seed Starting Mix
- Seed Starting Tray Buyer’s Guide
- Peat Pot Buyer’s Guide
- Seedling Heat Mat Buyer’s Guide
- Best Lights for Starting Seeds Indoors (and How to Use Them for Strong, Compact Seedlings)
- Lights to Grow Plants: Choose the Right Light
Seedling Care, Troubleshooting & Success Tips