How to Plant, Grow, and Harvest Chickpeas (Garbanzo Beans): The Complete Guide
Chickpeas, also known as garbanzo beans, are a nutritious and versatile legume that can thrive in home gardens. They are drought-tolerant, improve soil fertility, and produce protein-rich seeds for soups, salads, and hummus. Growing chickpeas requires understanding their climate needs, soil preferences, and proper care throughout the season.
🌱 Choosing the Right Variety
Popular chickpea varieties for home gardeners include:
- Desi: Smaller, darker seeds, commonly used for flour.
- Kabuli: Larger, beige seeds, commonly used for hummus and salads.
Choose a variety suited to your region and culinary preferences. Kabuli types often prefer longer, warmer growing seasons.
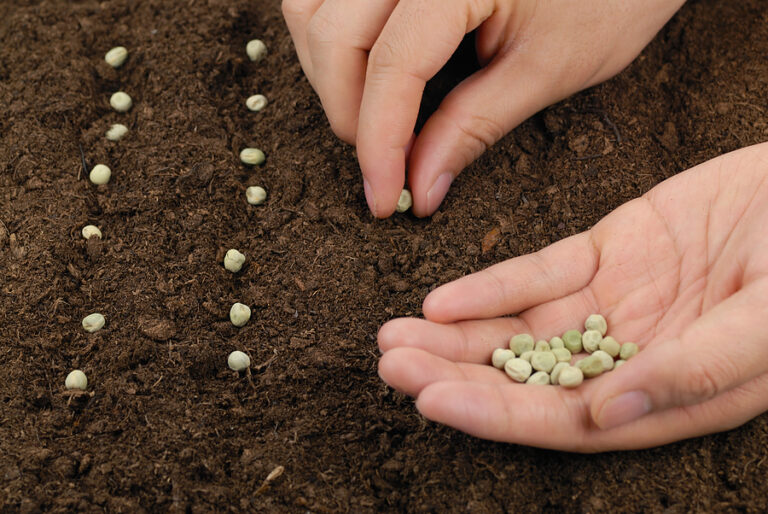
🌤️ Best Planting Time
Chickpeas prefer cool-season planting but need warm weather for flowering and pod development.
- Spring planting: Sow after the last frost when soil temperature reaches 50–60°F (10–16°C).
- Fall planting (in mild climates, USDA zones 9–11): Plant in late fall for a winter harvest.
Chickpeas require 6–8 weeks of cool growth followed by 4–6 weeks of warm, dry weather to produce mature pods.
🏡 Soil and Site Requirements
- Sunlight: Full sun, at least 6–8 hours daily.
- Soil: Well-drained, sandy loam or loamy soil with pH 6–7.
- Soil Preparation: Incorporate compost or aged manure. Avoid excessive nitrogen fertilizers, as chickpeas fix their own nitrogen.
- Spacing: Sow seeds 1–2 inches deep, spaced 3–6 inches apart, with 18–24 inches between rows.
💧 Watering and Care
- Watering: Keep soil consistently moist until germination. Once established, chickpeas are drought-tolerant.
- Mulching: Helps conserve moisture and prevent weeds.
- Support: Chickpea plants are generally self-supporting; staking is optional in windy areas.
🌾 Flowering and Pollination
- Chickpeas produce small white or pale purple flowers.
- Pollination occurs naturally, but gentle shaking of plants can help increase pod set.
- Avoid excessive watering or nitrogen after flowering, as it can reduce pod formation.
🫘 Harvesting Chickpeas
- Harvest when pods turn tan or brown and the seeds rattle inside.
- For fresh use (green chickpeas), harvest when pods are fully filled but still soft.
- For dried chickpeas, allow pods to mature fully on the plant, then shell and air-dry for storage.
Storage: Dried chickpeas store well in airtight containers in a cool, dry place for up to 1 year.
🌿 Companion Planting and Benefits
- Chickpeas improve soil fertility by fixing nitrogen.
- Excellent companions: carrots, cucumbers, corn, potatoes, and sunflowers.
- Avoid planting near onions and garlic, which can stunt growth.
🌱 My Experience
I’ve grown chickpeas successfully in Zone 9b by planting in late winter to early spring. They thrive in sandy, well-drained soil and need minimal care once established. Dried chickpeas from my garden store beautifully, and fresh green chickpeas make an excellent snack. They are a reliable, low-maintenance legume that enriches both the soil and the table.
🗓️ Chickpea Planting-to-Harvest Timeline
| Stage | Timing (Approx.) | Key Tasks | Notes |
|---|---|---|---|
| Soil Preparation | 2–3 weeks before planting | Loosen soil, add compost, remove weeds | Avoid high nitrogen fertilizer |
| Sowing Seeds | Spring (after last frost) or late fall in mild climates | Plant seeds 1–2 inches deep, 3–6 inches apart, rows 18–24 inches apart | Ensure soil temperature 50–60°F (10–16°C) |
| Germination | 7–14 days | Keep soil consistently moist until sprouts emerge | Cover lightly with soil if windy |
| Seedling Stage | 2–4 weeks after germination | Thin seedlings if crowded, keep weed-free | Mulching helps retain moisture |
| Vegetative Growth | 4–6 weeks | Monitor for pests, occasional watering | Avoid excessive nitrogen fertilizer |
| Flowering | 6–8 weeks | Plants produce small white/purple flowers | Gentle shaking can aid pollination |
| Pod Formation | 8–10 weeks | Monitor pod set, reduce watering slightly | Too much water can reduce pods |
| Harvest (Green Chickpeas) | 10–12 weeks | Pick pods when seeds are plump but still soft | Use fresh in salads or cooking |
| Harvest (Dry Chickpeas) | 12–16 weeks | Wait for pods to turn tan/brown, rattle inside | Shell and air-dry before storage |
| Storage | After harvest | Store dried chickpeas in airtight containers in cool, dry place | Lasts up to 1 year |
🟢 Chickpea Care Cheat Sheet
| Care Task | Tips & Guidelines |
|---|---|
| Soil | Well-drained loam or sandy soil; pH 6–7; add compost before planting. |
| Planting Depth | 1–2 inches deep; 3–6 inches between seeds; 18–24 inches between rows. |
| Sunlight | Full sun, at least 6–8 hours per day. |
| Watering | Keep soil moist until germination; once established, water moderately; avoid soggy soil. |
| Mulching | Helps retain moisture, suppress weeds, and protect roots from temperature swings. |
| Fertilization | Minimal nitrogen needed; compost or low-nitrogen fertilizer at planting is sufficient. |
| Support | Usually self-supporting; stake only if windy or plants are very tall. |
| Pests | Watch for aphids, cutworms, and leaf miners; use insecticidal soap or neem if needed. |
| Diseases | Prevent root rot and fungal issues with well-drained soil; rotate crops each year. |
| Flowering & Pollination | Occurs 6–8 weeks after planting; gently shake flowers to improve pod set if needed. |
| Harvest Timing | Green pods: 10–12 weeks; dried beans: 12–16 weeks when pods are brown and rattle. |
| Storage | Dried beans: Airtight container in cool, dry place; lasts up to 1 year. |
| Companion Plants | Carrots, cucumbers, corn, potatoes, sunflowers; avoid onions and garlic. |
Chickpea Learning Hub
Start Here / Overview
- Mastering Chickpeas: Planting, Growing, and Harvesting Tips
- How to Plant, Grow, and Harvest Chickpeas (Garbanzo Beans): The Complete Guide
Planning & Planting
- Best Chickpea Varieties to Grow: Kabuli, Desi, Black, and Specialty Types
- Short-Season Chickpeas: Best Varieties and Tips for Cooler Climates
- When to Plant Chickpeas: Temperature, Frost Windows, and a Month-by-Month Calendar
- How to Start Chickpeas From Seed: Indoors, Outdoors, and Spacing Tips
- Can You Grow Chickpeas in Containers? What Works—and What Doesn’t
- Growing Chickpeas in Raised Beds
- Best Companion Plants for Chickpeas (and What to Avoid)
Care & Maintenance
- How to Water and Feed Chickpeas for Maximum Pod Production
- Chickpea Care Guide: Weeding, Mulching, Trellising, and Seasonal Maintenance
Pests, Diseases & Troubleshooting
- Chickpea Pests: Identification, Prevention, and Organic Controls
- Chickpea Diseases and How to Prevent Them: Blight, Mosaic, Anthracnose & More
- Troubleshooting Chickpeas: Why Plants Fail, Don’t Flower, or Don’t Make Pods
Harvesting & Post-Harvest
- Harvesting Chickpeas: Fresh Green Pods vs. Dried Beans
- How to Store and Preserve Chickpeas: Fresh, Dried, Canned, or Frozen
Cooking & Enjoying