Essential Seed-Starting Supplies: Everything You Need for Strong, Healthy Seedlings
After more than 30 years starting seeds indoors—from tomatoes and peppers to brassicas and herbs—I’ve learned that you don’t need fancy equipment, but you do need the right foundational supplies. The right tools make seed starting easier, more consistent, and far more successful.
Here are the seed-starting supplies I rely on every year in my Sonoma Valley garden, along with my tips for choosing the best options.
Seed-Starting Mix
A fine-textured, sterile seed-starting mix is essential. Avoid heavy garden soil indoors—it compacts and harbors disease.
What I use: A peat- or coir-based mix with added perlite for drainage.
Why it matters:
- Prevents damping-off
- Holds moisture without getting soggy
- Allows delicate roots to grow freely
Seed Trays & Containers
You can start seeds in just about anything, but reusable seed trays and cell packs make the process cleaner and more efficient.
Best options:
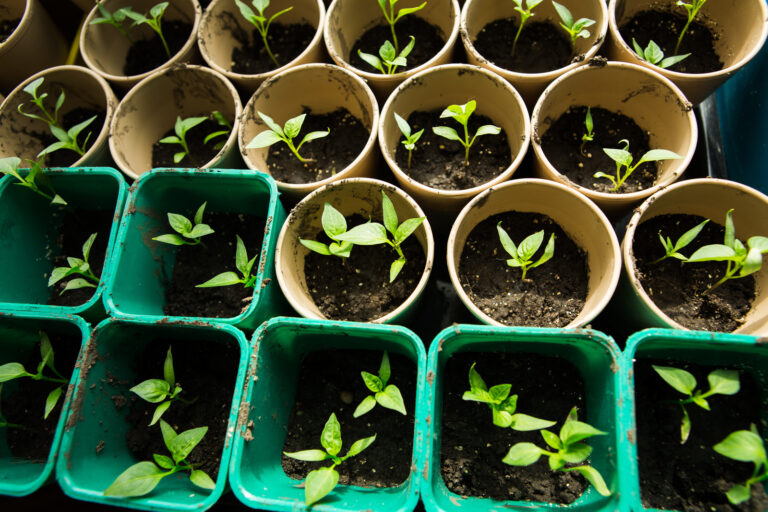
- Cell trays (40, 50, or 72 cells) for most vegetables
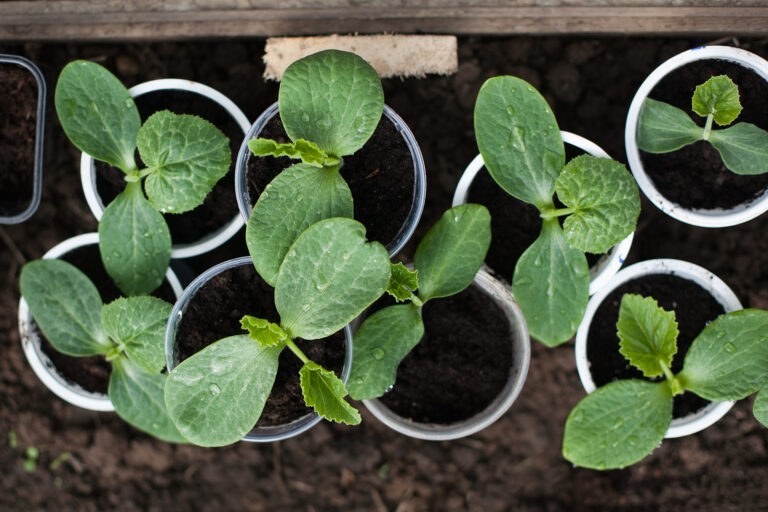
- 3–4 inch pots for large seeds (squash, cucumbers) or potting up
- Soil-block makers if you prefer plastic-free
My experience:
I use 72-cell trays for my early sowings because they fit easily under lights and transplant well.
Humidity Domes
Humidity domes hold moisture and warmth during germination.
Tips:
- Remove the dome as soon as seedlings sprout
- Vent daily to prevent fungal issues
Humidity domes give consistent germination—especially helpful for slow sprouters like parsley or peppers.
Heat Mat
A heat mat is one of the few “optional” tools I consider essential for warm-season crops.
Why I use it:
- Speeds germination dramatically
- Improves consistency for tomatoes, peppers, eggplants
- Keeps soil at 70–75°F—ideal for most seeds
Cool-season crops (lettuce, brassicas) often germinate fine without it.
Grow Lights
Windows alone rarely provide enough light for strong seedlings. After decades of trial and error, high-quality LED shop lights or grow lights offer the best results.
Light placement:
- 2–4 inches above seedlings
- 14–16 hours per day on a timer
Good lighting prevents leggy seedlings—one of the most common beginner issues.
Labels
You think you’ll remember what you planted—until everything sprouts at once. Labels save frustration.
What I like:
- Plastic tags for trays
- A wax pencil or fine-tip marker that won’t fade
Spray Bottle or Fine Watering Can
Gentle watering is key to avoiding seed displacement.
My approach:
- Use a spray bottle early
- Switch to bottom watering trays once seedlings grow
This keeps stems dry and reduces disease risk.
Fertilizer
Seedlings don’t need fertilizer until the first true leaves appear. When they do, I use:
• A half-strength organic liquid fertilizer
Feed every 10–14 days for steady, healthy growth.
Fan for Air Circulation
A small tabletop fan strengthens stems and reduces fungal pressure.
How I use it:
- Low setting
- A few hours each day
- Pointed near seedlings, not directly at them
Optional But Helpful
- Seedling heat mat thermostat for precision
- Boot trays under seed trays to collect water
- Shelving units to organize large seed-starting setups
Final Thoughts
With the right seed-starting supplies—and just a bit of practice—you can grow vigorous, transplant-ready seedlings every year. Over time, you’ll customize your setup based on the crops you grow most often, but these essentials will give you a dependable foundation.
Seed-Starting Shopping List
Seed-Starting Mix
- Sterile seed-starting mix (peat-based or coir-based)
- Perlite (if you want to lighten your mix)
Containers & Trays
- 72-cell seed trays
- 40–50 cell trays (for larger seedlings)
- 3–4 inch pots (for potting up)
- Reusable seed-starting trays (no holes) for bottom watering
- Soil-block maker (optional, plastic-free)
Humidity & Temperature
- Clear humidity domes
- Seedling heat mat
- Thermostat for heat mat (optional but useful)
Lighting
- LED grow lights or LED shop lights
- Light stand or adjustable shelving
- Digital timer for lights (essential for consistency)
Watering Tools
- Spray bottle (fine mist)
- Small watering can with a narrow spout
- Boot tray or leak-proof tray for bottom watering
Labels & Markers
- Plastic plant labels
- Wooden craft sticks (optional)
- Wax pencil, grease pencil, or fade-resistant marker
Air Circulation
- Small tabletop fan
- Power strip (if running multiple lights/fans)
Fertilizer
- Organic liquid fertilizer (half-strength for seedlings)
Cleaning & Sanitation
- Hydrogen peroxide or mild bleach solution
- Gloves (optional)
- Old towel for drying trays
Optional Helpful Items
- Seed storage box or binder
- Handheld soil thermometer
- Garden planner or seed-starting calendar
- Extra shelving or utility rack for expanding your setup
Seed Starting & Propagation Learning Hub
Start here — Seed Starting Basics: A Complete Beginner-to-Advanced Guide for Indoor and Outdoor Seed Starting
Seed Starting Fundamentals
- Seed Starting Guide
- Starting Plants from Seed
- Vegetable Seed Starting Indoors and Out
- How to Start Seeds Indoors Step-by-Step
- Starting Vegetables Indoors: 15 Varieties for Success
- Vegetable Seed Germination
- How to Read a Seed Packet
Planning & Timing
- Seed Starting Calendar: When to Start Seeds Indoors and Outdoors
- Spring Outdoor Seed Sowing Schedule
- Seed Catalog Guide: How to Choose the Best Seeds for Your Garden
- Vegetable Seed Buyer’s Guide
Seed Starting Tools, Supplies & Setup
- Essential Seed Starting Supplies
- Seed Starting Mix Buyer’s Guide
- How to Make Your Own Seed Starting Mix
- Seed Starting Tray Buyer’s Guide
- Peat Pot Buyer’s Guide
- Seedling Heat Mat Buyer’s Guide
- Best Lights for Starting Seeds Indoors (and How to Use Them for Strong, Compact Seedlings)
- Lights to Grow Plants: Choose the Right Light
Seedling Care, Troubleshooting & Success Tips