How to Start Chickpeas From Seed: Indoors, Outdoors, and Spacing Tips
Growing chickpeas—also called garbanzo beans—is simpler than many gardeners expect. With more than 30 years of growing warm-season legumes in raised beds and open rows, I’ve found chickpeas to be one of the easiest crops for home gardens. They thrive in light, warm soil, ask for little fertilizer, and reward you with nutty, protein-rich pods perfect for fresh eating or drying. Here’s how to start chickpeas from seed indoors or outdoors—and the spacing tips that ensure success.
Why Grow Chickpeas?
Chickpeas are cool-loving spring legumes that can handle light frost, especially early in the season. They need far less heat than black-eyed peas or lima beans. They’re also drought tolerant once established and a great crop for gardeners who want a dependable, soil-building plant: chickpeas fix nitrogen in the soil, enriching it for the next crop.
Starting Chickpeas Indoors
I rarely start chickpeas indoors, but there are times when it makes sense—especially if your spring warms late or your soil stays cool into May.
When to start:
Start seeds indoors 3–4 weeks before your last expected frost.
How to start:
- Use biodegradable pots (chickpeas dislike root disturbance).
- Fill pots with a light seed-starting mix.
- Sow seeds 1 inch deep; keep the mix evenly moist but never soggy.
- Maintain temperatures between 60–70°F.
- Provide bright light—grow lights 2–4 inches above seedlings work best.
Transplanting:
Transplant seedlings outdoors when they are 3–4 inches tall and the soil temperature reaches about 50–60°F. Plant the entire pot so the roots are not disturbed.
Direct Sowing Chickpeas Outdoors
Most chickpeas in my garden are direct-sown. They sprout quickly in warming soil and grow sturdily from the start.
When to sow:
- As soon as the soil can be worked in spring.
- Chickpeas tolerate light frost and prefer cool, dry spring conditions.
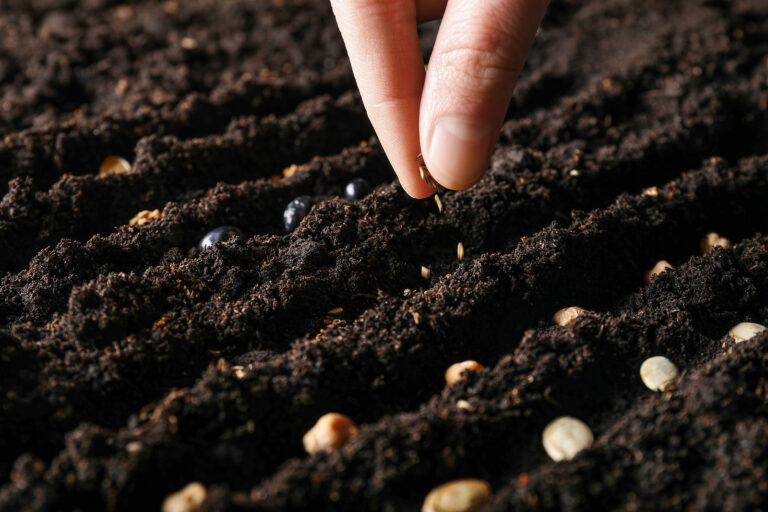
How to sow:
- Loosen soil 8–10 inches deep; chickpeas like loose, well-drained beds.
- Rake the surface smooth.
- Plant seeds 1 to 1 ½ inches deep.
- Water in lightly—just enough to settle the soil.
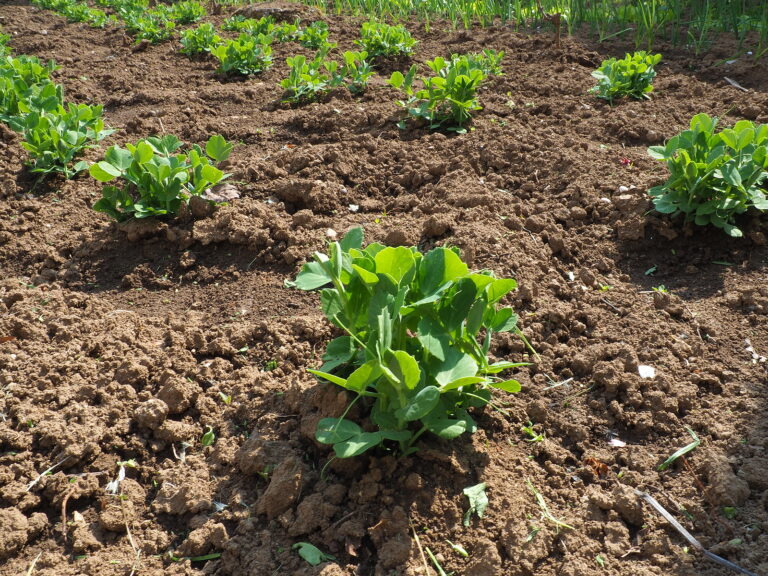
Spacing Tips for Healthy, Productive Plants
Spacing is where chickpeas really benefit from careful planning. After growing them in narrow beds and wide rows for decades, I’ve settled on these reliable spacings:
In Rows
- Spacing between plants: 4–6 inches
- Spacing between rows: 18–24 inches
This gives plants room to branch and set a full crop of pods.
In Blocks or Raised Beds
- Equidistant spacing: 6–8 inches apart in all directions
This method—part of the NEW system I’ve used for years—creates a balanced canopy and consistent pod set.
In Containers
Use at least a 12-inch-deep container and plant 2–3 seeds spaced 6 inches apart. Chickpeas have a deep taproot and need soil depth more than width.
Watering and Early Care
Once seedlings are up, water sparingly. Chickpeas are naturally drought tolerant; too much moisture encourages excess leaf growth and fewer pods.
A light side-dressing of compost at planting time is enough—avoid nitrogen-rich fertilizers, which delay flowering.
Harvest Timeline
Chickpeas take about 90–100 days from planting to harvest.
- For fresh green chickpeas: Pick pods when they are bright green and full.
- For dry chickpeas: Allow plants to yellow; harvest when pods are dry and rattling.
If you’re looking for a legume that fits easily into a spring planting plan, chickpeas are one of the most dependable. With simple seed starting, light soil preparation, and smart spacing, you can count on a flavorful crop that enriches your garden’s soil for the season ahead.
Chickpea Learning Hub
Start Here / Overview
- Mastering Chickpeas: Planting, Growing, and Harvesting Tips
- How to Plant, Grow, and Harvest Chickpeas (Garbanzo Beans): The Complete Guide
Planning & Planting
- Best Chickpea Varieties to Grow: Kabuli, Desi, Black, and Specialty Types
- Short-Season Chickpeas: Best Varieties and Tips for Cooler Climates
- When to Plant Chickpeas: Temperature, Frost Windows, and a Month-by-Month Calendar
- How to Start Chickpeas From Seed: Indoors, Outdoors, and Spacing Tips
- Can You Grow Chickpeas in Containers? What Works—and What Doesn’t
- Growing Chickpeas in Raised Beds
- Best Companion Plants for Chickpeas (and What to Avoid)
Care & Maintenance
- How to Water and Feed Chickpeas for Maximum Pod Production
- Chickpea Care Guide: Weeding, Mulching, Trellising, and Seasonal Maintenance
Pests, Diseases & Troubleshooting
- Chickpea Pests: Identification, Prevention, and Organic Controls
- Chickpea Diseases and How to Prevent Them: Blight, Mosaic, Anthracnose & More
- Troubleshooting Chickpeas: Why Plants Fail, Don’t Flower, or Don’t Make Pods
Harvesting & Post-Harvest
- Harvesting Chickpeas: Fresh Green Pods vs. Dried Beans
- How to Store and Preserve Chickpeas: Fresh, Dried, Canned, or Frozen
Cooking & Enjoying