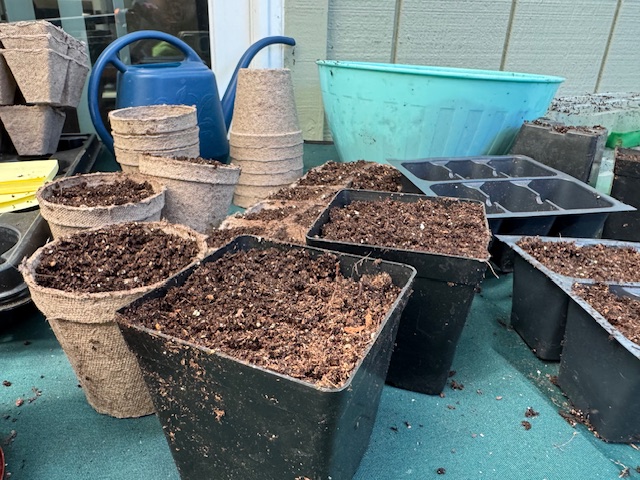
How to Make Your Own Seed Starting Mix
Making your own seed starting mix is one of the simplest ways to ensure strong, healthy seedlings. A good mix supports fast germination, steady moisture, and early root development. After more than 30 years of starting seeds in Sonoma Valley—indoors under lights, outdoors in raised beds, and in containers—I’ve tested dozens of homemade blends. The best mixes all have the same qualities: fine texture, good drainage, good moisture-holding, and freedom from disease.
Below are several reliable recipes, including the well-known University of California seed starting mix, professional-style blends, and the homemade formula I use for most of my seedlings.
What Makes a Good Seed Starting Mix
Seed starting mix is different from potting soil. A good mix should be:
- Lightweight — fine enough for young roots to push through
- Sterile — free from pathogens that cause damping-off
- Moisture-retentive — holds water evenly
- Well-draining — seeds can rot if the mix stays soggy
- Low fertility — seedlings don’t need heavy nutrients early on
Over the decades, I’ve found that keeping mixes simple with just a few key ingredients produces the most consistent results.
The University of California Seed Starting Mix
The UC mix is widely respected for its simplicity and reliability. It was developed for consistent germination and disease prevention.
University of California Mix (UC Mix)
- 1 part fine sand
- 1 part peat moss
This mix is:
- Sterile (when made with new sand and peat)
- Fast-draining
- Excellent for germinating seeds prone to rot
My experience with the UC mix:
I use UC mix when I want maximum drainage, especially for onions, leeks, herbs, and cool-season crops that prefer not to sit in wet media. Seeds germinate evenly and roots stay clean and well-branched.
If you want a bit more moisture-holding ability, mix in 10–20% vermiculite.
My Preferred Starting Mix (30+ Years of Use)
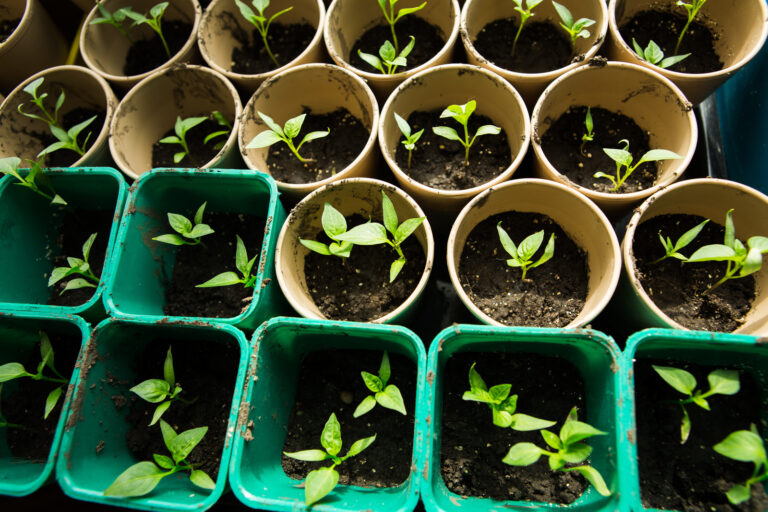
This is the mix I rely on for most vegetable starts—tomatoes, peppers, brassicas, basil, lettuces, and more. It balances moisture and airflow beautifully.
My Standard Seed Starting Mix
- 1 part peat moss or coconut coir
- 1 part vermiculite
- 1 part perlite
Why it works:
- Coir/peat retains moisture without compacting
- Vermiculite holds water and keeps the mix fluffy
- Perlite improves drainage and airflow
Tips from experience:
- Moisten the mix before filling trays—it should feel like a wrung-out sponge.
- Compress lightly; don’t pack tightly. Seedlings need air pockets.
- Bottom-water after sowing to keep the surface from crusting.
Cornell Seed Starting Mix
Another widely used recipe from Cornell University, ideal for vegetable and flower starts.
Cornell Peat-Lite Mix
- 3 parts peat moss
- 1 part perlite
- 1 part vermiculite
Cornell developed this mix for commercial greenhouse propagation. It retains moisture well and is excellent for small seeds like lettuce, kale, and herbs.
John Innes Seedling Mix (UK Standard)
A classic British recipe known for stability and balanced nutrients.
John Innes Seedling Mix
- 2 parts loam
- 1 part peat or coir
- 1 part sharp sand
- Plus a pinch of lime (to neutralize peat)
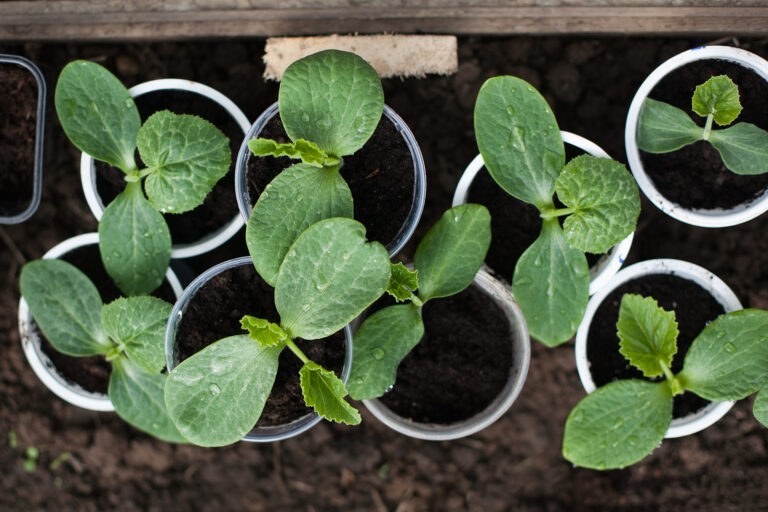
This mix is heavier and not sterile unless pasteurized. I use it occasionally for large seeds like squash, cucumbers, and melons when starting in pots—but rarely for fine indoor seedings.
Recipe: Simple Peat-Free Seed Starting Mix
If you prefer peat-free gardening, this blend performs very similarly.
Peat-Free Mix
- 2 parts coconut coir
- 1 part compost (sifted)
- 1 part perlite or pumice
Note from experience:
Compost must be very fine and fully mature. Sift it through ¼-inch hardware cloth to remove sticks and clumps.
How to Sterilize Your Homemade Mix
If using compost, garden soil, or sand from outdoors, sterilizing prevents damping-off.
Two easy methods:
Oven Method
Spread mix on a baking tray (2–3 inches deep) and heat at 180–200°F (82–93°C) for 30 minutes.
Solarization (best for larger batches)
Place moist mix in a black plastic bag, seal, and set in full sun for 4–6 weeks.
I rarely need sterilization when using store-bought components, but it’s essential when using native soil or compost.
How to Use Homemade Seed Starting Mix
- Pre-moisten the mix until evenly damp.
- Fill trays or pots loosely—don’t compact.
- Tap containers to settle the media instead of pressing it down.
- Sow seeds at recommended depth (often very shallow).
- Mist the surface, then bottom-water after germination.
- Keep warm (70–80°F for warm crops) until sprouts appear.
- Provide strong overhead light to prevent legginess.
With consistent moisture and good airflow, most vegetable seeds germinate in 5–10 days.
Troubleshooting Your Homemade Mix
Mix dries out too fast
Add more:
- Peat or coir
- Vermiculite
Mix stays too wet
Add more:
- Perlite
- Sharp sand
Seedlings look yellow
This can happen after 2–3 weeks; the mix is intentionally low in nutrients.
Use a diluted liquid fertilizer (¼-strength) once true leaves appear.
Final Thoughts
Making your own seed starting mix puts you in control of quality, texture, and moisture. After decades of experimenting in my Sonoma Valley garden, I always return to simple recipes—UC mix when I want extra drainage and my own 1:1:1 coir/vermiculite/perlite mix for most seedlings.
With the right blend, seeds germinate more reliably and seedlings develop strong, healthy root systems that transplant beautifully into the garden.
Seed Starting Mix Comparison Chart
| Mix Name | Ingredients | Best For | Pros | Cons | My Notes from Experience |
|---|---|---|---|---|---|
| University of California (UC Mix) | 1 part fine sand; 1 part peat moss | Onions, leeks, herbs, cool-season crops; seeds that dislike excess moisture | Very fast draining; sterile; simple | Dries quickly; low moisture retention | Excellent for fine seeds; great in humid greenhouses. I add 10–20% vermiculite for extra moisture. |
| My Standard Mix (1:1:1) | 1 part peat or coir; 1 part vermiculite; 1 part perlite | Tomatoes, peppers, brassicas, lettuce, herbs—most vegetables | Balanced moisture + drainage; very lightweight; consistent germination | Requires separate fertilizing after 2–3 weeks | My go-to mix for 30+ years. Produces compact, sturdy seedlings. |
| Cornell Peat-Lite Mix | 3 parts peat; 1 part perlite; 1 part vermiculite | Small seeds; lettuce; kale; herbs; broccoli | Holds moisture well; very uniform; commercial-quality | Peat-heavy; can stay wet in cool rooms | Best when starting many trays at once; reliable for cool-season crops indoors. |
| John Innes Seedling Mix | 2 parts loam; 1 part peat or coir; 1 part sharp sand | Large seeds; squash; cucumbers; melons; outdoor starts | Nutrient stable; good structure | Heavy; not sterile unless pasteurized | Excellent for pot-grown seedlings; anchors roots. I use it mostly outdoors. |
| Peat-Free Homemade Mix | 2 parts coir; 1 part sifted compost; 1 part perlite or pumice | Organic gardens; eco-focused gardeners; general seed starting | Sustainable; good water retention; inexpensive | Compost must be perfect; sterilization needed | Works well when compost is fine and mature. Sift well to avoid crusting. |
| Simple Coir-Vermiculite Mix | 2 parts coir; 1 part vermiculite | Lettuce, herbs, small-seeded crops | Very fine texture; great for tiny seeds | Needs perlite added for drainage | Great for indoor germination trays where fine texture is critical. |
| Sand-Coir Mix (Desert-Style) | 1 part washed sand; 1 part coir; 1 part perlite | Heat-loving crops, heavy clay soils | Fast draining; reduces rot | Requires frequent watering | Helpful for peppers and chilies in warm climates like Sonoma. |
Seed Starting & Propagation Learning Hub
Start here — Seed Starting Basics: A Complete Beginner-to-Advanced Guide for Indoor and Outdoor Seed Starting
Seed Starting Fundamentals
- Seed Starting Guide
- Starting Plants from Seed
- Vegetable Seed Starting Indoors and Out
- How to Start Seeds Indoors Step-by-Step
- Starting Vegetables Indoors: 15 Varieties for Success
- Vegetable Seed Germination
- How to Read a Seed Packet
Planning & Timing
- Seed Starting Calendar: When to Start Seeds Indoors and Outdoors
- Spring Outdoor Seed Sowing Schedule
- Seed Catalog Guide: How to Choose the Best Seeds for Your Garden
- Vegetable Seed Buyer’s Guide
Seed Starting Tools, Supplies & Setup
- Essential Seed Starting Supplies
- Seed Starting Mix Buyer’s Guide
- How to Make Your Own Seed Starting Mix
- Seed Starting Tray Buyer’s Guide
- Peat Pot Buyer’s Guide
- Seedling Heat Mat Buyer’s Guide
- Best Lights for Starting Seeds Indoors (and How to Use Them for Strong, Compact Seedlings)
- Lights to Grow Plants: Choose the Right Light
Seedling Care, Troubleshooting & Success Tips