Essential Cauliflower Care: From Seedling to Harvest
Cauliflower is a rewarding but sensitive crop. In my 30+ years of growing brassicas, I’ve learned that consistent, hands-on care from seedling to harvest is the key to producing large, tender heads. Missing even one critical step—watering, feeding, or pest management—can result in stunted growth or buttoning.
This guide covers the essential care practices for cauliflower, combining personal experience with horticultural expertise to ensure healthy plants and a bountiful harvest.
1. Seedling Care
- Starting seeds indoors: Use a fine seed-starting mix and keep soil consistently moist.
- Temperature: Maintain 65–70°F for strong germination.
- Thinning: Remove weaker seedlings to give the strongest plants space to grow.
From my experience: Hardening off seedlings gradually is critical. I move trays outside for increasing hours each day over a week, reducing transplant shock and improving survival rates.
2. Transplanting
- Space seedlings 18–24 inches apart in rows 24–36 inches apart.
- Water thoroughly after planting.
- Apply mulch to conserve moisture and protect roots.
Transplant at 4–6 weeks old, when seedlings have 4–5 true leaves. Proper spacing and care during this stage prevent crowding and promote strong head development.
3. Watering
- Keep soil consistently moist—about 1–1.5 inches per week.
- Use drip irrigation or soaker hoses to minimize leaf wetness and reduce disease.
- Mulch helps retain moisture and regulate soil temperature.
Tip: Uneven watering often causes small or loose heads. Steady moisture is essential, especially during head formation.
4. Feeding
- Incorporate compost or well-rotted manure before planting.
- Side-dress with balanced organic fertilizer 2–3 weeks after transplanting and again during head formation.
- Use micronutrients like calcium to prevent tip burn.
Balanced, timely feeding keeps plants vigorous and supports both leafy growth and head development.
5. Pest and Disease Management
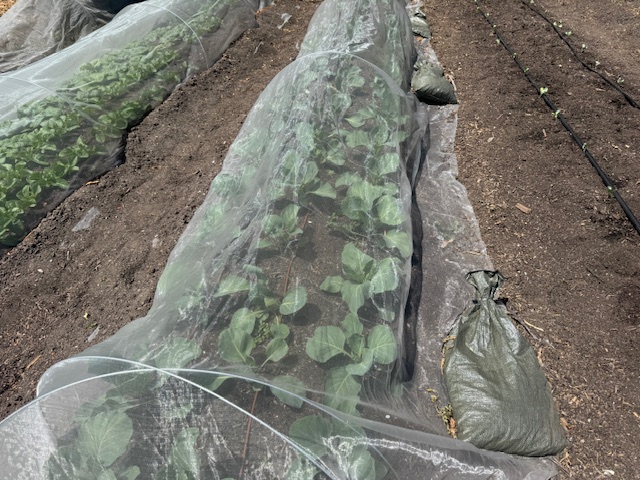
- Common pests: Cabbage worms, aphids, and flea beetles. Use row covers or handpick pests.
- Diseases: Downy mildew, clubroot, and black rot. Rotate crops and avoid overcrowding.
- Preventive care: Maintain airflow, keep leaves dry, and practice crop rotation.
From experience: Companion planting with herbs like dill and thyme naturally deters many pests.
6. Blanching
- Tie outer leaves over developing heads when they’re 2–3 inches across.
- Protects curds from sun exposure, improving flavor and appearance.
7. Harvesting
- Heads are ready when 6–8 inches across, compact, and firm.
- Cut with a sharp knife, leaving a few leaves attached to protect the head.
Tip: Timely harvesting ensures the best flavor and prevents heads from loosening or discoloring.
Final Thoughts
Caring for cauliflower requires attention at every stage—from seedling to harvest. With proper watering, feeding, pest control, and timing, even this demanding crop rewards you with large, tender, flavorful heads.
After decades of growing cauliflower, I’ve found that consistent, attentive care is far more important than any single fertilizer, mulch, or watering trick.
Cauliflower Care Timeline: Seedling to Harvest
| Stage | Timing / Age | Key Actions |
|---|---|---|
| Seed Starting | 0–4 weeks (indoors) | Sow seeds in seed-starting mix, maintain 65–70°F, keep soil moist. Thin seedlings. |
| Hardening Off | Week 4 | Gradually expose seedlings to outdoor conditions over 7–10 days. |
| Transplanting | Week 4–6 | Plant 18–24” apart, water thoroughly, mulch to retain moisture. |
| Vegetative Growth | Weeks 6–10 | Maintain even moisture, side-dress with compost or balanced fertilizer. |
| Pest & Disease Care | Ongoing | Monitor for cabbage worms, aphids, and fungal issues; use row covers or companion plants. |
| Blanching | When curds reach 2–3” | Tie outer leaves over heads to protect from sun and improve flavor. |
| Head Development | Weeks 10–14 | Keep soil consistently moist; fertilize lightly if needed. |
| Harvesting | Weeks 12–16 (6–8” heads) | Cut heads with sharp knife, leave protective leaves attached. |
Pro tip from my garden: I like to color-code the timeline in my personal planner—seedling (green), transplant (blue), head formation (yellow), harvest (orange). It makes care tracking simple and stress-free.
Cauliflower Learning Hub
Start here: The Ultimate Cauliflower Growing Guide: From Seed to Harvest
🌱 Planting & Growing
- When and How to Plant Cauliflower for Best Results
- Cauliflower Seed Starting Tips
- Cauliflower Planting Calendar: Month-by-Month Guide
- How to Transplant Cauliflower Seedlings Successfully
- Proper Cauliflower Spacing for Bigger Heads
- Growing Cauliflower in Containers: Step-by-Step Guide
- Best Companion Plants for Cauliflower (and What to Avoid)
💧 Care & Maintenance
- How to Water Cauliflower the Right Way
- Feeding Cauliflower: Fertilizer Tips for Healthy Growth
- Essential Cauliflower Care: From Seedling to Harvest
- Blanching Cauliflower: Why and How to Do It
🐛 Pests & Problems
🌾 Harvest & Storage
🍴 Kitchen & Use
❓ What to Grow