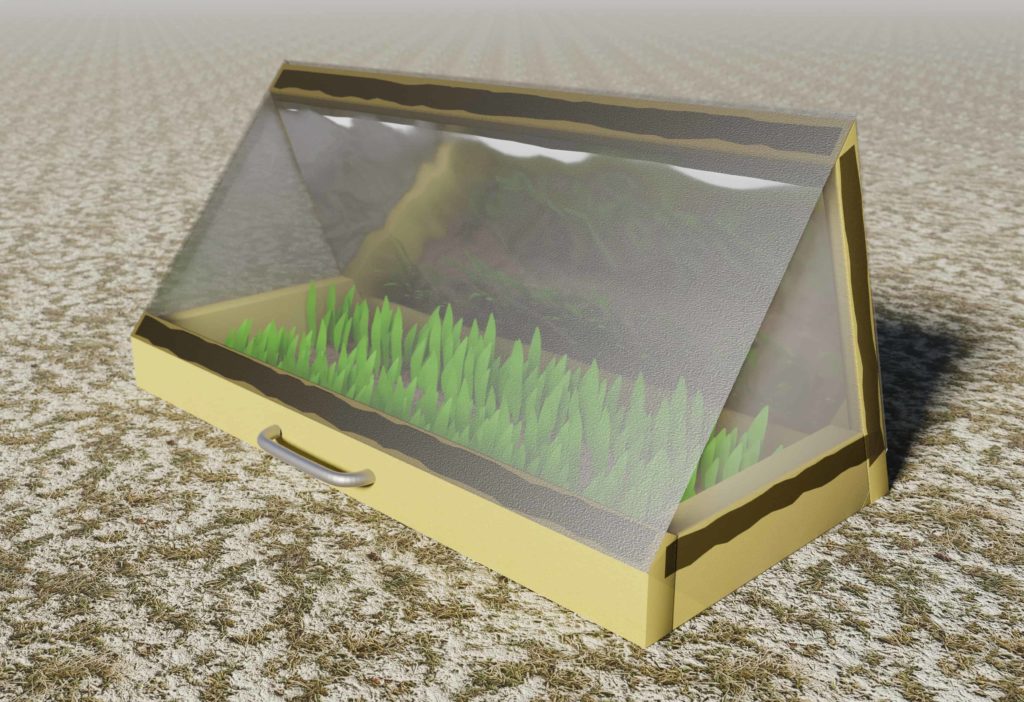
A cold frame—a low, bottomless box with a clear glass or plastic top, that is set on the ground or over a sunken bed—can extend the growing season by 1 to 3 months.
Use a cold frame to extend the growing season from fall into early winter and late winter into spring and protect plants in summer and winter. Insulate the cold frame with sheet plastic or thick rigid urethane to protect plants in mid-winter; replace the cold frame lid with a lath in summer to create a lath house.
A frame 3 by 6 feet (1 by 1.8 m) will fit easily atop a raised bed. A frame this size is portable but large enough to reduce temperature swings inside the frame.
Good Products for Season Extension at Amazon:
- Walk-In Greenhouse Tunnel 15x7x7
- Row Cover for Freeze Protection 10×30
- Garden Cloches for Plants
- Plant Cover Freeze Protection with Hoops
Use a lid made of plastic, plexiglass, acrylic, or plastic sheeting. A double layer of plastic sheeting will keep the frame interior 10 to 20 degrees warmer than the outside temperature. Add additional insulation—a tarp or old blanket–atop the lid on nights when the temperature is frigid.
The seal between the lid and the top of the frame should be as tight as possible. Cover the frame edge with weather stripping or strips of carpet underpadding to close gaps. Be sure to prop the lid open on mild days for ventilation.
The height of the frame should be slightly taller than the plants growing inside at maturity.
A low frame—6 to 8 inches (15 or 20 cm) is all that is needed for seed starting in spring. Frame units of the same size can be stacked on the bottom unit to raise the height of the frame if more height is needed. Use pegs that fit in the unit below to secure the frame. The top unit should have a sloping lid.
The slope of the frame lid should be 7 to 15° to admit light and allow rain to run off. To maximize sunlight and warmth in the frame—especially in early spring or late autumn, a lid slope of 30° is desirable.
Frames or frame units set on a raised bed can be removed and stored during the summer or the lid can be covered with cheesecloth, plant fabric, or shade cloth to protect young seedlings from summer heat.
Cold frame year-round use
Cold frames can be used for year-round gardening:
- Spring: Use the frame to start seeds early and harden off seedlings.
- Summer: Use the frame as a nursery bed to start fall crops from seed: simply remove the lid.
- Autumn: Extend the summer harvest by protecting low-growing warm-weather crops or growing compact cool-weather crops.
- Winter: Extend the harvest of autumn crops and grow cool-weather crops in cold weather.
How to make a cold frame
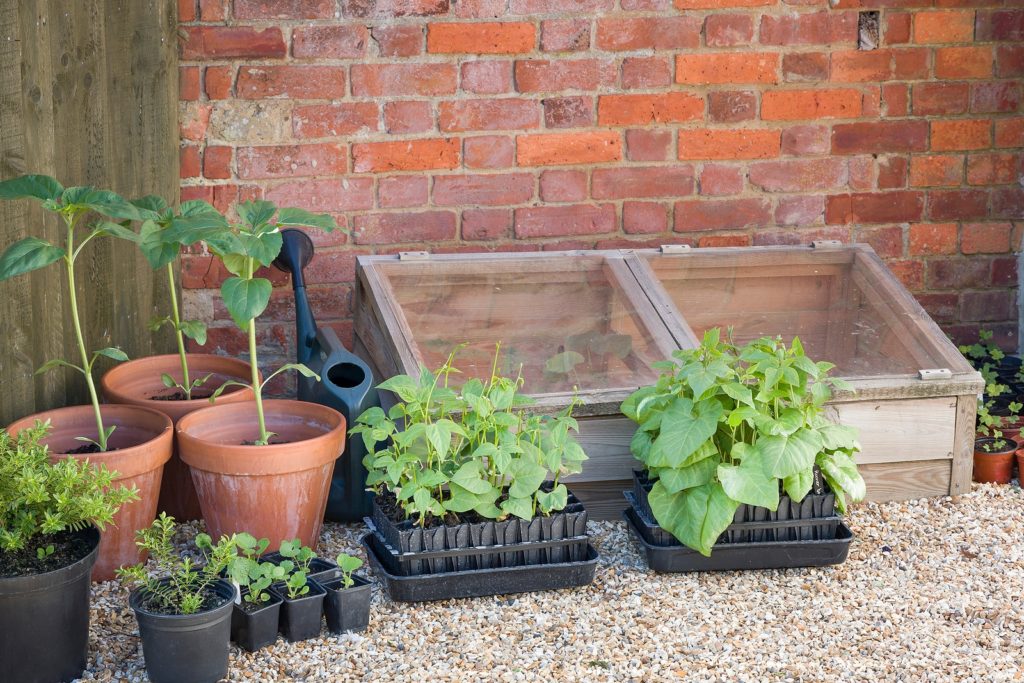
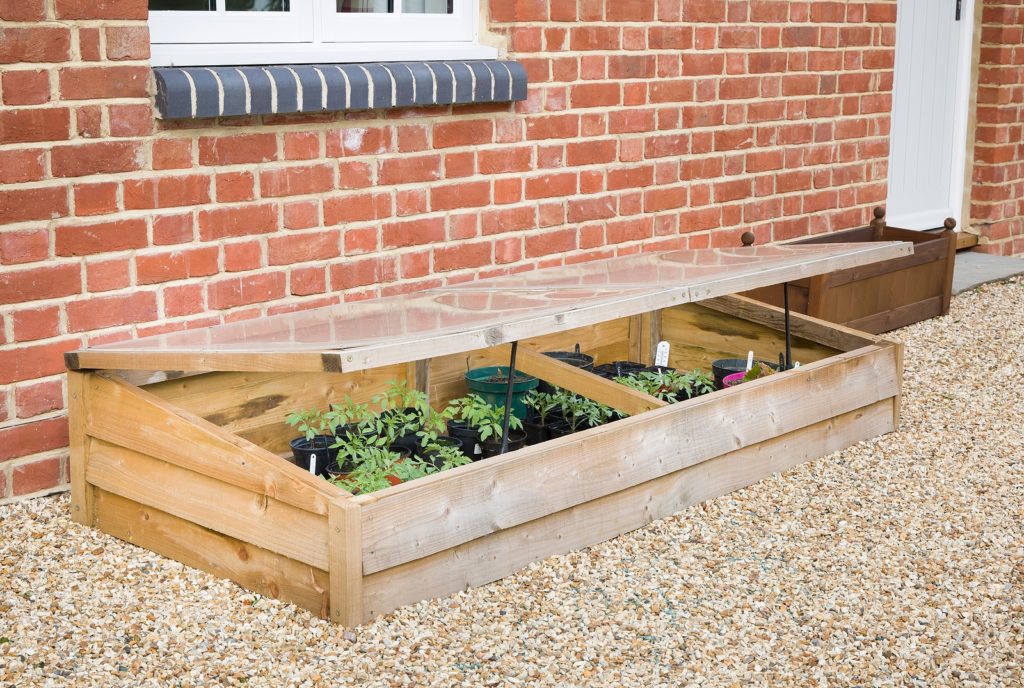
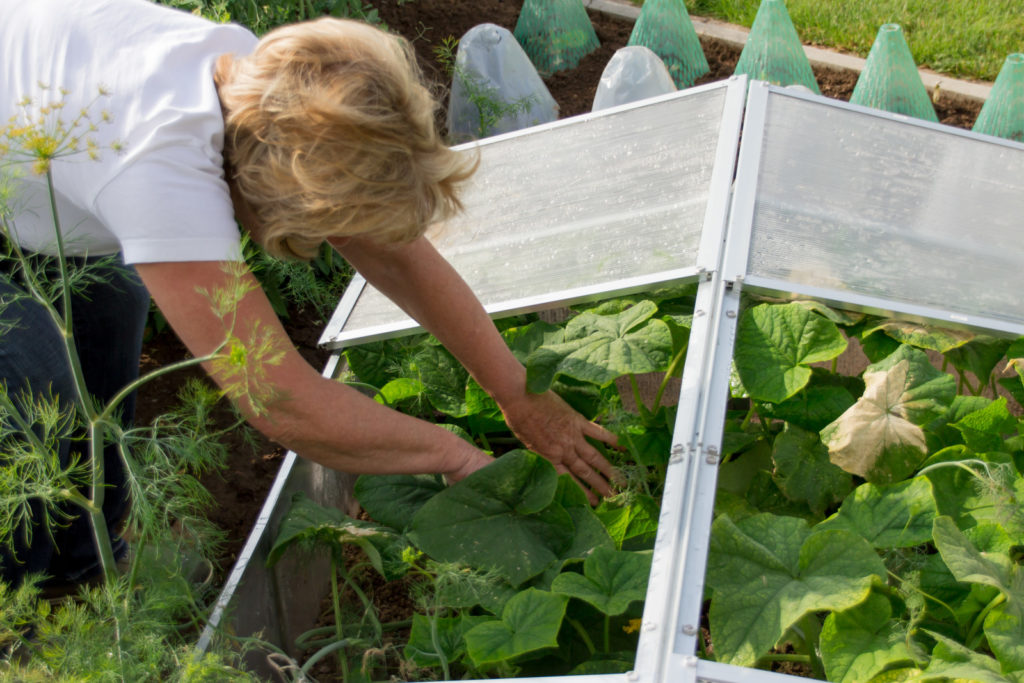
A cold frame consists of a bottomless wooden, masonry, or plastic box—the sides can be wood, cinder block, or brick with a clear plastic or glass top. Construct a wood-sided cold frame with 2-by-8- or 2-by-10-inch boards forming a box. The box can sit on a raised bed or directly on the ground or over a sunken garden bed. The top or cover can be made out of 1-by-3-inch boards with one or two layers of polyethylene plastic or glass–two layers offer greater insulation from cold weather. Old storm windows make excellent tops.
Portable cold frames commonly have aluminum frames and clear plastic or polyethylene sides. Small- to medium-size cold frame kits are relatively inexpensive and easy to assemble and disassemble for storage. Portable frames with clear covers and sides are made from acrylic, Plexiglas, UV-stabilized polyethylene attached to a frame, or glass. Polyethylene and plastic are less expensive than glass but usually last no more than five seasons—they deteriorate when exposed to the sun.
Polyethylene transmits 90 percent of available sunlight and protects plants to 25°F.
Boards, planks, bricks, concrete blocks, and even bales of hay or mounded soil can be used to make a cold frame. Often a homemade cold frame is a simple four-sided wooden box with no bottom and a clear glass or plastic top. A cold frame can be permanent or portable.
Cold frames can vary in size: 3 feet wide by 6 feet long is the size of an average home garden cold frame. The back side of a frame is usually taller (often 18 to 24 inches high) than the front (commonly 8 to 12 inches high) with the clear top sloping down from back to front allowing rain to run off and sunshine to flood in. The taller the frame the taller the plants it will accommodate. A home garden cold frame needs to be no deeper than a person’s reach (24 to 36 inches); this will allow plants to be tended without stepping into the frame.
Wooden-sided frames can be made of long-lasting wood that has not been chemically treated: well-cured pine, cypress, redwood, or chestnut can be used. The translucent top or lid of the cold frame can be made from a standard window sash–approximately three by six feet. Several sashes can be placed in a row to make a long cold frame. Sheets of Plexiglass or other plastic sheeting also can be framed to create the cold frame lid. The lid or sash is usually hinged to the back side of the frame but an unhinged lid can simply rest on the top of the frame.
Cold frame construction
Here’s how you can make a simple cold frame: Construct the frame with 2 x 8 inch or 2 x 10 inch or 2 x 12-inch boards cut to size to form the box. Cut the side boards on a diagonal so that the front (southward-facing side) of the frame is lower than the back. Five-inch nails or screws and 4-inch metal fasteners can be used to hold the sides together. Hinge the lid of the frame to the back. The top can be made from an old window sash or framed Plexiglas. Set the corners of the frame slightly below grade on bricks to prevent the frame from settling. Fill in around the frame with soil to keep the cold out. You can build a higher-sided cold frame by adding framed tiers atop a framed box or an existing raised-bed frame.
If you do not want to cut the side boards diagonally, do this: Fasten two wooden stakes to the back plank; drive the stakes into the ground to about 5 or 6 inches leaving the back plank two or three inches above the ground–the back plank should, of course, be level. The front plank is sunk two or three inches into the ground and held upright by stakes on the outside, nailed on. Remove enough soil from inside the frame to bank up the side planks about halfway, thus sloping the frame from back to front. Fill in the soil along the sides and back of the frame. Attach or set on the translucent lid or sash.
The placement of your cold frame should be where the sun will strike most directly–facing south in the Northern Hemisphere–and where it will be sheltered from the north. Set the frame on the south side of a building or fence to ward off north winds. Even a hedge or low-growing shrubs to the north of the frame will protect it.
Cold frames for very cold winter regions. In very cold winter regions, cold frames can be fitted with insulated sides and set atop insulated foundations to retain more heat. A wooden, cement block or solid cement cold frame can be insulated easily with the addition of 2 or more inches of Styrofoam around the inside of the frame and with a layer of 1½ inches on the bottom under the growing bed. Insulating foam can be easily cut and glued or tacked to the inside of the frame. As well foam shutters or mats can be placed atop the frame’s clear lid at night. Insulation can increase the night air temperature inside the frame by 8°F or even more. A double-paned glass or plastic top or a sash fitted with an under-layer of 4 to 6 mil plastic sheeting will provide additional insulation of up to 6°F.
To further insulate a cold frame in very cold winter regions, place hay bales or bags of leaves around the outside of the frame. Tarps, woven mats, and old blankets can be used to help insulate the top; this additional protection can increase the temperature inside the frame by 6°F at night. The inside of a frame can be painted white to reflect sunlight or black to retain heat. Thermal collectors as simple as masonry blocks or jugs of water set against the north wall of a frame will retain solar heat during the day that is released back into the frame at night.
Cold frame sash
The clear or translucent top or cover of the frame may be called by different names: lid, sash, glazing, or light. The top can be made of glass or rigid fiberglass, acrylic, Plexiglass, or UV-stabilized polyethylene plastic. Home-made cold frames often use old storm windows for lights. The light is usually hinged at the back of the frame for easy raising and lowering and ventilation. But a frame top can also simply slide on and off the frame.
A top sash with a double layer of glass (or plastic) is better than a single pane or layer. The space between the double layers of glass provides a cushion of insulating air between the upper and lower glass and will eliminate the need for top mats, blankets, or other covers to keep the frame warm on very cold nights.
The top should always be free to be opened to ventilate the frame. You can ventilate the frame by simply propping a stick or block under the sash. There are ways to make opening and closing the sash even easier: an automatic solar-powered frame opener attached to a thermostat can raise the top when the inside temperature reaches above 70°F.
Add another layer of protection inside the cold frame
When temperatures are very cold, a second layer of covering inside the cold frame can add to plant protection. Poly-row covers or plant blankets inside the frame will keep the temperatures around plants a few degrees warmer than the temperature inside the frame and several degrees warmer than the outside temperature. Many cold hardy vegetables can survive temperatures down to 10°F; the objective of a second covering inside the frame is to protect plants from temperatures that low.
The objective of a double cover inside a cold frame is not to extend the growing season but to extend the harvest season or to allow plants to over-winter for renewed growth in spring. Use lightweight row covers that will allow air and light to pass through. A double cover increases humidity which also increases protection.
Place row covers over crops inside the frame just before the weather gets cold enough to freeze inside the cold frame. Be sure that the row cover fabric does not touch plant tissue in freezing weather. Row covers inside the frame can be supported by wire hoops.
Earth-sided cold frame
If constructing a cold frame from wood or cement blocks is not an option, there is an alternative. You can make a temporary cold frame from the earth–essentially grading up the soil around your planting bed to protect it. One way to do this is to make a sort of cold frame mold into which you can pack soil to form your earthen frame sides. Use scrap wood to make a box mold with flared sides. Place the mold along the edges of the bed where you intend to sow seeds and hill up the earth into the mold and pack it firmly with your feet or a tamper. You can then place your sash or plastic lid atop the “frame.” When the weather warms and the plants are established you can use a hoe or spade to remove the earthen walls.
Where to site a cold frame
Cold frames should be slanted so that plants receive the maximum sun exposure. (In the northern hemisphere, the frame should face south.) The back wall should be a few inches higher than the front wall. A rule of thumb is to add 20 degrees to your latitude to arrive at the best angle from the horizon (for example, if you live at the 40-degree parallel, the top should slant 60 degrees from the horizon).
Good drainage is essential for a cold frame. Make sure the site is well-drained; do not allow water to stand inside a cold frame–roots will drown.
Ventilation is important. A thermometer inside is helpful. The frame top should be opened when the temperature inside reaches 65° to 75°F. Direct sunlight can overheat a cold frame and harm plants.
Where winters are very cold, a cold frame can be insulated. Line the sides of the frame with 2-inch-thick foam sheets and use double-thick plastic or glass for the top.
A cold frame can help you extend your growing season by capturing the warming rays of the winter sun and holding them. Even the simplest cold frame can lengthen your growing season by several weeks.

Cold frame site tips
To get the most out of your cold frame give some forethought to the site where it will best perform. Here are some tips for situating your cold frame:
- Most sun. Site the frame where it will receive sun from mid-morning to mid-afternoon in the winter and early spring.
- Face south. Site the frame so that it faces south, southwest, or southeast; this will ensure the greatest exposure to solar heat during the winter months when the sun tracks furthest to the south. (For those of you who live in the Southern Hemisphere, site the frame to face north.)
- Size of the frame. The back wall of the frame should be at least a few inches higher than the front wall so that the top or sash is angled and receives maximum sun exposure. Commonly, the front of the frame is 4 to 10 inches lower than the back side allowing for the maximum sun exposure.
- Easy access. Site the frame where it is easy to monitor, not far from the house. Like all of your vegetable garden beds, the beds (and plants) that get the most attention are likely to be the most bountiful.
- Level ground. Site the frame on level, well-drained soil. Water should not be allowed to sit in or around the cold frame. If you must situate your frame on a slope, be sure that water from up the slope drains away from and not into the frame.
- Near water. Site the frame near a source of water. Plants growing in the cool time of the year require less water but still require watering. Keep the soil or growing medium just moist but not wet.
- Good soil. The open-bottomed frame should be sited over good soil or a raised bed. If the frame is permanent prepare the soil as you would any other vegetable-growing bed. Amend the soil in the frame just as you would other vegetable-growing beds, adding a layer of compost twice a year. If the frame is portable, prepare the bed and amend the soil before you set the frame in place for the winter season.
- Protect from wind. Site the frame where it is protected from prevailing winds; place the frame to the south of a building, wall, fence, or hedge. Wind will rob the frame of stored solar heat. Plants exposed to wind can be damaged or robbed of moisture.
- Out of shade. Site the frame where it is not shaded by buildings or evergreen trees. A frame for winter use may be sited near deciduous trees which will be bare of leaves in winter. Maximum exposure to the winter sun is important.
- Capture reflected heat. Site the frame against a building or wall where heat and light will bounce off the building or wall and into the frame.
Garden Planning Books at Amazon:
- Vegetable Garden Grower’s Guide
- Tomato Grower’s Answer Book
- Vegetable Garden Almanac & Planner
- Kitchen Garden Grower’s Guide Vegetable Encyclopedia