Peas are a cool-weather crop; they must mature in cool weather. Grow peas in spring and sometimes autumn in cold-winter regions. Grow peas during the winter and early spring in mild-winter regions.
Peas mature in about 60 days. Time your pea planting so your pea harvest comes during cool weather. That means planting peas in late winter and very early spring (February and March in the northern hemisphere) in regions where there is seldom snow. In snowy winter regions, pea planting can start in mid-spring (April in the northern hemisphere). As a general rule, peas can be planted six weeks before your last spring frost date.
The botanical name for peas is Pisum sativum.
Related articles:
- How to Cook and Serve Garden and Snap Peas
- How to Prepare Spring Peas
- How to Cook and Serve Snow Peas
- Peas Seed Starting Tips
- How to Harvest and Store Peas
- How to Plant and Grow Peas
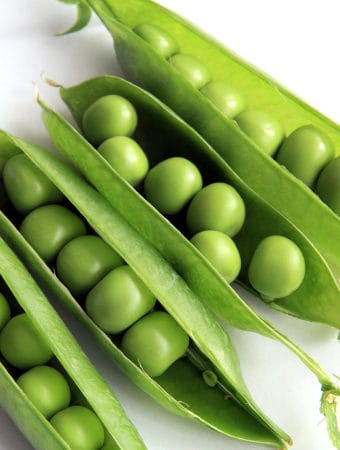
Peas are easy to grow. And, there are many kinds of peas to choose from. Garden peas–or English peas as they are sometimes called–are available in both bush and climbing varieties. They are eaten after being shelled. Snap and snow peas have edible pods. Snap peas are full, sweet, and crunchy–and can be eaten pod and all or shelled. Snow peas are flat, sweet, and crunchy and are eaten whole, never shelled.
Generally, peas must be grown between the time when the ground is workable and the heat of summer. For the most part peas as a spring crop in the home garden. Some home gardeners try to utilize the coolness of autumn by making late sowings, but a successful fall crop is not a sure bet. The fact that peas are available year-round in grocery stores is due to the fact that somewhere there is always a period of a few cool weeks in which to grow them.
Tall peas–called climbing or pole peas–mature in about 60 to 80 days. Low bushy types mature in about 55 days. Pole peas grow 3 to 6 feet tall and need a pole, trellis, fence, or net to climb. (‘Lincoln’ and ‘Alderman’ are two pole peas to try.) Bush peas grow 1 to 3 feet tall and are quicker to harvest than pole types, but bear fewer pods.
Snow peas are picked before the seeds inside begin to form bumps. These peas can be picked at any stage and can be eaten raw or quickly cooked. There are both bush and climbing varieties. These peas have only half the calories of English peas. Finally, snap peas combine the qualities of English peas and snow peas. They can be eaten at any stage of development–whole or shelled, raw or cooked. They grow best with some support.
Peas and temperature
The optimum seed starting soil temperature for peas is 75°F; this makes growing peas for fall harvest a strong option when they are planted 55 to 70 days before the first frost–depending upon variety.
Here is your complete guide to growing peas.
Basics to know about peas
- Common name. Pea, garden pea, green pea, sugar pea, English pea snow pea
- Botanical name. Pisum sativum
- Family: Leguminosae (other legumes include beans, soybeans, chickpeas, peanuts, and lentils)
- Origin: Europe, Near East
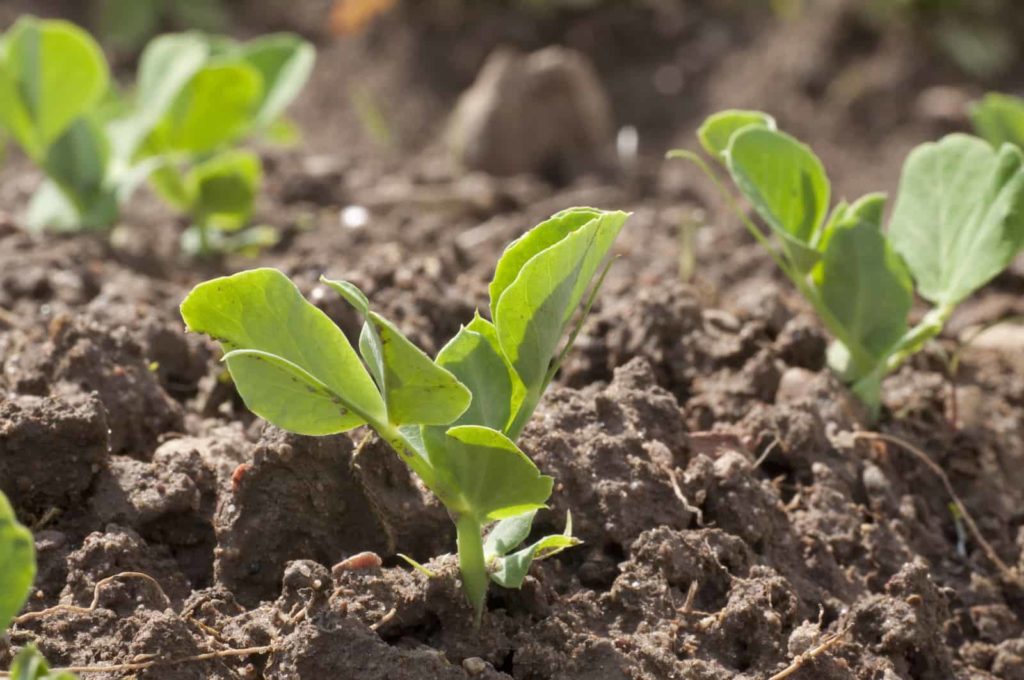
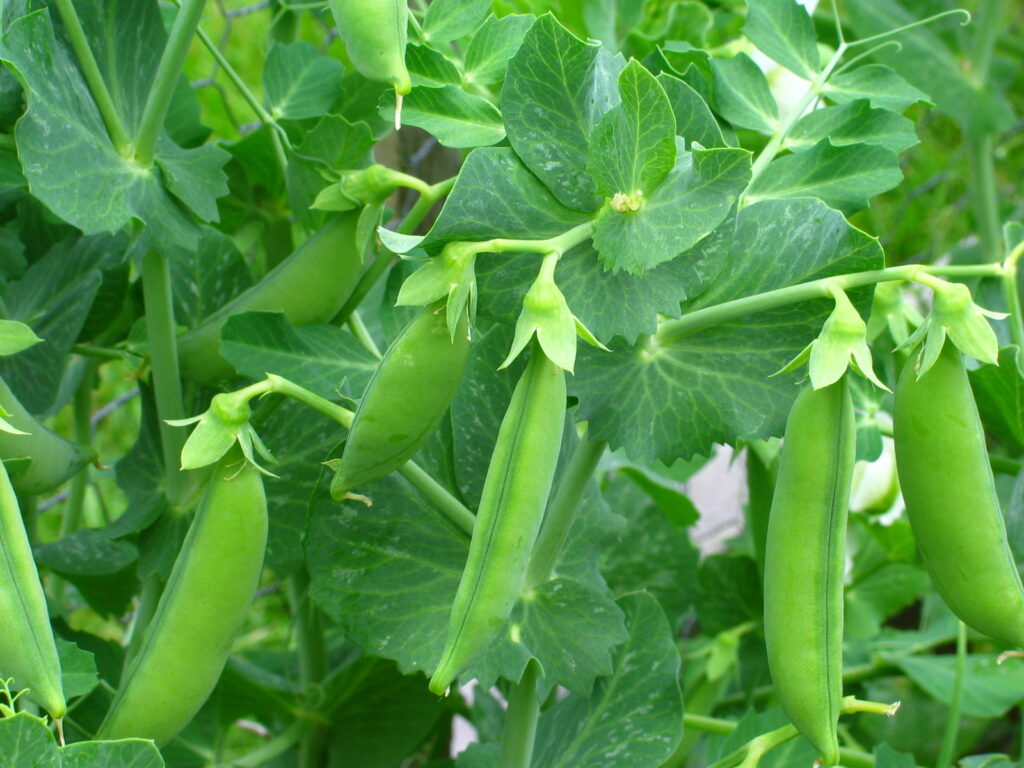
- Peas are weak-stemmed vining annuals with leaf-like stipules, leaves with one to three pairs of leaflets, and tendrils used for climbing.
- Peas grow 6 to 10 peas or seeds in a pod. Seeds are either smooth or wrinkled depending on the variety.
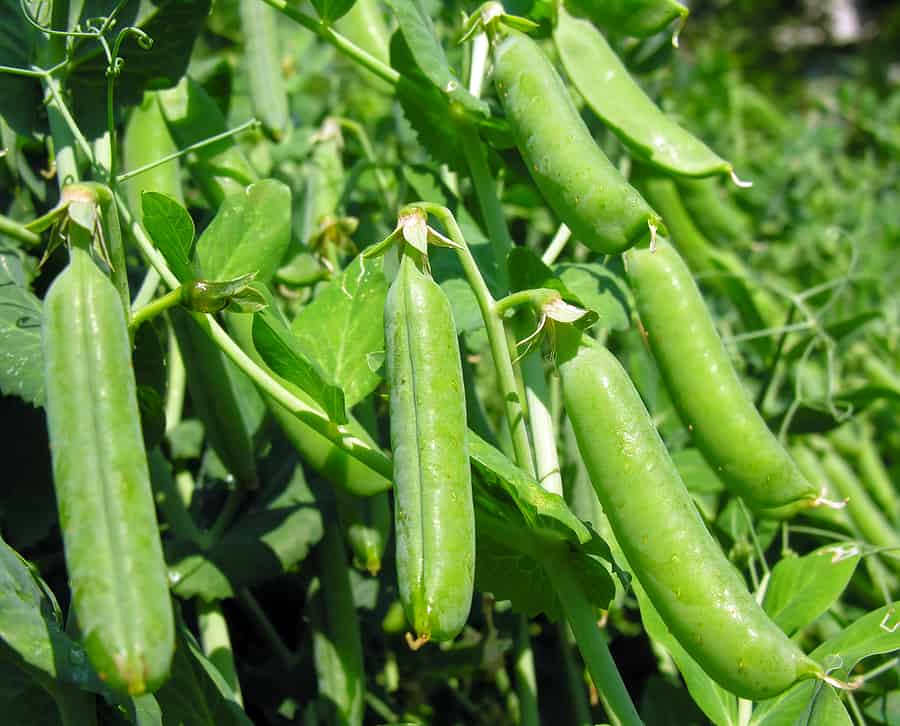
- Garden peas, also called English peas, and snap peas, also called sugar peas, are grown for the maturing seeds in the pods. These are harvested when pods are 4 to 6 inches (10-15cm) long and pods are bulging but before the pods begin to dry.
- Snap or sugar and snow peas are grown for their edible pods. These are harvested when pods are 1½ to 2½ inches (4-6mm) long and the peas inside are barely visible.
- Peas are commonly a cool-season crop that must mature before hot weather arrives. The ideal growing temperature for peas is 55°F to 70°F (13-21°C). (That said there are a few varieties that can be grown in very warm weather and in regions where peas are not usually grown.)
- Sow peas in the garden in early spring about 6 weeks before the average last frost date in spring or as soon as the soil can be worked.
Types of peas
Here are three types of peas to grow—shelling, snow, and snap.
- Garden peas–also known as English peas– have fat seeds for fresh eating or shelling or drying. English peas with wrinkled seed covers are generally sweeter than English peas with smooth seed covers.
- Snap peas have tender pods and juicy seeds. They are eaten pod and all. They are not shelled or dried. Snap peas can be eaten when they are young like snow peas or the pea seeds can be allowed to enlarge; snap peas are then eaten pod and all when they are meatier. Snap peas can be eaten raw or lightly steamed. Snap peas grow to bush size, 2 to 3 feet (61-91cm) tall.
- Shelling peas are the classic garden pea. There are early, mid-season, and late varieties; there are bush and tall types. Harvest shelling peas when the pods are full of round seeds. Petit pois are varieties of shelling peas that produce small pods, just 2 or 3 inches (5-7.5cm) long.
- Snow peas have thin, tender, succulent pods. They are eaten whole. Snow peas are not shelled; they are served raw or lightly stir-fried. The pods will be 2 to 3 inches long (5-7.5cm) with tiny seeds that barely bulge in the pod. There are both bush and tall varieties. Snow peas sometimes have fibrous strings that must be removed.
There are bush and climbing varieties of peas. Bush types are sometimes called dwarf peas. Climbing peas are sometimes called telephone peas. Climbers will produce a greater yield than bush peas but commonly require support.
Good Products for Growing Peas at Amazon:
- Captain Jack’s Dead Bug Brew
- Harris Neem Oil Plant Disease Control
- Freeze Protection Garden Mesh Netting Kit
- Kitchen Garden Grower’s Guide Vegetable Encyclopedia
- Vegetable Garden Almanac & Planner
Where to plant peas
Grow peas in full sun. Set rows north to south so that plants get plenty of sun throughout the day. The only reason to plant peas in part shade is if you live in a region where the weather turns hot quickly. Afternoon shade in hot and arid regions will give peas the cool air temperatures they prefer at harvest time. Peas do not do well when the daytime temperature rises above 80ºF (27ºC), The sugar levels of peas are higher in cool weather.
Peas grow best in loose, well-drained soil rich in organic matter and nitrogen. Turn the soil with a spade to a depth of 10 inches or more, and work in aged compost before sowing. If your soil is heavy—with clay—plant your peas in raised beds that have been amended with lots of compost to ensure good drainage. Add a low nitrogen fertilizer to the planting bed such as 5-10-10.
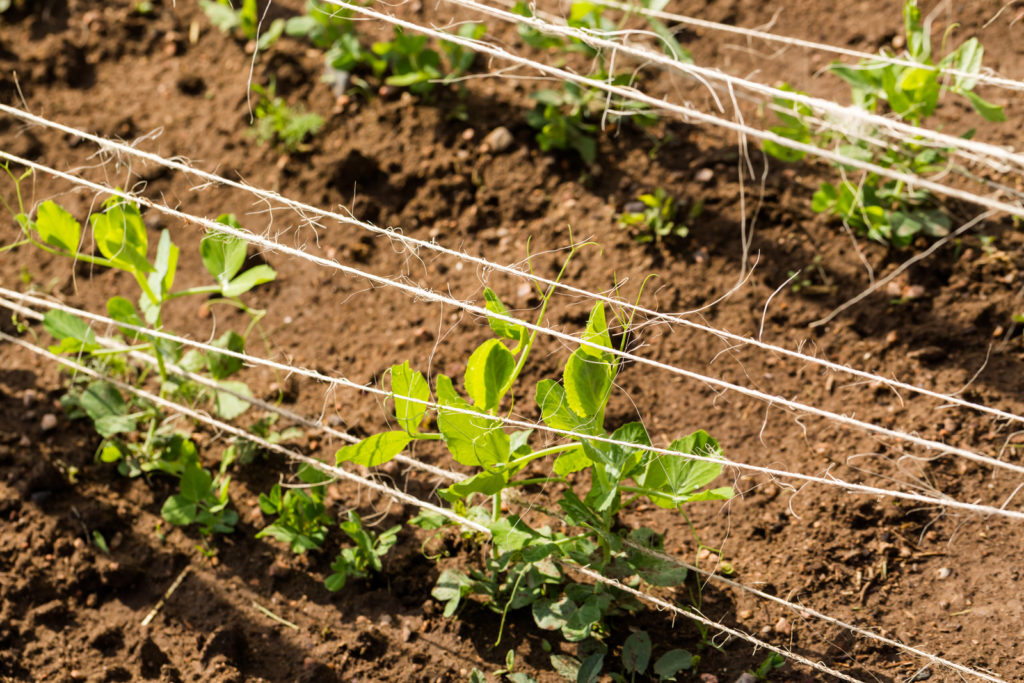
Sow peas in raised beds in spring or where the soil is heavy or drains poorly. Raised beds warm quickly in the spring. Peas planted in too cold or too wet soil may not germinate or could rot before they even sprout. If your soil is sandy, again amend your soil with plenty of organic matter and compost.
- Plant peas in full sun or partial shade.
- Grow peas in rich, loamy soil that is well-drained. Peas will produce earlier if planted in sandy soil. Later crops can be planted in heavier, clay soil.
- Peas prefer a soil pH of 5.5 to 6.8. Do a soil test before planting.
- Grow peas supported by poles, a trellis, or a fence.
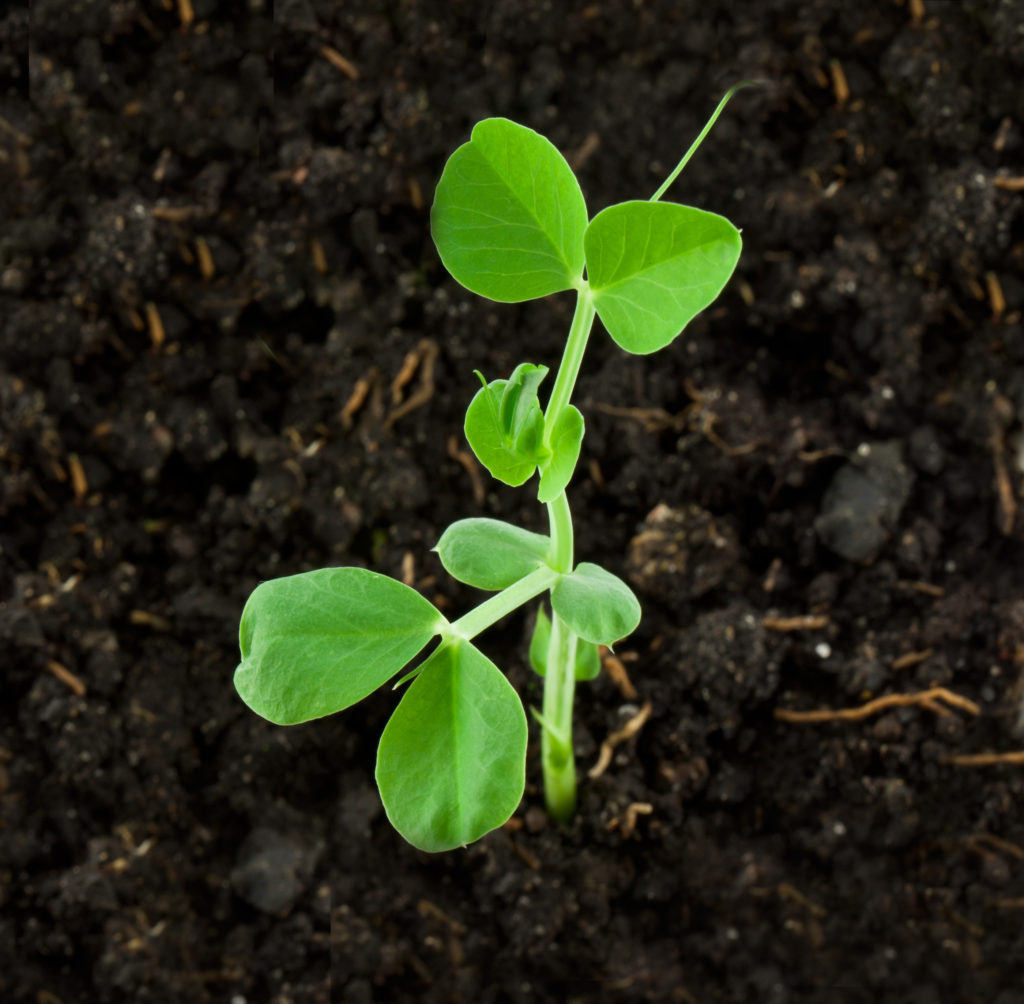
Peas planting time
Peas can be sown in spring as soon as the soil is workable. Peas germinate more slowly in cold soil, in about 9 days in 60°F soil, and in about 36 days in 40°F soil. Use black plastic sheeting to warm the soil in cool regions. (Peas can survive temperatures down to 19°F.) Pea seedlings are frost tolerant.
Summer and fall sowing peas for an autumn harvest
Sow peas in late summer in cold winter regions for a fall harvest. Sow peas in fall in mild-winter regions for a late autumn harvest.
Peas sown in late summer for fall harvest will germinate more quickly than spring-sown seed; the warmer soil temperature is optimal for pea seed germination.
The old-fashioned pea variety Mammoth Melting will sprout in as little as three to six days sown in late summer. For varieties that are slower to germinate, soak the seed in water for 24 hours before sowing to help loosen the seed coat and speed germination.
Be sure to sow peas for fall harvest so that the crop is ready a week or two before the first expected fall frost. Young pea seedlings may need to be shaded on hot fall days. When the weather gets cool protect peas with floating row covers.
- Peas are a cool-season crop that must mature before the weather gets warm.
- Peas like cool nights and bright, cool days.
- The ideal germination soil temperature is 45° to 75°F.
- At 75°F, peas seed germination takes 5 to 7 days. Use an inoculant available from a garden center when planting in chilly soil or clay soils.
- The ideal growing temperature for peas is 55°F to 70°F (13-21°C).
- Sow peas in the garden 6 weeks before the average last frost date in spring or as soon as the soil can be worked. Peas can be planted in spring as soon as the ground is not frozen.
- If you live in a mild-winter region, sow peas so that they come to harvest when the temperature is greater than 55°F (13°C).
- In the South, plant peas in early spring or the fall. In more moderate zones, plant in late summer to get a fall crop.
- Where summers are cool, plant succession crops every 3 to 4 weeks.
Round peas and wrinkled peas
- For growing in winter, sow round, not wrinkled, pea seeds.
- Round seeds can withstand cold and wet soil better than wrinkled seeds.
- Wrinkled seeded peas are sweeter.
- Round pea varieties are sometimes called “earlies”–for an early or quick harvest. For an early harvest, look for pea varieties that are ready for harvest in 55 to 60 days.
Planting peas
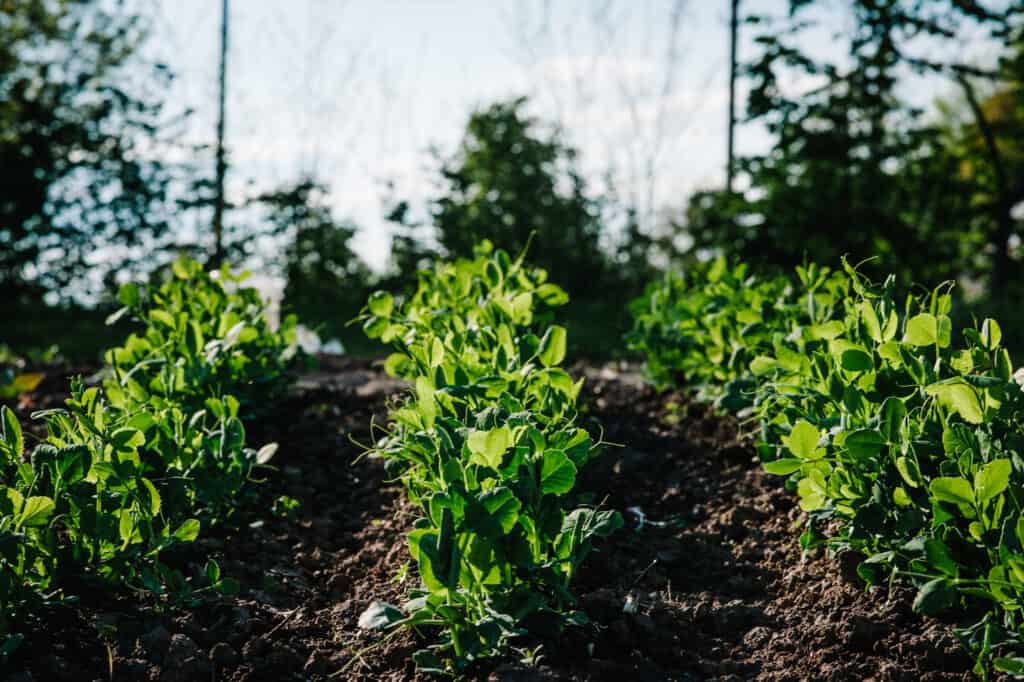
planted in wide rows–16 inches wide or more–will grow up and support one another. No trellis or other support is needed.
Peas also can be planted in double rows–twin furrows 6 inches apart with a trellis between the rows. Space double rows 24 to 30 inches apart.
Thin successful plants to 4 inches (10 cm) apart in all directions. Give peas regular water keeping the soil evenly moist.
Plant dwarf or bush peas 1 inch deep and 1 inch apart in rows 2 feet apart. Plant vining types in double rows 8 to 10 inches on either side of 6-foot tall stakes. Thin seedlings to 2 to 3 inches apart. Seeds started indoors should be planted out about 3 weeks after they are up.
Grow tall peas on poles, fences, or trellises. Give peas a complete fertilizer 6 weeks after planting. If the soil was prepared with well-rooted manure and bone meal before planting, no fertilizing is necessary.
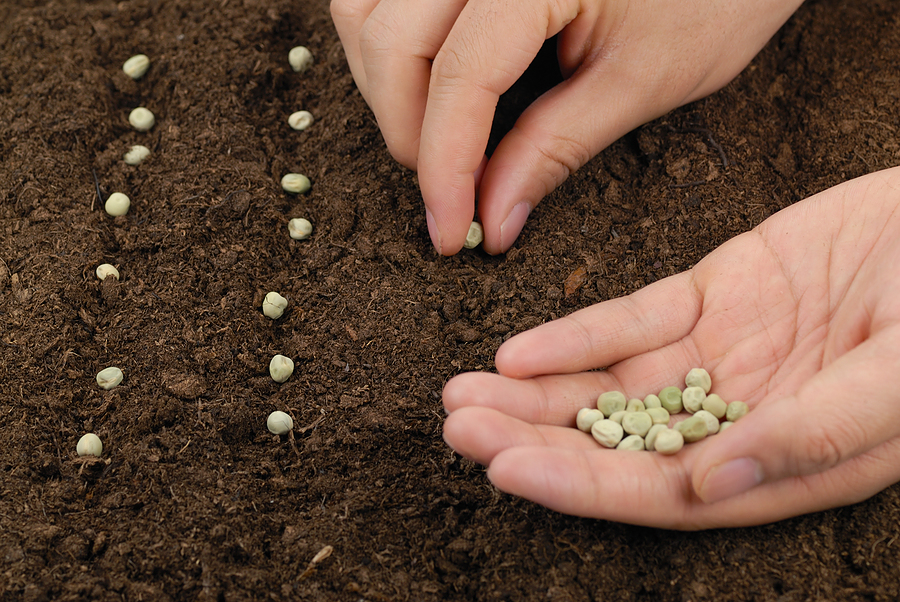
- Sow pea seed 2 inches (5cm) deep, 2 to 3 inches (5-7cm) apart in double rows supported by a trellis, netting, or wire or string supports between two poles for bush varieties.
- Sow two seeds in each hole. Thin plants to 4 inches (10cm) apart.
- Pea seeds can also be planted in a long trench; use the handle or the corner of your hoe to make the trench. Rake soil over the seeds once they are planted.
- To speed germination, soak seeds in a flat dish of water; spread the seeds in the flat dish and then add enough water to come halfway up the pea seeds. Soak seed for 4 to 6 hours before sowing.
- Space rows 18 to 24 inches (46-61cm) apart.
- Bush peas can be planted close together in wide rows; they will hold each other up. Dense planting is recommended in warming growing regions; the dense mass will keep all cool.
- Sow pole or vine varieties in a circle around a pole or stake.
- Sow seed 8 to 10 inches (20-25cm) from the pole and thin to the 8 strongest plants.
- Peas yield. Plant 30 plants per household member.
Inoculate the seed before planting peas
Peas and other legumes sown in planting beds that have not grown peas or beans in the last three years will grow better and be more productive if treated with the nitrogen-fixing bacteria Rhizobia before sowing. The Rhizobia bacteria form nodules on the roots of legumes; the nodules change nitrogen from the air into nitrogen that pea and bean roots can absorb and use. Treat or inoculate pea seeds by rolling wet seeds in inoculant powder available from seed companies. (One packet of inoculant is usually enough for a pound of seed.) Once seeds have been inoculated it is not necessary to add nitrogen fertilizer to the soil. The bacteria will live in the soil for many years and new seeds will not require inoculation.
Planting peas in wide rows or blocks
Bush or dwarf peas can be grown without support (but it will require some bending or knee harvesting later on). Sow bush peas in wide-row blocks; scatter the seed over the bed 1 inch apart and later thin plants to three inches apart. Don’t plant in wide rows so wide that you can’t reach the center at harvest. Wide-row or block-planted peas do not need staking or trellising. Some of the plants on the edge of the block may flop over, but generally, block-planted peas will offer a very good yield. (Use knee pads, a patch of carpet for your knees, or a small stool to make harvesting easier.)
Planting peas in twin furrows
Sow peas in twin furrows (narrow grooves in the ground), one furrow on each side of the trellis about 6 inches apart. Sow the seed in each row every 2 inches; stagger the seeds on each side of the trellis. Make the furrows 1 inch deep in sandy or cool soil and 2 inches deep in heavy or warm soil.
More tips: Peas Seed Starting Tips.
Bush pea planting suggestions
- Bush peas are best planted in wide rows using intensive planting or equidistant planting methods. Planted equidistant in wide rows, bush peas will support each other.
- For the first planting of bush peas, make drills about 2 inches deep in light sandy soil, and about 1 inch deep in heavy clay soil. Later plantings should be in drills about twice this depth but only half filled at first. As the plants grow the trench is gradually filled up.
- Scatter seeds freely in the drill, not less than an inch apart. As the plants come up they can be thinned so that the final plants are 2 to 3 inches apart.
Pole pea planting suggestions
- Space the rows of tall pea varieties about 30 to 36 inches apart and sow seeds in double rows with supports in between.
- Make two parallel drills or trenches about 6 inches apart and about 4 inches deep.
- Plant seeds 2.5 inches apart in each drill. Cover the seeds with only enough soil to half-fill the drills or trench. Save the rest of the soil to support the plants once they come up.
- The space between double rows can be used for brush or wires between posts to support the tall plants.
Grow Your Garden with Products from Amazon:
- 55 Heirloom Vegetable Varieties–27,500 Non-GMO Seeds
- Heirloom Vegetable Seed Collection – 105 Varieties
- Full Spectrum, LED Grow Lights
- Seed Starter Kit with Humidity Dome (120 Cells Total Tray)
- Galvanized Raised Garden Bed with Cover
- Gardzen 10-Pack 10 Gallon Grow Bags
Support peas if not grown in blocks
Peas benefit from support. If grown in blocks or wide rows, pea plants will support one another. If not, even dwarf varieties will benefit from a trellis to climb on. Place metal posts or stakes into the ground down the center of each double row; use stakes at least as high as the variety you are growing. Make sure the posts are securely anchored. Tie hardware cloth, chicken wire, or reinforcing wire to the stakes; be sure, the mesh is large enough to put your fist through at harvest time
Companion plants for peas
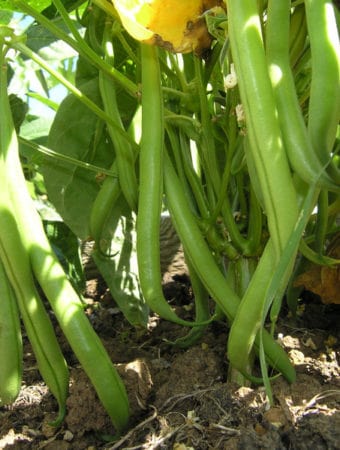
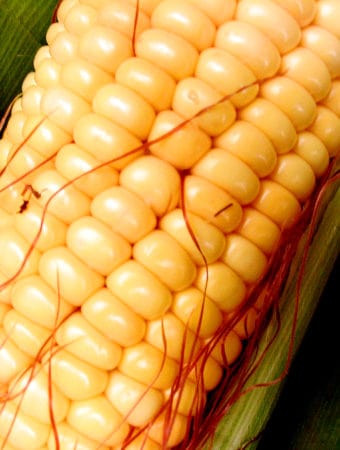
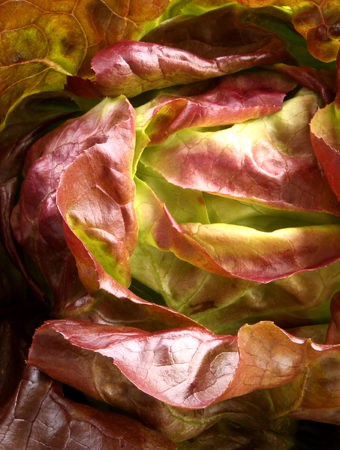
Interplant peas with radishes, spinach, lettuce, or other cool-weather greens. In the late summer and fall, plant peas with corn, pole beans, or tomatoes that will shade them until the weather turns cool.
- Good companion plants for beans, carrots, corn, cucumbers, radishes, and turnips.
- Do not plant next to garlic, onions, or potatoes.
Container growing peas
- Include peas in any cool-season container garden.
- Peas will grow in a container at least 8 inches (20cm) deep. The number of plants required to produce a reasonable crop may not justify the effort.
- Plant 12 seeds per 12-inch pot or 15 seeds per square foot box.
- Use commercial organic potting soil when growing peas in containers.
Watering peas
Peas want consistent soil moisture. Keep the soil moist but not overly wet. Peas will not germinate, grow, or bloom if the soil is dry. Pea pods will not fill out if the soil is dry. Stick your finger in the soil near your peas. If it is dry when you remove it, water. If it is glistening, the soil is too wet. If your finger is damp, the soil is just right.
When the first blossoms appear, give peas about an inch of water (almost a gallon) each week until the pods are filled.
- Keep the soil evenly moist. Do not allow the soil to dry out.
- Avoid getting plants wet when they are flowering or the crop may be reduced.
Feeding peas
Peas grow best in soil rich in organic matter and compost. Peas and beans produce their own nitrogen, so there is little need to add manure to your soil.
- Add aged manure and aged compost to planting beds in advance of planting.
- Side dress plants with aged compost at midseason.
- Cultivate gently around peas to avoid harming the fragile roots.
Caring for peas
- Weeds will compete with peas for nutrients and soil moisture. Keep the pea patch weeded. Peas have a shallow root system; pull weeds using shallow cultivation, especially around young plants.
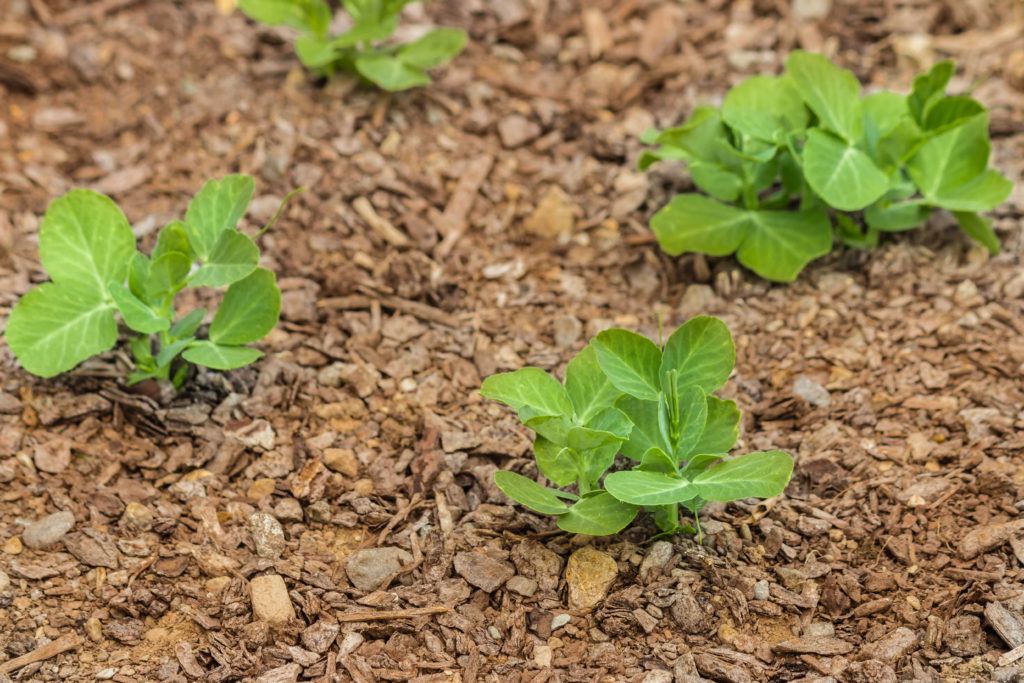
- Mulch around peas with aged compost to keep down weeds and conserve soil moisture.
- Mound soil up around the base of peas to help support the plants. Bush peas are best supported by mounding soil or spacing plants close together.
Supporting tall peas
- Provide a trellis or pole to support the pea vines.
- Peas can be trained up string or wire attached to overhead support.
- Place supports at planting time. Twiggy brush with the bark on is often used. It sould be 4 to 5 feet tall after the stems are stuck in the ground.
- Ordinary chicken wire 4 to 5 feet high can be used. Stretch it as tightly as possible between stout post. After harvest the wire can be cleaned, rolled, and stored.
- Peas can be grown without support; however, they will grow and produce much better with support.
Tie-in pea vines
When vines are 12 to 15 inches high, tie in the row by looping twine between support poles to hold the new growth in and up. Tie-in vines as it grows up every 12 to 15 inches. This will keep wind and rain from whipping vines sideways.
Pea pollination and seed saving.
- Peas are self-fertile and insect-pollinated.
- To save seed, let pea pods stay on the vine until they are well developed. Dry and shell out the pod.
- Pea seeds are viable for 3 to 4 years.
Pea pests
Watch for aphids, pea weevils, and thrips. Beneficial insects will control aphids and thrips. You a stream of water from the garden hose to knock these pests off the plant. Use floating row covers to control weevils. Avoid pest problems by rotating your crops. Don’t plant peas in the same spot more than once every five years.
- Peas can be attacked by aphids, rabbits, and birds.
- Control aphids by pinching out infested foliage or by hosing them away.
- Fence out rabbits.
- Use bird netting to keep birds away.
- Cutworms can attack young seedlings; place low cylinders around plants to exclude cutworms.
Pea diseases
Plant disease-resistant varieties and rotate crops every year to avoid diseases that live in the soil. Peas are susceptible to leaf spot or scab, blights and rots, fusarium wilt, powdery mildew, botrytis and molds, damping-off, and mosaic virus. Good drainage will control root rot fungi. Powdery mildew may appear when the weather warms. sulfur dust applied early can control powdery mildew.
- Peas are susceptible to rot, wilt, blight, mosaic, and mildew.
- Plant disease-resistant varieties and plant peas in well-drained soil to avoid root-rot disease.
- Avoid handling vines when they are wet.
- Remove and destroy diseased plants.
- Control measures include long rotations with unrelated crops, extra-early planting, well-draiend soil, planting treated seed.
Disease and pest problems and solutions: Pea Growing Problems: Troubleshooting
Peas and birds
Birds are particularly attracted to young pea plants. Cover rows of pea seedlings with netting or chicken wire until the sprouts are up 5 inches.
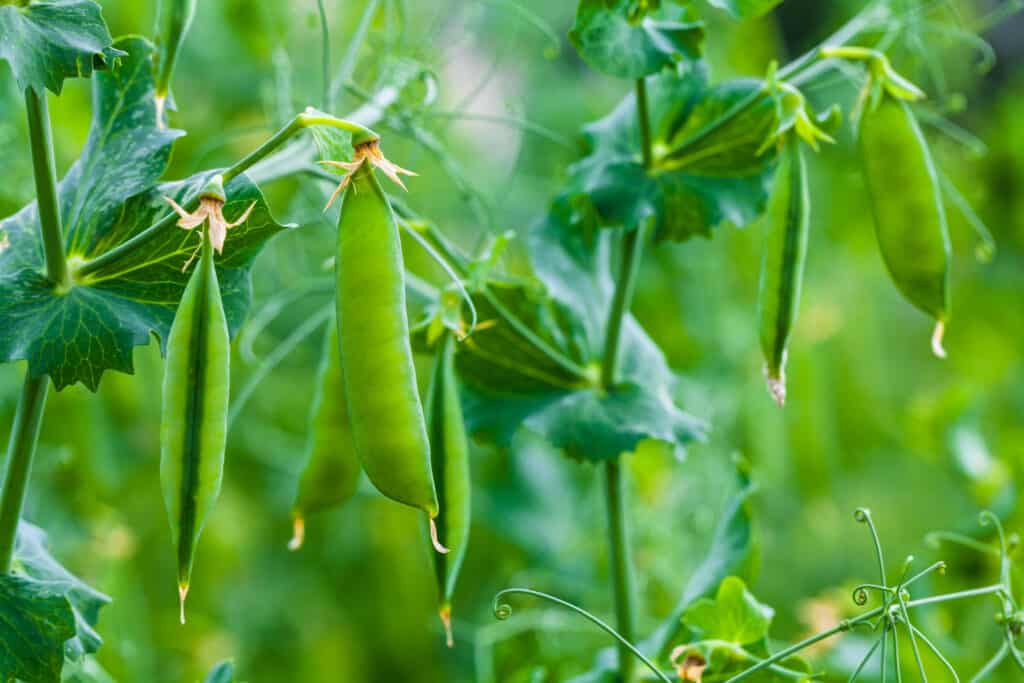
Harvesting peas
Peas will be ready for harvest 55-70 days after sowing, about three weeks after blossoms appear. Pick when pods are just bulging but before they are full size. Pick daily as the plant reaches maturity so that new pods will form. Store peas in a plastic bag in the refrigerator for 1-2 weeks. Dried peas can be stored in a cool, dry place for 10 to 12 months.
Pick snap peas when the pods are plump and bright green; pick garden or English peas for shelling when they are plump as well. Pick snow peas while the pods are still nearly flat–the seed will be barely developed.
Pinch pea pods away from the vine with your finger and thumbnail or use scissors. Hold the upper stem with one hand and pinch the pod away with the other; to avoid injuring the plant avoid pulling pods away from the stem.
- Peas will be ready for harvest 55 to 80 days from sowing depending on the variety. Pea seedlings can be harvested as microgreens.
- Peas flower then they soon make pods. Start harvesting as soon as the pods are filled out.
- Pick shelling peas (garden, English, and snap peas) when the pods are bulging and green before peas start to harden. Young peas will be tastier than older ones.
- Timing of harvest is important: if you pick too soon the plant’s efforts will be thwarted, but if you wait a few days too many, the peas will become yellow and hard.
- Withered and yellowed pods can be used for dried peas.
- Pick sugar and snow peas when pods are 1½ to 2½ inches (4-6mm) long and peas are just barely visible within the pods.
- Pick pea pods gently so as not to break the plant or pull out the roots. Hold the plant in one hand as you pull the pods with the other.
- The sugar in peas will begin converting to starch as soon as peas are picked. To slow the process, chill the peas in their pods as they are picked and shell them immediately before cooking.
- Peas will continue to produce if you keep the well watered and well picked, every other day or so.
- Peas have lots of natural sugars that start to turn to starch as soon as they are picked. Use peas fresh or dry or freeze them as soon a possible.
- Don’t shell peas until just before cooking.
More harvest tips: How to Harvest and Store Peas.
Storing and preserving peas
- Peas will keep in the refrigerator unshelled for up to one week.
- Peas can be frozen, canned, or dried.
- Dry peas on the vine until the leaves have turned color. Then pick the pods and shell out the peas. They can finish drying in an airy place out of the sun.
- Freeze peas after blanching them in boiling water then dunking them in cold water.
- Can peas using the raw-pack or hot-pack process; tender, young peas are best frozen.
- Dried peas will keep in a cool, dry place for up to 12 months.
- Edible-pod peas will keep in the refrigerator for 7 to 10 days in a plastic bag.
- Edible pod peas can be frozen and will lose little flavor.
Peas in the kitchen
- Fresh eating peas. Peas are the sweetest tasting right after picking; eat fresh peas within a day of picking. Snow peas can be eaten raw or added to stir-fried dishes. Snap peas can be eaten raw or cooked like snap beans. The seeds of English peas are shelled and cooked fresh or dried for later cooking. Just steamed bright green peas can be added to a salad or tossed in butter with new potatoes.
- Peas for soups. Peas for soups or to use like dried beans are left on the vine until the pods turn brown; shell dried peas and let them dry for three weeks or dry them in an oven for three hours at 120°F. Cool the peas and store them in an airtight container. Later separate the two halves of the pea with a mortar and pestle to prepare split peas.
- Shelled garden peas can be served raw or cooked.
- Snow peas can be served raw or cooked.
- Sugar snap peas can be served whole raw or only briefly cooked to retain their crispness.
- Never pick peas more than an hour or two before cooking.
- Don’t wash peas before cooking or preserving. Just shell them out of the clean pods.
- Peas can be steamed, sauteed, or included in stir fry.
- Fresh peas are always the most flavorful.
Field peas
Field peas–also called dried peas–are grown specifically to be used dried.
Dried peas are used in soups, pasta, cereals, and purées. Dried field peas are available at farm markets whole or split.
The green pea and the yellow pea are the two most common field peas. The black-eyed pea or cowpea and the chickpea are also sold dried, but these are not peas but beans.
Field peas are cool-season vegetables just like garden peas and sugar peas, but they are allowed to dry on the vine before harvest and so are usually harvested during the hot summer months.
Field peas usually contain four to nine seeds. They are ready for harvest after their pods have matured, dried, and turned yellow or tan.
Split peas are whole dried peas that have been divided along their natural seam. Split peas have long been used for soups.
The English pease pudding of nursery rhyme fame was a split pea soup. Pease pudding is made from dried peas, butter, and eggs. As the rhyme goes, pease pudding is good hot, cold, and nine days old. Pease pudding is traditionally eaten with pork and boiled bacon.
Bacon, sausage, and smoked pork are flavorful additions to dried peas and dried peas soups.
Preparation. Whole field peas and split peas are boiled in 4 parts water to 1 part peas until soft (about one hour). They can be boiled further to reduce them to a purée. Puréed peas can be seasoned with butter or spices or made into soup.
Most dried peas require presoaking to soften them before cooking: cover the peas with cold water and soak for at least 8 hours or overnight.
To quickly soak peas, cover them with cold water, bring them to a boil, boil for 1 minute, cover, remove from heat, and let stand for 1 hour. Discard the soaking water before cooking.
Filed peas facts and trivia. Dried peas have been cultivated and used for food for more than 10,000 years. Dried peas were found in a Bronze Age village unearthed in Switzerland. The peas had been dried in about 7,800 B.C. And when the German archaeologist Heinrich Schliemann discovered the ancient Troy of Homer’s Iliad fame, he also found dried beans. They were still edible.
Most peas were eaten dried or ground until the sixteenth century. At that time, Italian and Dutch gardeners began to develop tender varieties of peas for cooking and eating fresh.
The botanical name of field peas is Pisum sativum.
Peas frequently asked questions
Q: What is the best way to support peas?
A: Netting made just for supporting peas is at the garden center. Or use chicken wire stapled to stakes or twine strong between horizontal poles.
Q: Can I grow peas in hot summer southern regions?
A: You will have the best success growing peas as a fall crop in hot summer regions. Peas can grow anywhere when there are 60 to 70 mild, cool weather days.
Q: When should I pick peas?
A: The garden peas havest season begins when the pods are swollen and still shiny. Sugar pod peas can be picked with the pods fill out but before individual peas begin to show in the pod. Snow peas are best picked when about 3 inches long. Pole and snow peas on the same plant will be ready at different time; keep picking to keep the plant productive.
Q: Are peas prone to disease?
A: In damp climates, peas are susceptible to powdery midlew. Planting for good air circulation will slow diseases in damp climates.
Peas: types and varieties
Garden peas or English peas for shelling
The pods of shelling peas are not eaten. Varieties include ‘Knight’, ‘Oregon Trail’ (a prolific producer), ‘Coral’, and ‘Green Arrow’. ‘Maestro’ and ‘Eclipse’ are good for warm regions. ‘Tall Telephone’ also called ‘Alderman’ grow to 5 feet and has long pods. ‘Alaska’ is a short-season variety. ‘Little Marvel’ and ‘Wando’ are heat tolerant.
Snap peas
Snap peas are eaten fresh or cooked without shelling. Varieties include ‘Sugar Ann’ a dwarf, early variety. ‘Super Sugar Snap’ is a pole type that is resistant to powdery mildew. ‘Cascadia’ is resistant to enation (a disease characterized by bumps on the leaves and pods). ‘Sugar Pop’ and ‘Sugar Daddy’ are stringless varieties.
Snow peas
Snow peas are eaten whole usually after cooking. Varieties include ‘Oregon Giant’ is disease resistant. ‘Oregon Sugar Pod 2’ is good in cool regions. ‘Dwarf White Sugar’ is good for stir-frying.
Varieties of peas to grow
• Garden, English, and snap peas: ‘Alaska’ (52-58 days); ‘Alderman’ (75 days); ‘Bounty’ (61 days); ‘Cascadia’ (58 days); ‘Freezonian’ (60 days); ‘Frosty’ (64 days); ‘Green Arrow’ (62-100 days); ‘Lincoln’ (66 days); ‘Little Marve’l (62 days); ‘Maestro’ (57-61 days); ‘Novella’ (57 days); ‘Olympia’ (60-62 days); ‘Oregon Pioneer’ (61 days); ‘Oregon Trail’ (69 days); ‘Patriot’ (65 days); ‘Petit Provencal’ (58 days); ‘Spring Knight’ (60 days); ‘Tall Telephone’ (75 days); ‘Thomas Laxton’ (65 days); ‘Utrillo’ (71 days); ‘Wando’ (75 days).
• Sugar and snow peas: ‘Carouby De Maussane’ (55-65 days); ‘Chinese Snow’ (65 days); ‘Dwarf Gray Sugar’ (65 days); ‘Little Sweetie’ (60 days); ‘Mammoth Melting Sugar’ (69 days); ‘Mega’ (60 days); ‘Norli’ (50-58 days); ‘Oregon Giant’ (60 days); ‘Oregon Sugar Pod’ (65 days); ‘Snowbird’ (58 days); ‘Sugar Ann’ (58 days); ‘Sugar Bon’ (57 days); ‘Sugar Mel’ (60-60 days); ‘Sugar Snap’ (62-70 days); ‘Sweet Snap’ (66 days)
Peas rlated articles on Harvest to Table:
How to Cook and Serve Garden and Snap Peas
How to Prepare Spring Peas with No Recipe
English Peas, Spring Onions, and Roasted Almonds
Baby Beets, Baby Carrots, and Sugar Snap Peas Salad
How to Cook and Serve Snow Peas
Garden Planning Books at Amazon:
- Tomato Grower’s Answer Book
- Vegetable Garden Almanac & Planner
- Kitchen Garden Grower’s Guide Vegetable Encyclopedia
- Vegetable Garden Grower’s Guide
More how to grow articles:
Learn how to plant, grow, and harvest your favorite vegetables. Click below for all you need to know.
- Artichoke
- Arugula
- Asparagus
- Beans, Snap
- Beets
- Broad Beans
- Broccoli
- Brussels Sprouts
- Cabbage
- Cantaloupe — Melons
- Cardoon
- Carrots
- Cauliflower
- Celeriac
- Celery
- Chard
- Chayote Squash
- Chickpeas
- Chicory
- Chinese Cabbage
- Collards
- Corn Salad
- Corn, Sweet
- Cresses
- Cucumbers
- Eggplant
- Endive and Escarole
- Fava Beans
- Florence Fennel
- Garbanzo Beans
- Garlic
- Horseradish
- Jerusalem Artichoke
- Kale
- Kohlrabi
- Leeks
- Lettuce
- Lima Beans
- Melons
- Mizuna
- Mustard Greens
- New Zealand Spinach
- Okra
- Onions
- Parsnips
- Peanuts
- Peas
- Peppers
- Potatoes
- Pumpkins
- Radicchio
- Radishes
- Rhubarb
- Rutabaga
- Salsify
- Shallots
- Sorrel
- Southern Peas
- Soybeans
- Spinach
- Squash, Summer
- Squash, Winter
- Sunchokes
- Sweet Potato
- Swiss Chard
- Taro
- Tomatillo
- Tomatoes
- Turnips
- Watermelon
- Zucchini